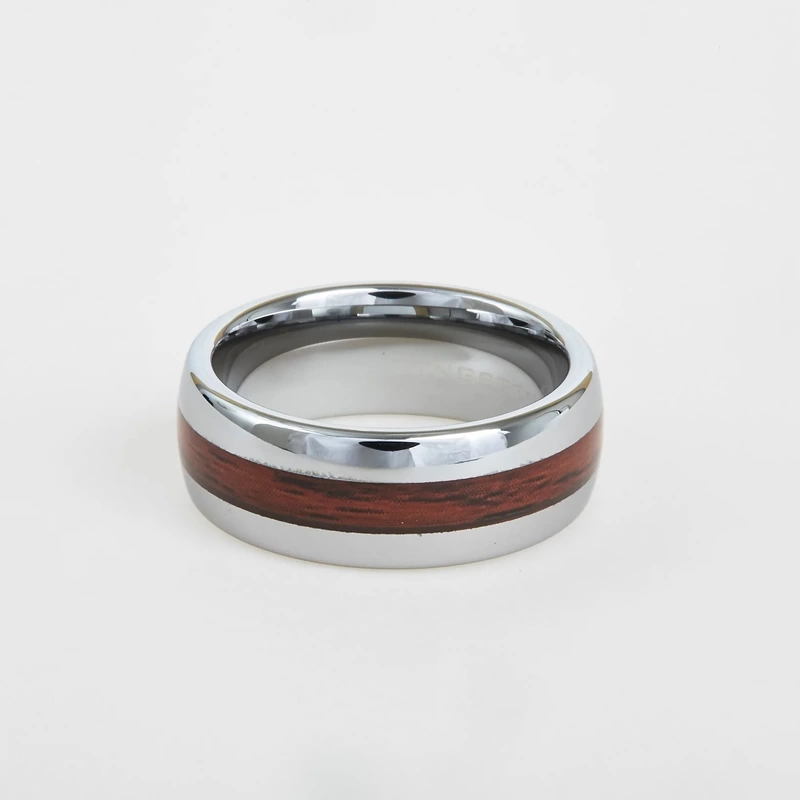
WOOD INLAY RING
|

|

|
|
|
|
TECHNICAL SKILLS VIDEOSGrading Criteria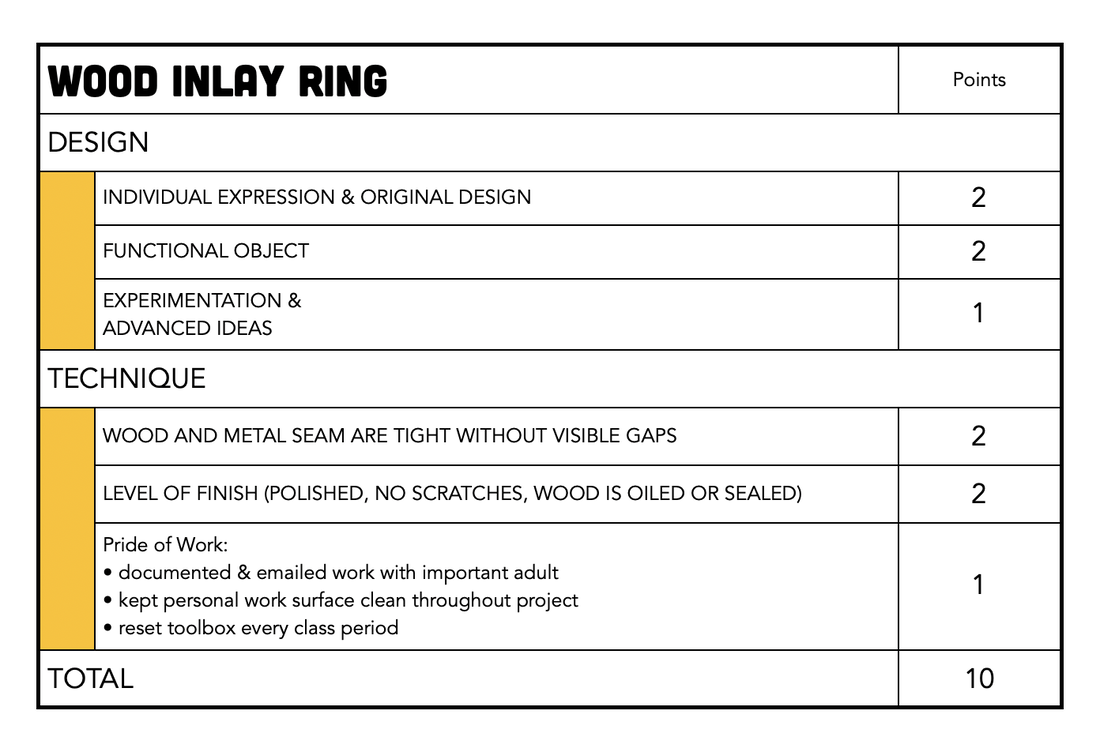
|
INSTRUCTION
ADVANCED IDEAS
|

|

|
|
|
|
|
|
|
|
|
TECHNICAL SKILLS VIDEOSGrading Criteria
|
INSTRUCTION
ADVANCED IDEAS
|
|
|
