
|
|
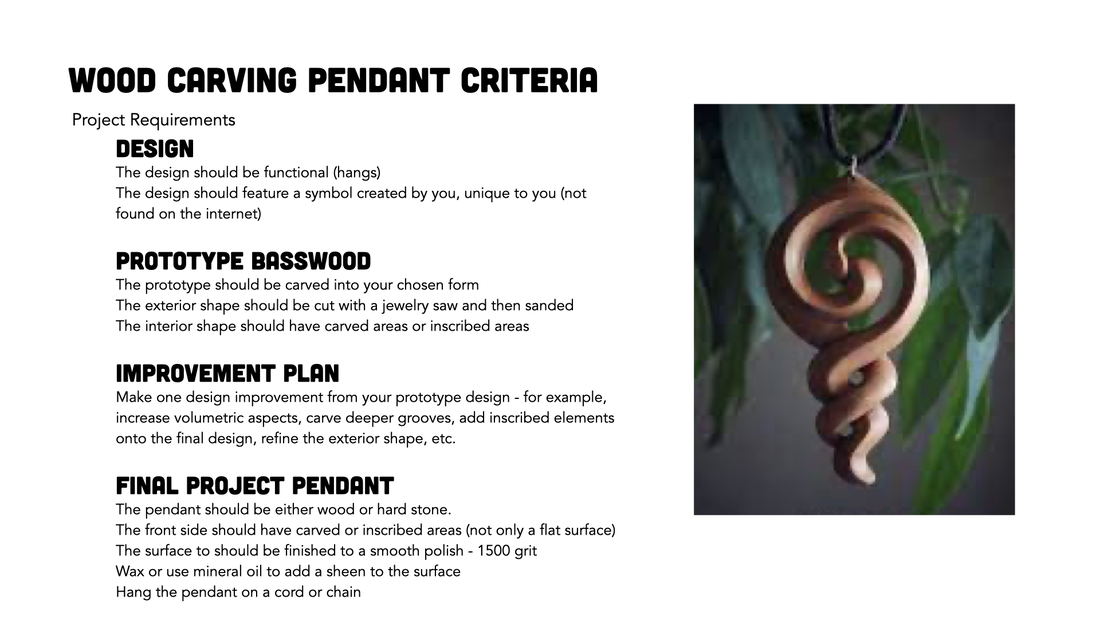
Wood Carving PendantsStudents will create a wood carved pendant with recessed levels.
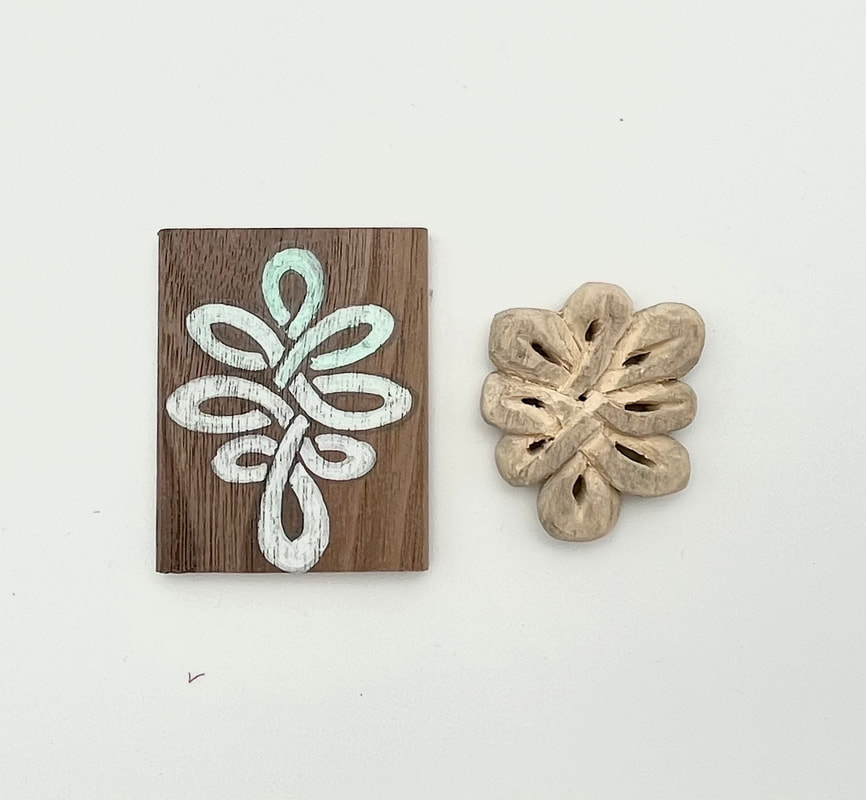
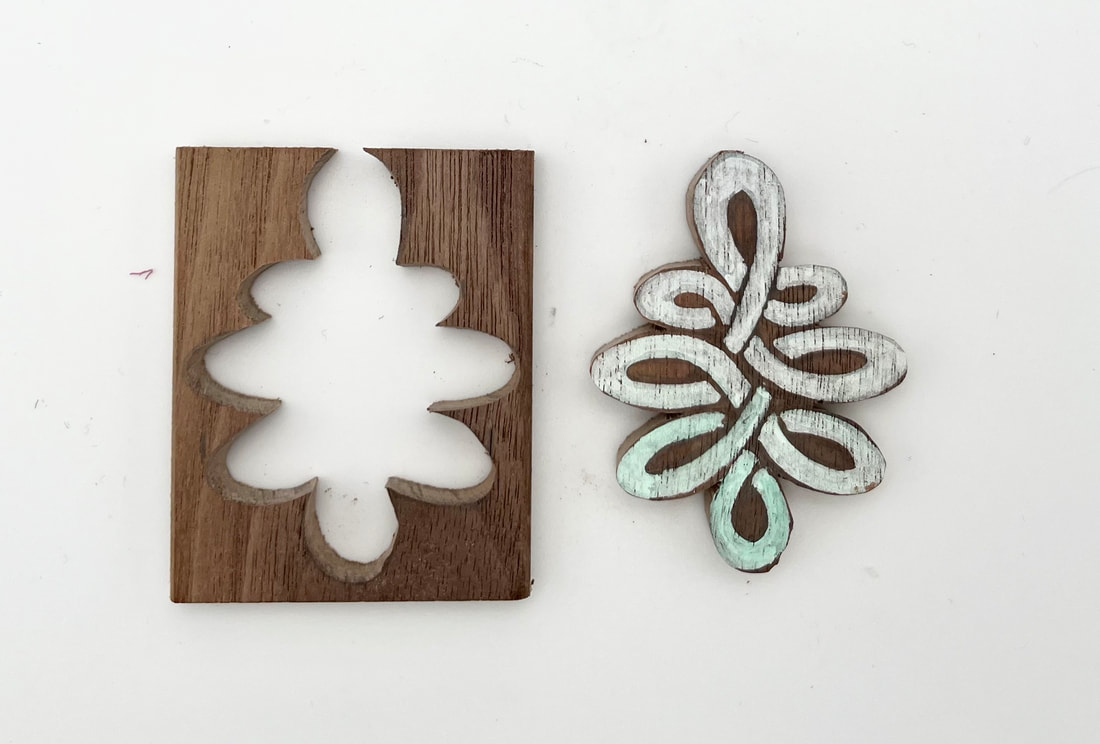
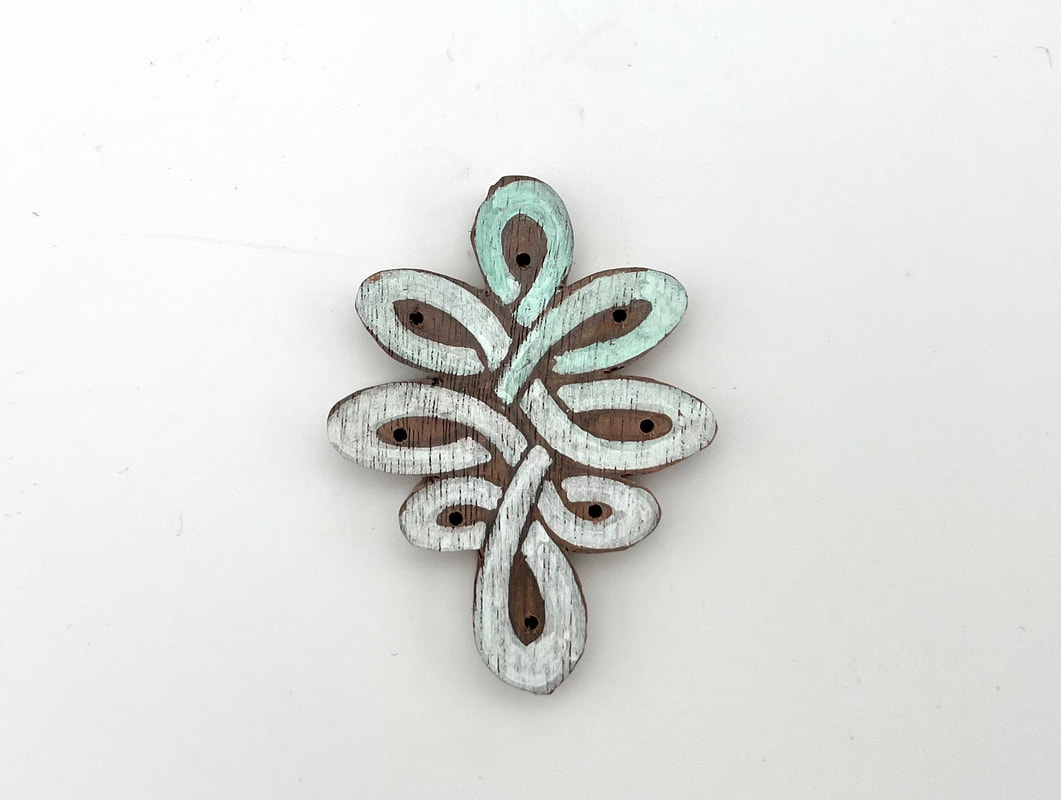
This unit has four parts: research and design (designing a project, measuring for materials), prototype (practicing carving with soft wood), final design in hard wood, and documentation of the finished work (photos, email, reflection, and critique). |
Overview Unit Goal
Composition Concepts
|
|
Technical Skill Videos |
Order of WorkDetermine Your Design
|
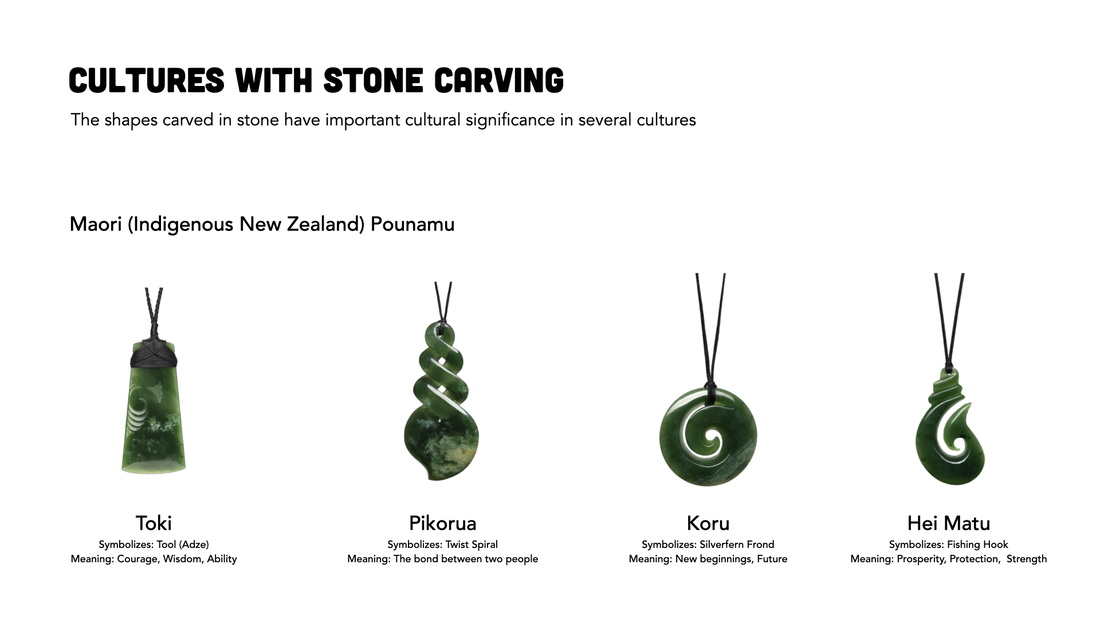
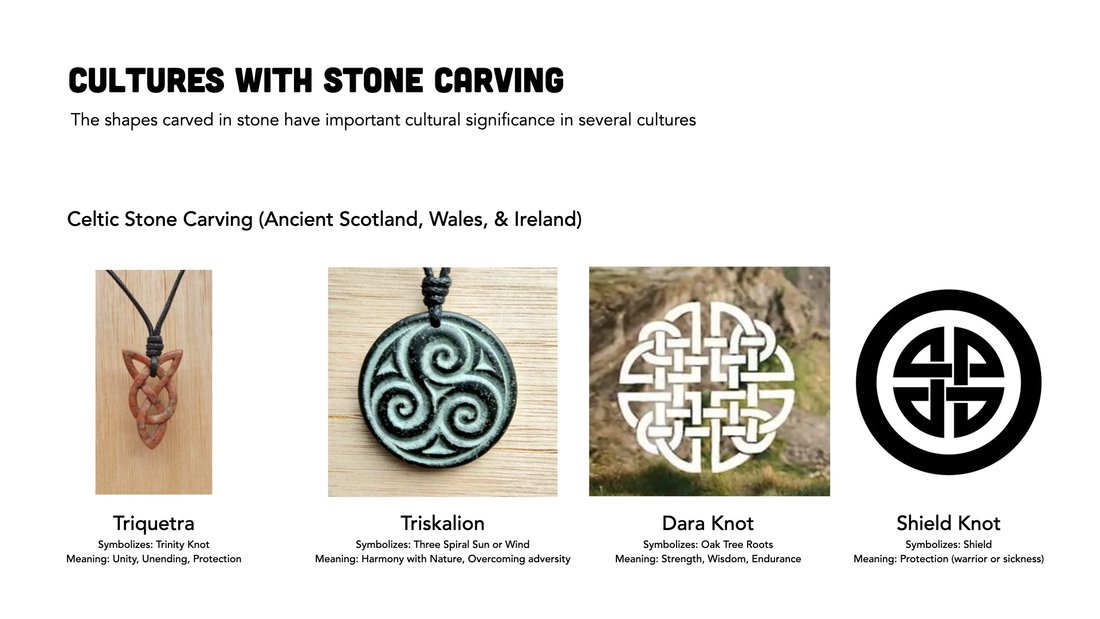
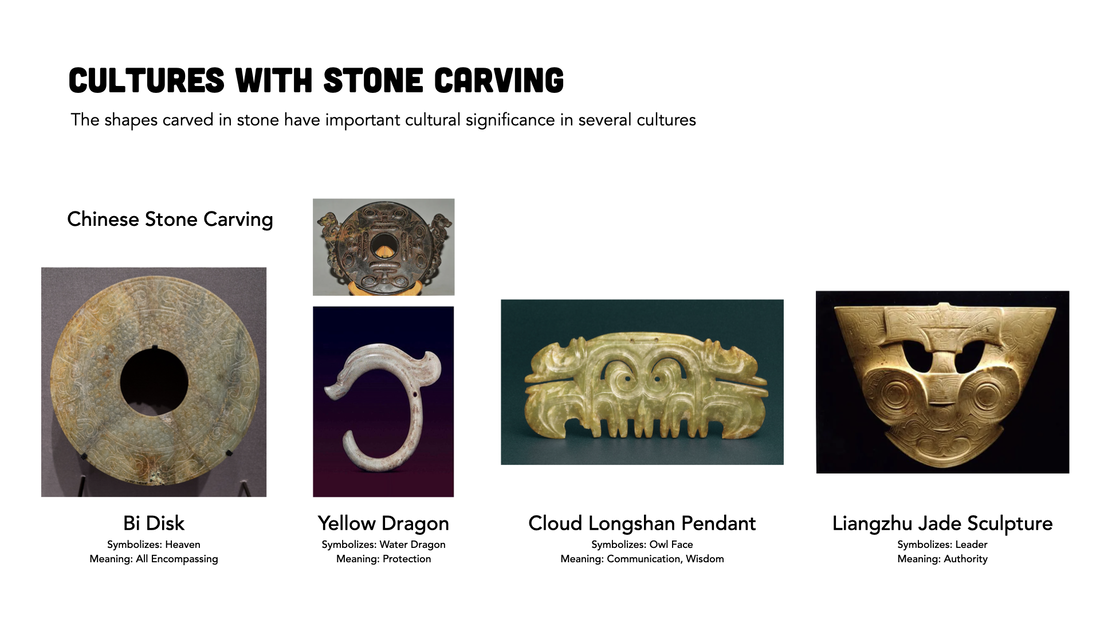
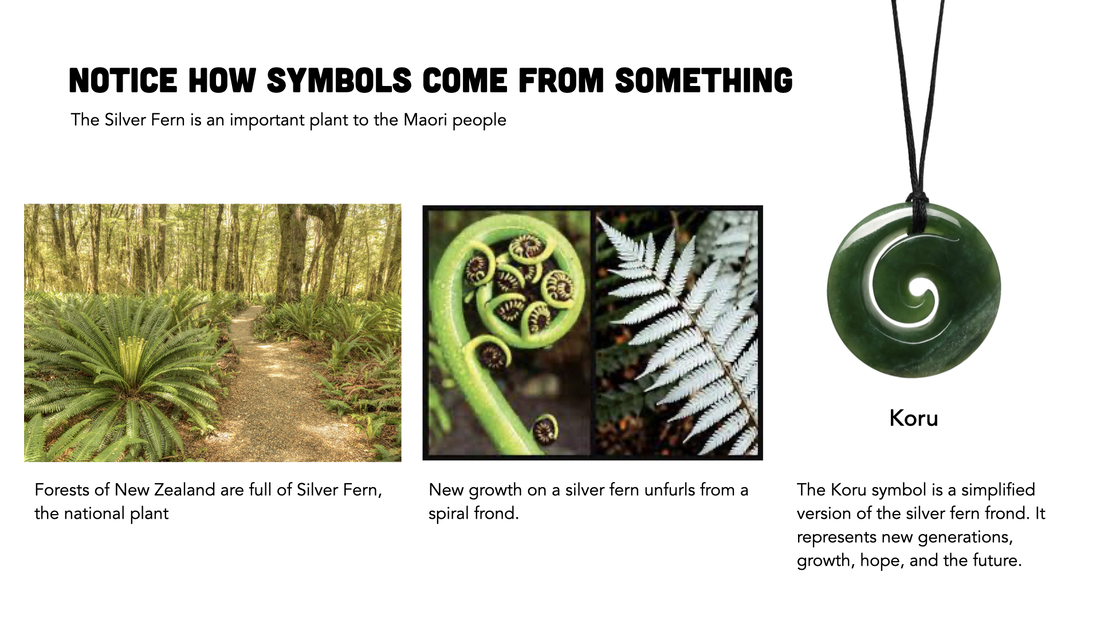
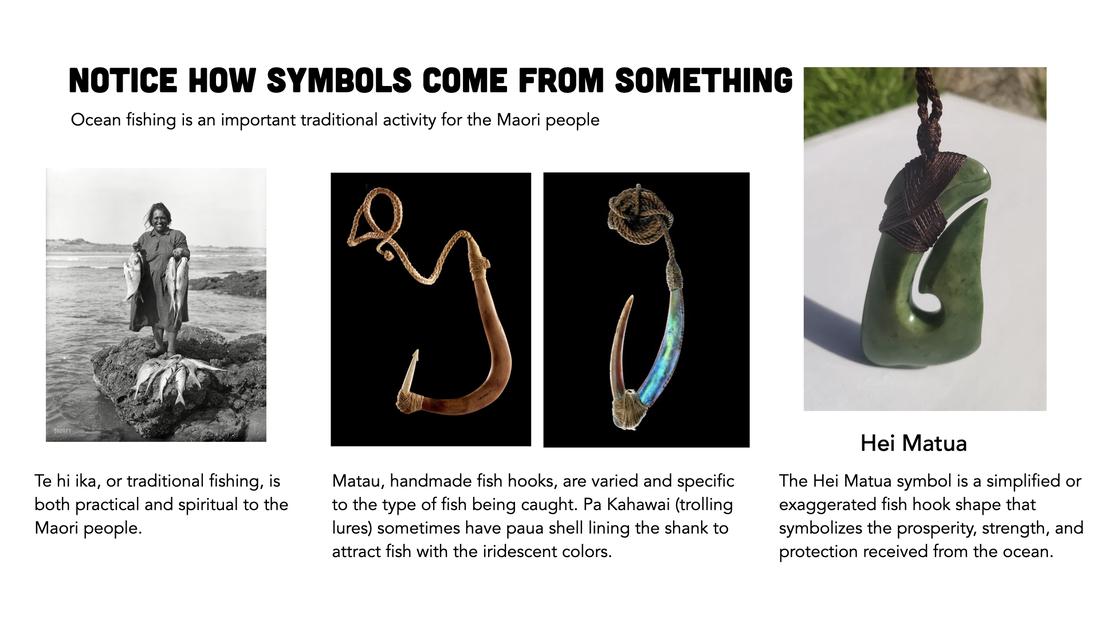
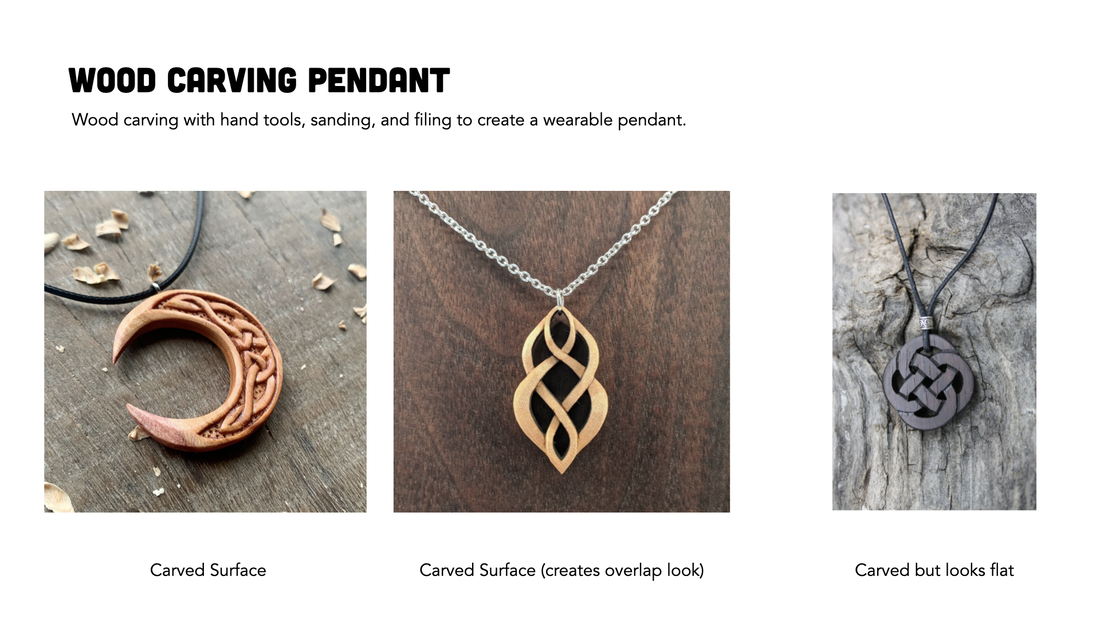
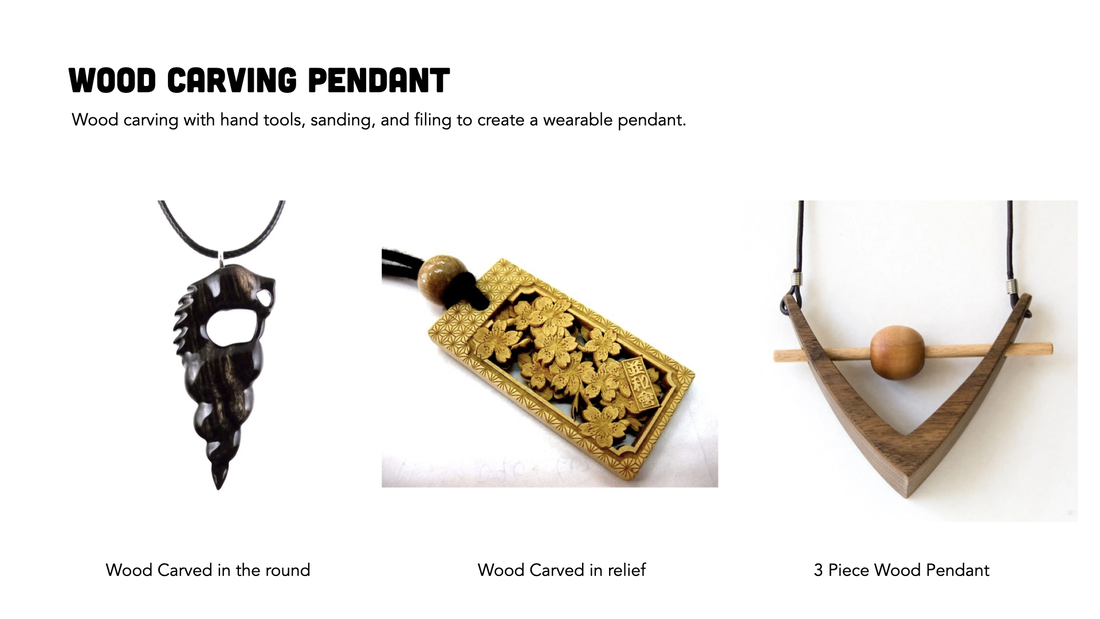
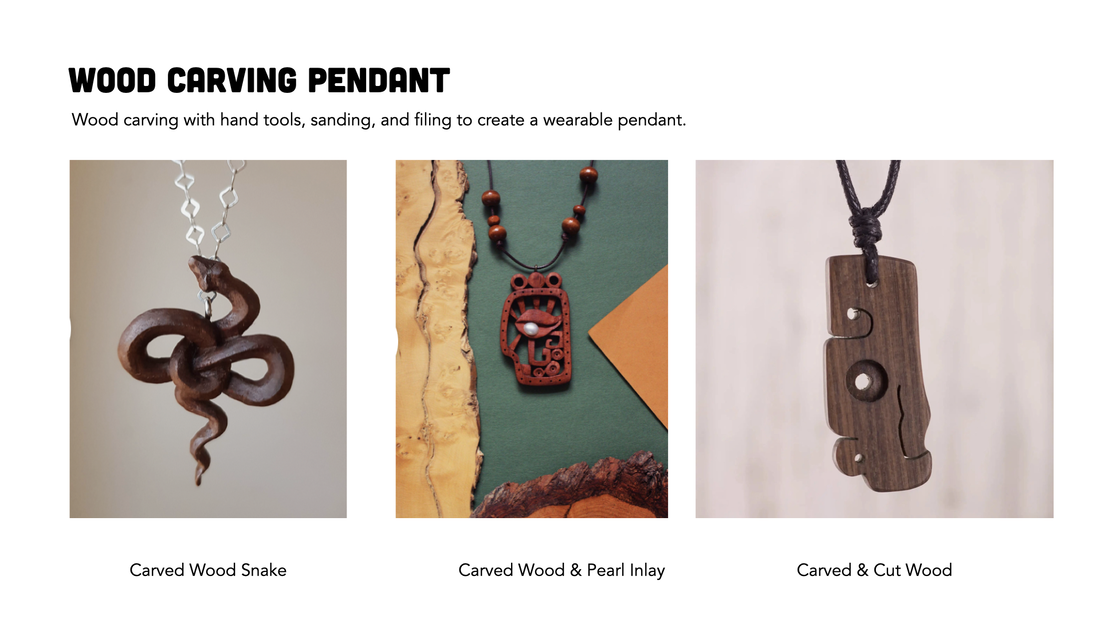
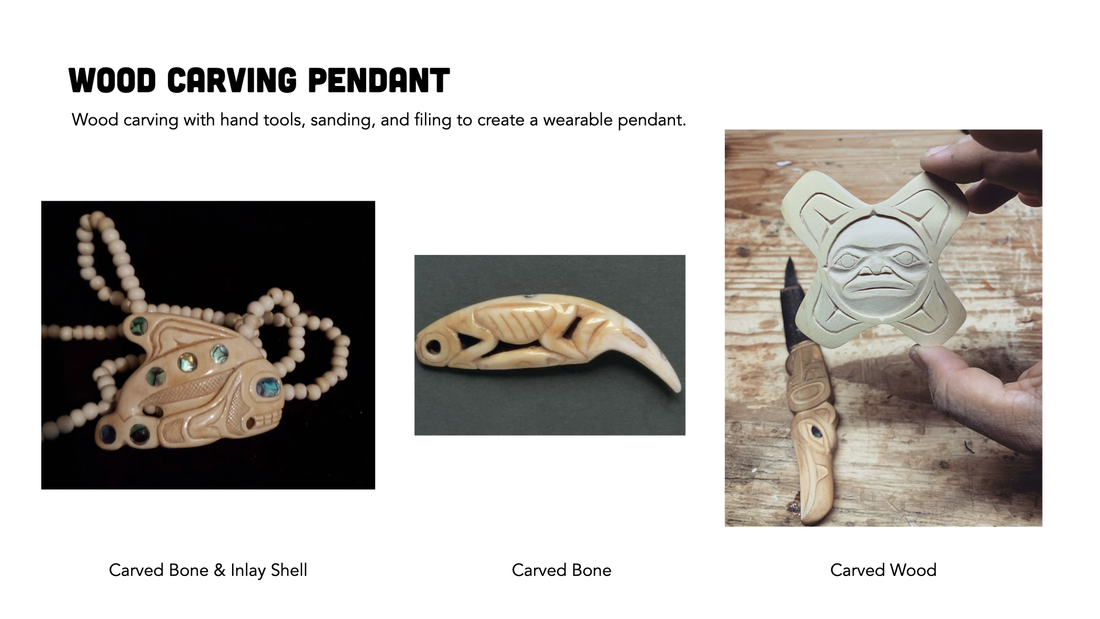
Cultures with Carved Pendants

Designing your Symbol
Things to Consider
- Your symbol should be unique to you. (You can't find it on the internet)
- You should give your symbol meaning, so that it becomes meaningful to you.
- Consider simplifying your important object/place into simple shapes.
- Consider combining more than one symbol that you find meaningful into a new symbol of your own creation.
- Your design should fill up as much of the wood as possible.
- The front face of the pendant must be carved so that the surface is no longer flat.
- Your wood will likely break if you make weight bearing parts too thin. Consider how thick you can make each area and still make your symbol recognizable.
- Remember to add a way to hang your pendant - you can add a hole to hang it from - or - you can create a groove in the stone where cord can be wrapped around the stone.
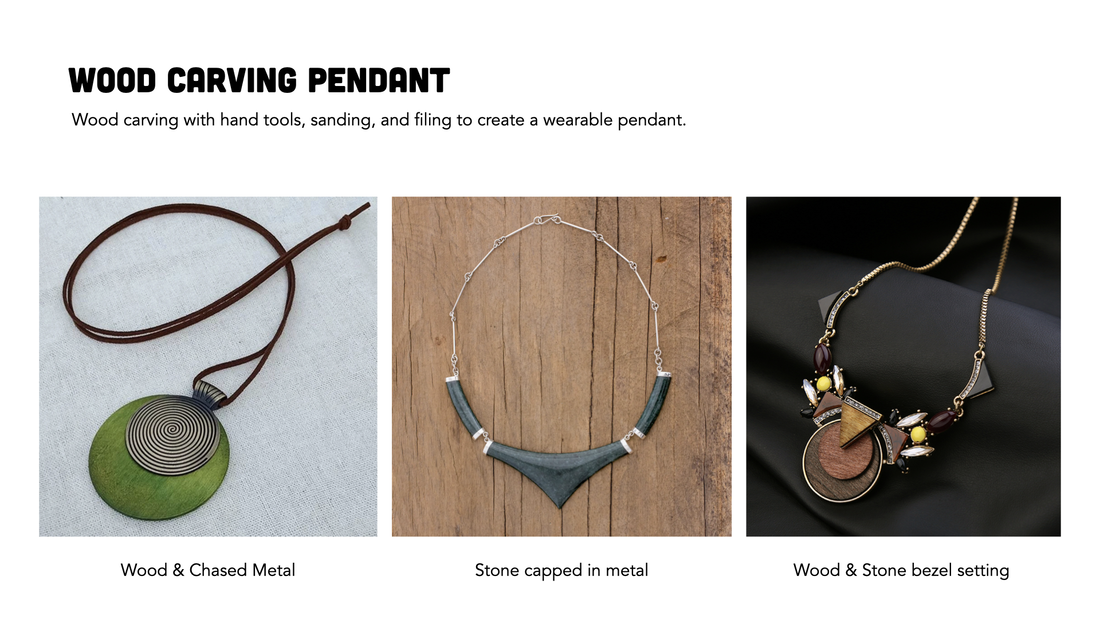
- Optional: You can add resin, metal, or stone to your wood pendant design.
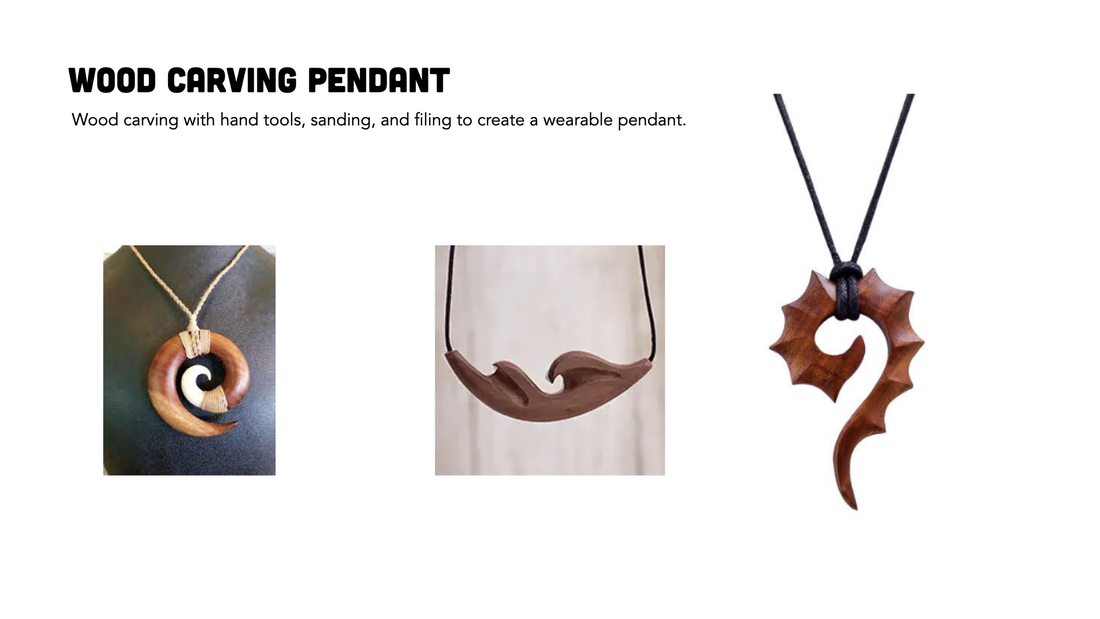
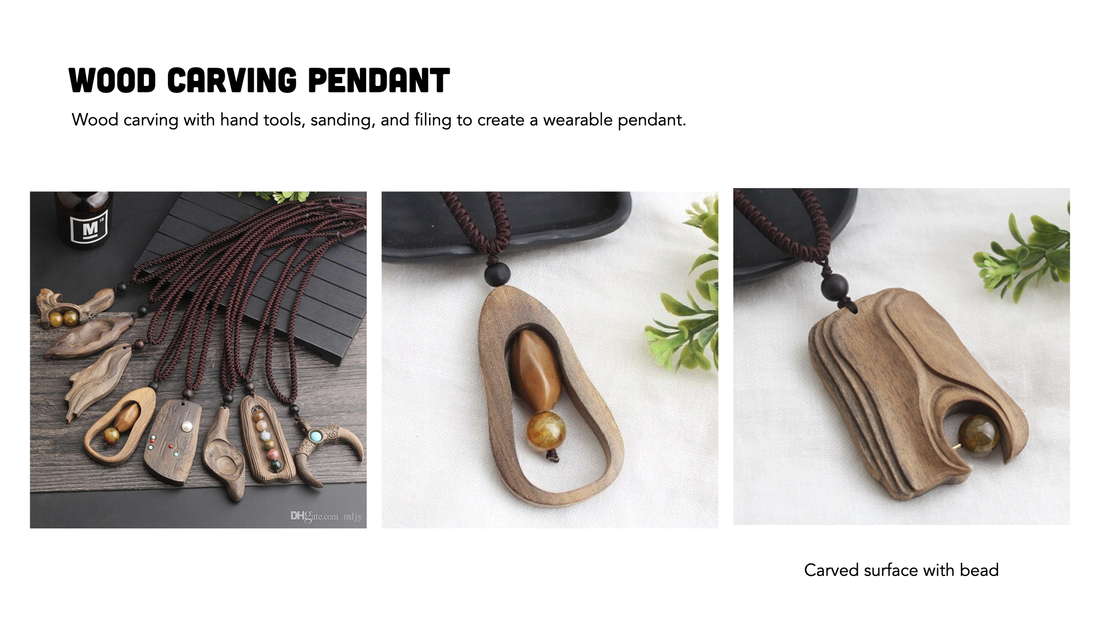
Wood Pendant Ideas


3 Photos of your Wood Pendants
Email an Image of Your Project
|
Grading Criteria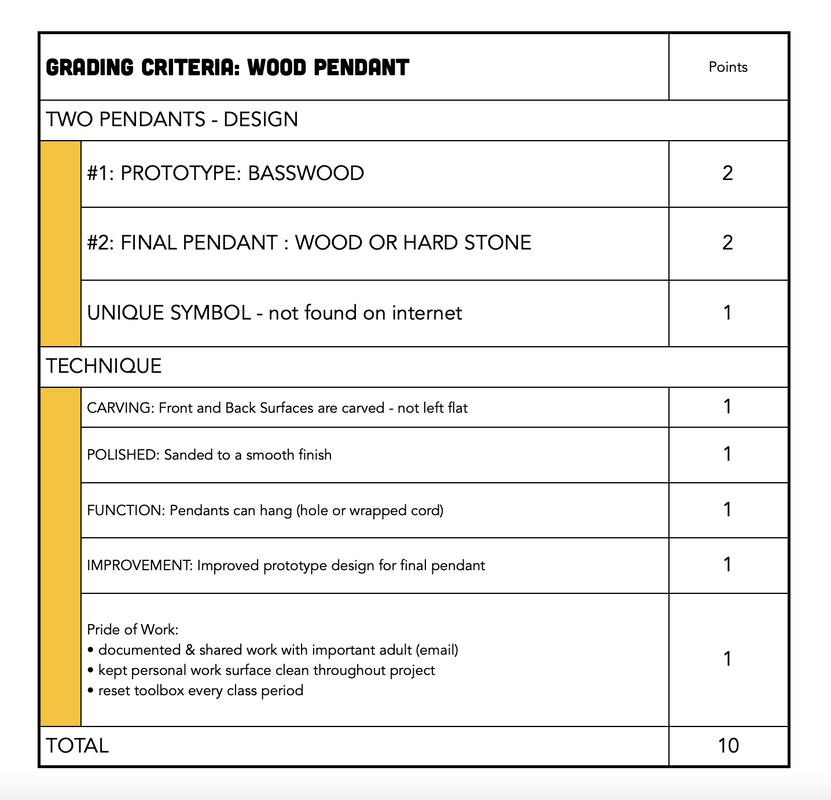
|
