|
|
WIRE ANIMAL SCULPTUREStudents will investigate form using photographs of an animal to guide their work, practice tooling techniques with wire, pliers, and snips, make a prototype to ensure enough volume is achieved, create a wire sculpture of an animal, and document their work using commercial photography techniques.
This unit has six parts: research, photo references, drawing to scale, prototype, final sculpture, and documentation of the finished work. |
Overview Unit Goal
Content
|
Art HistoryWire Sculpture Artists
|
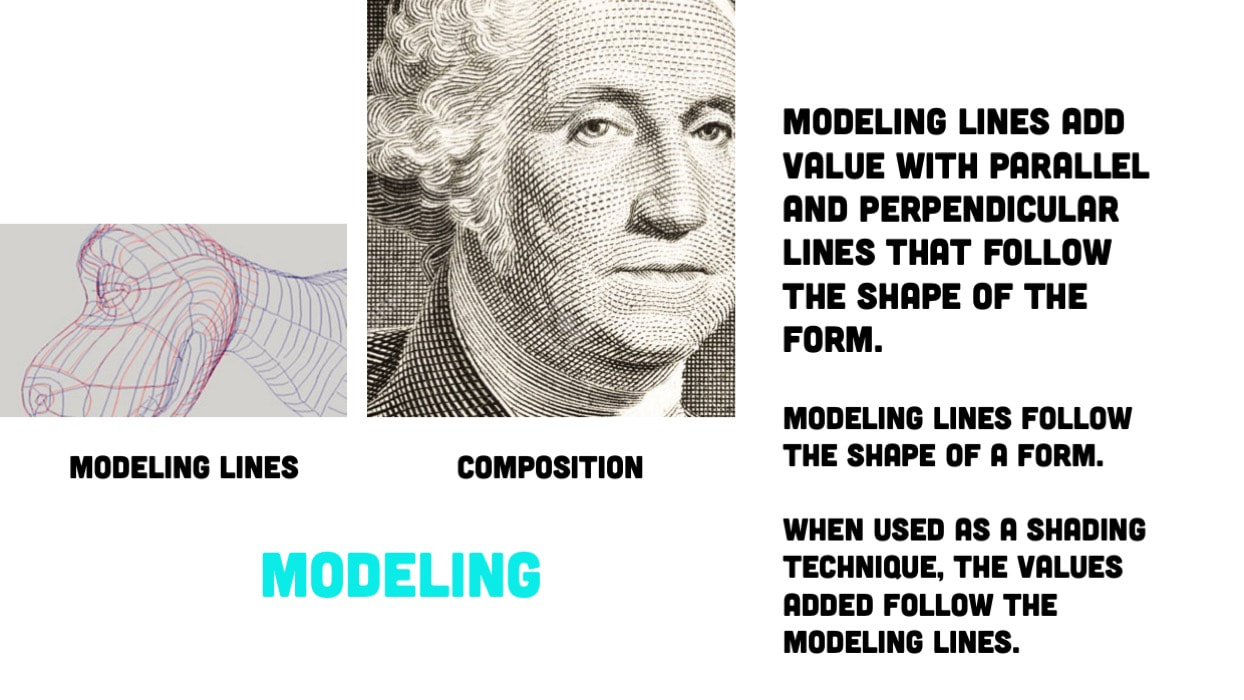
Composition Concepts
|
|
Content: Animals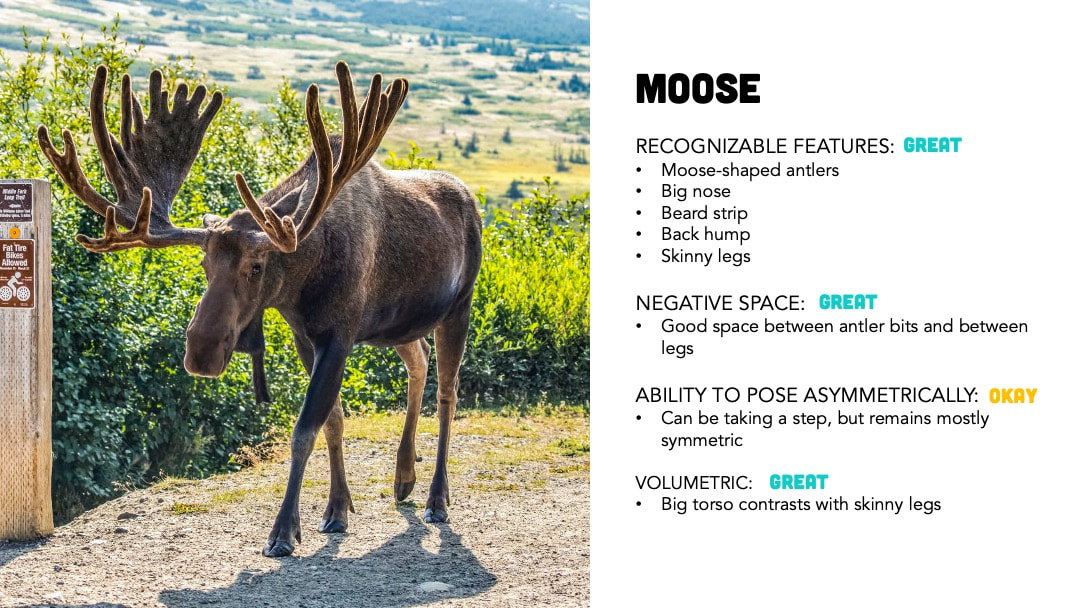 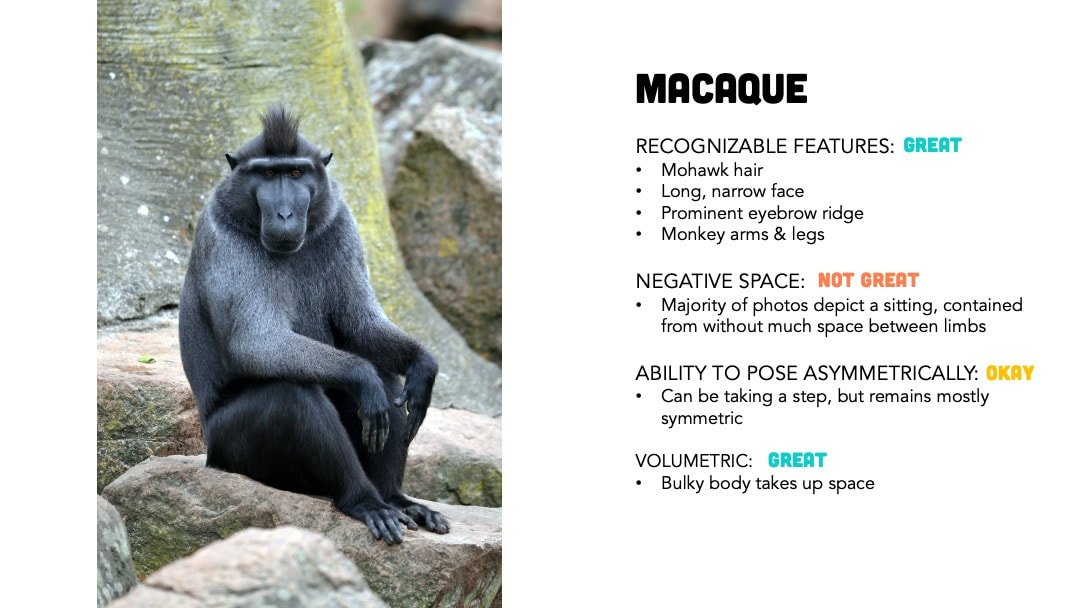 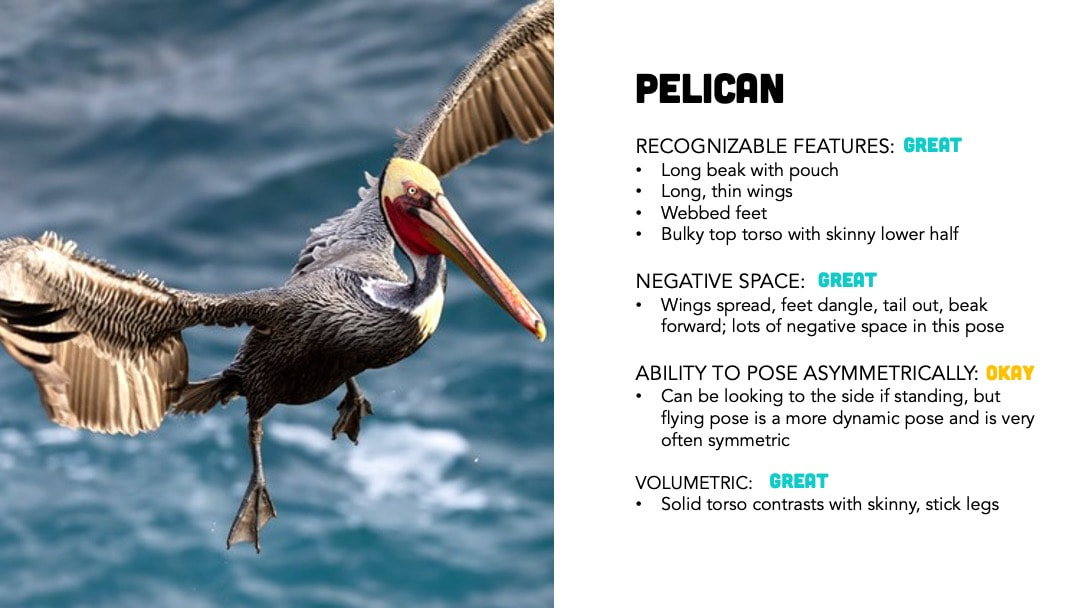 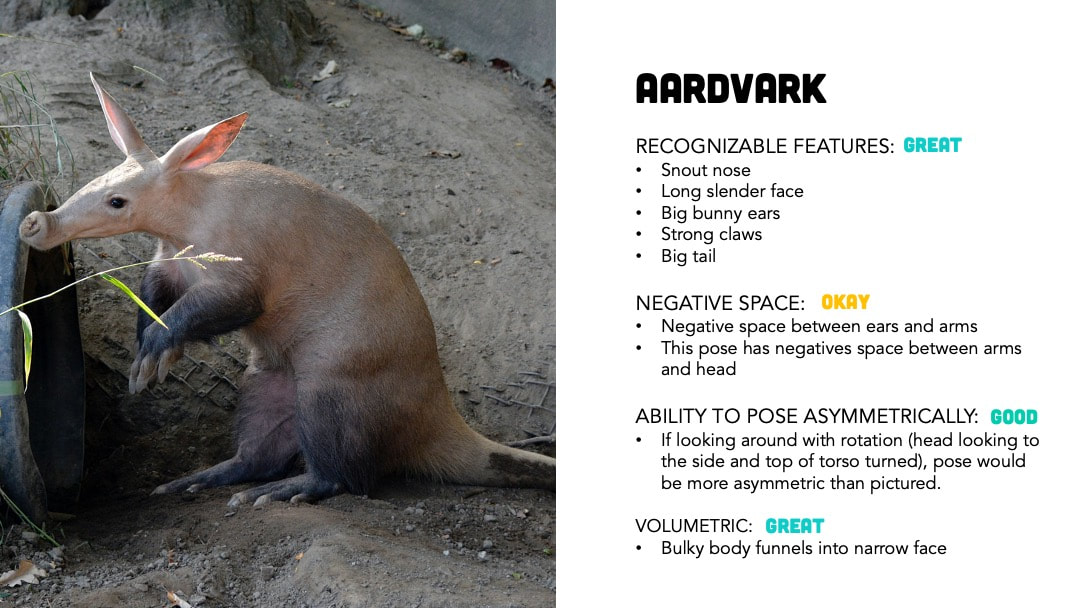 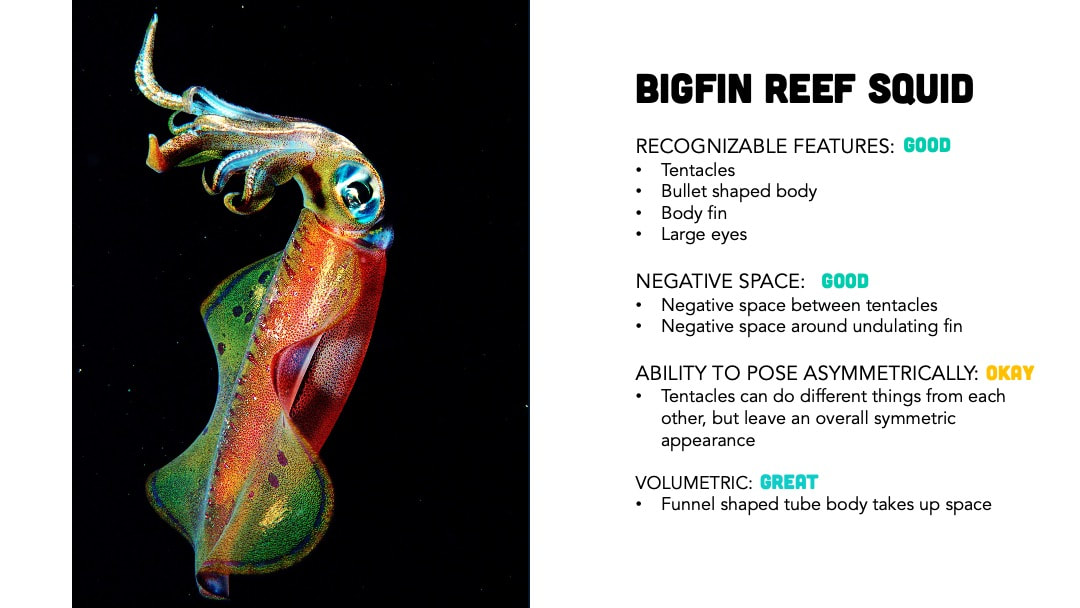 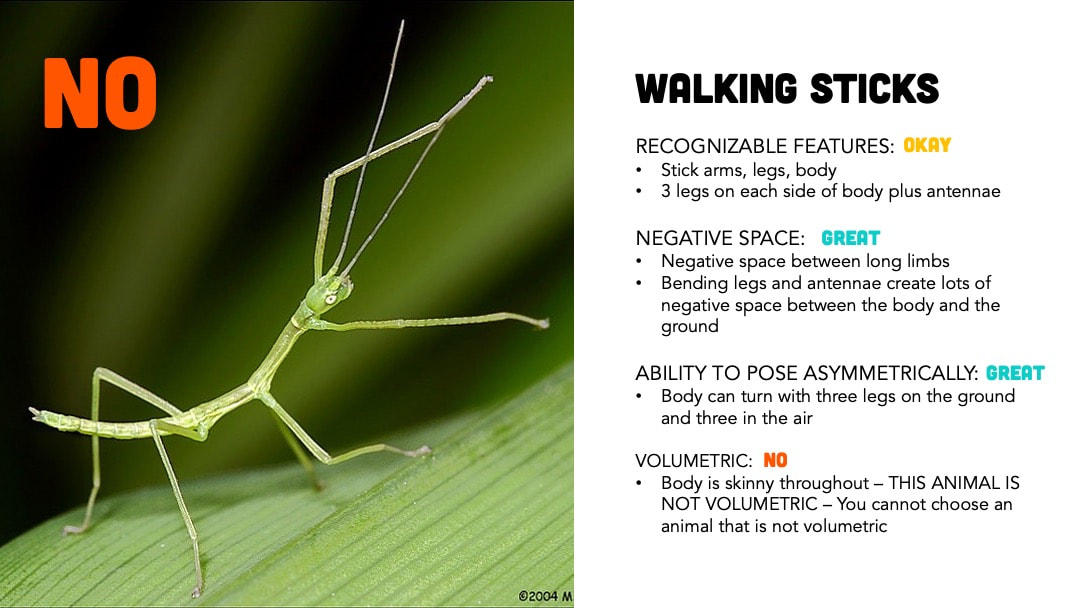 |
Art History: Wire Sculpture Artists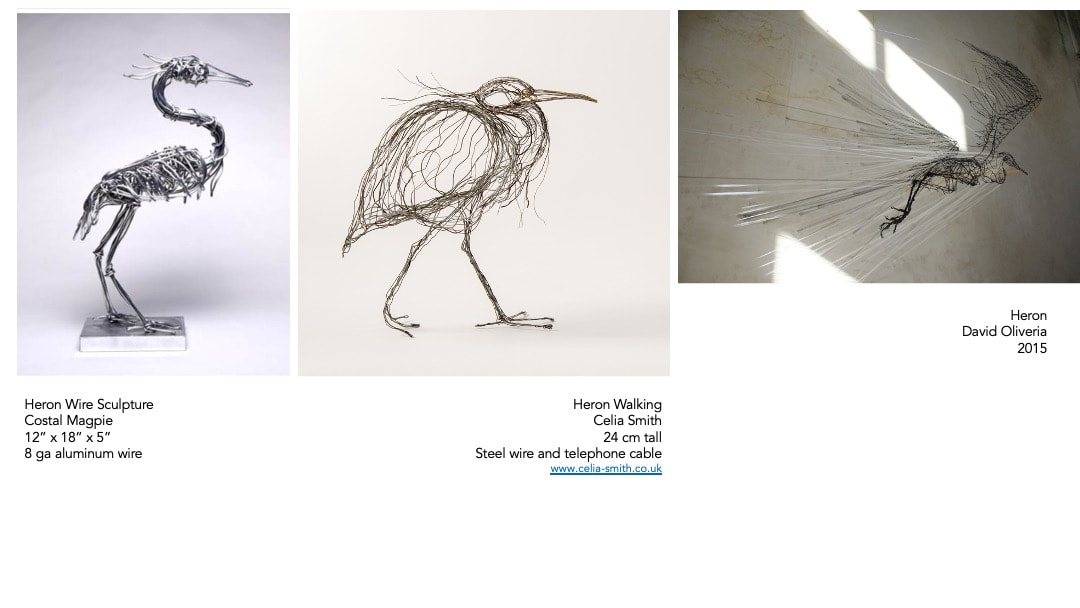 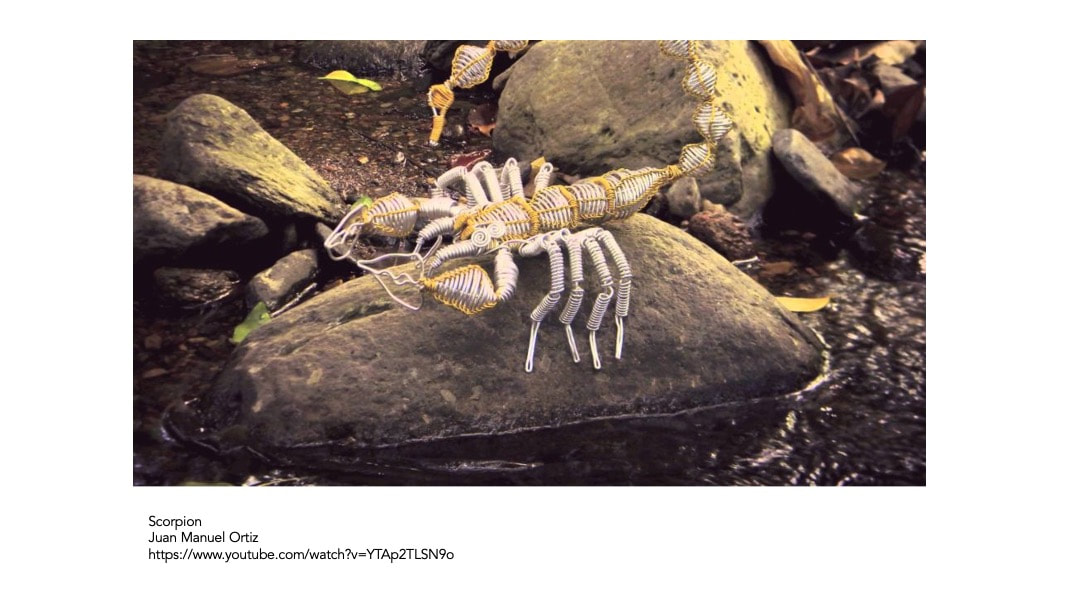 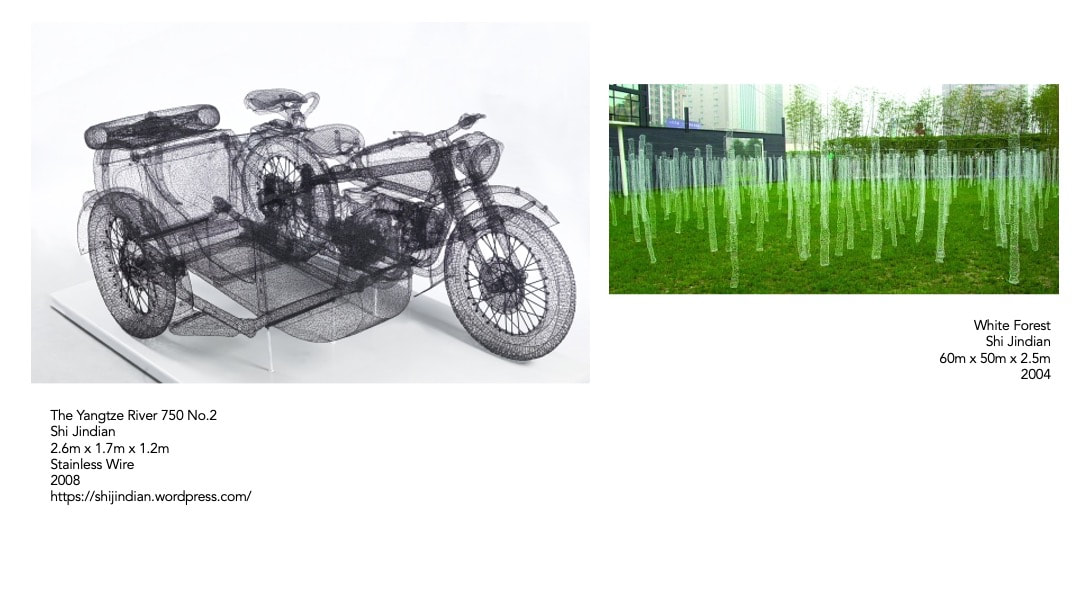 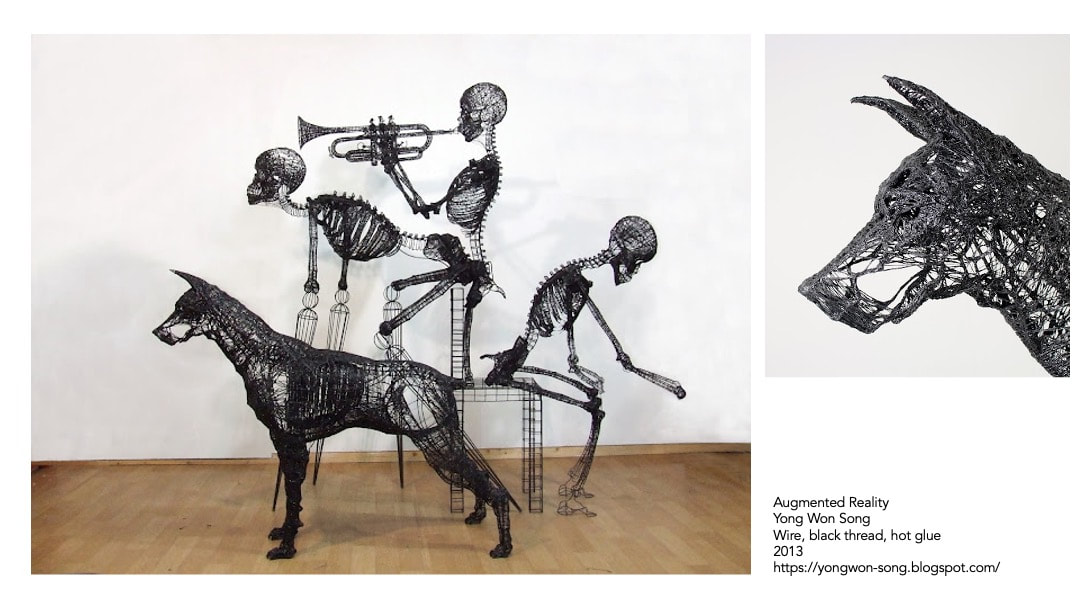 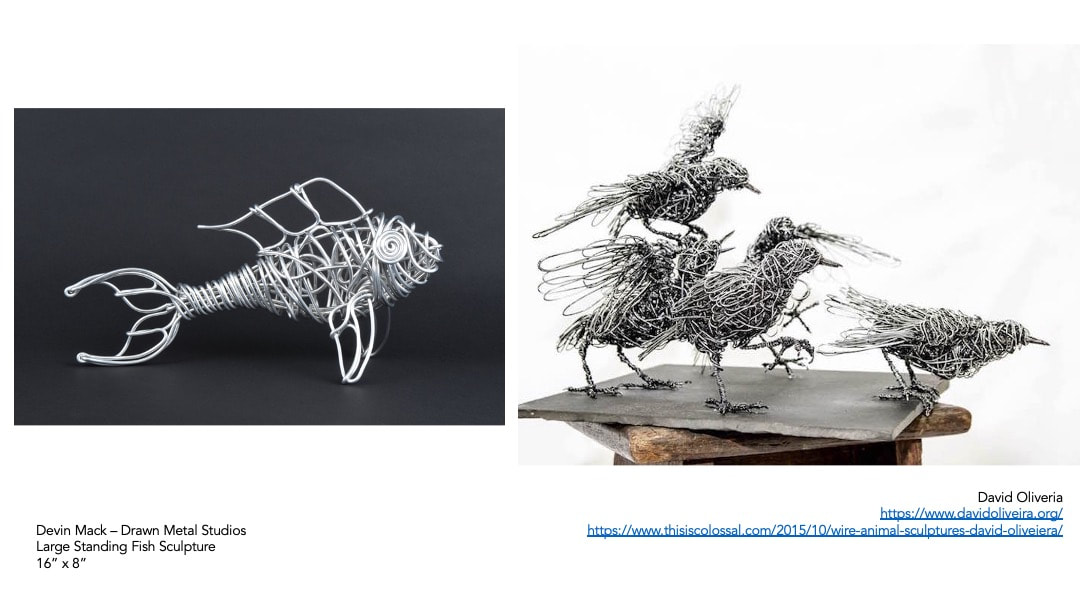 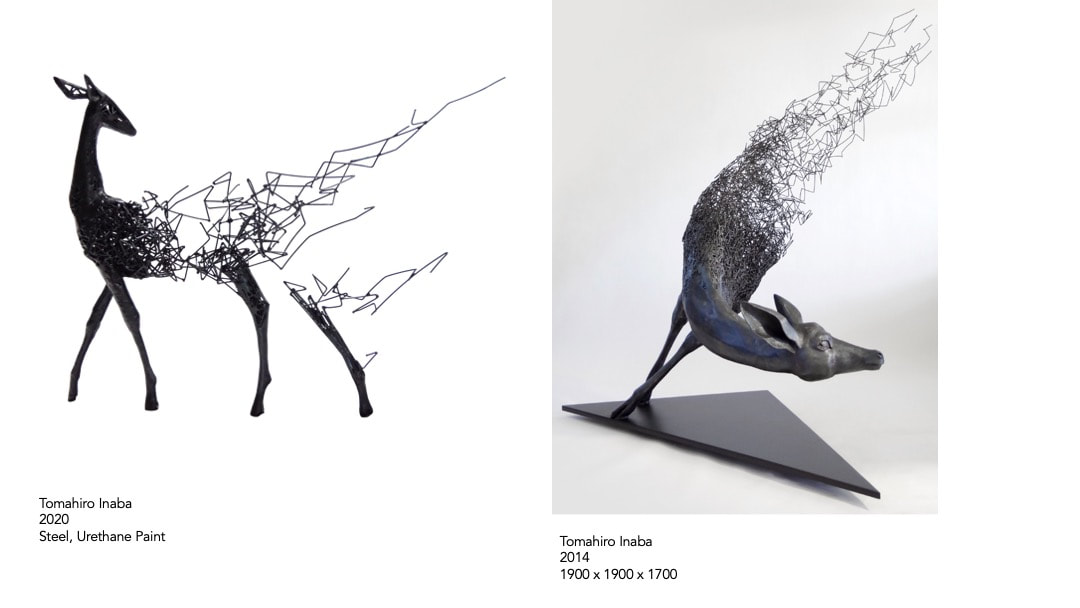 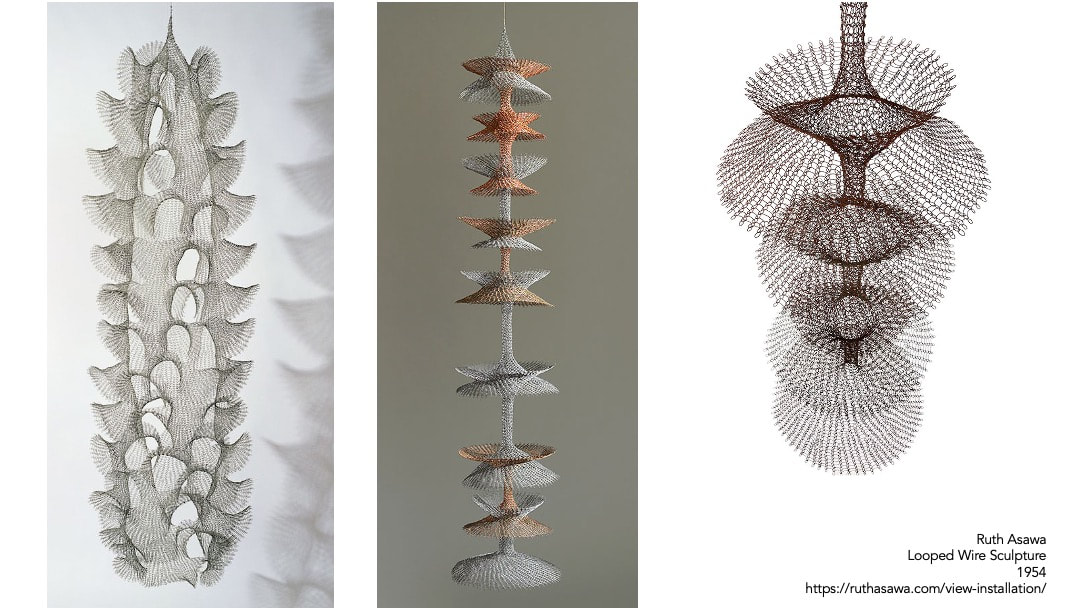 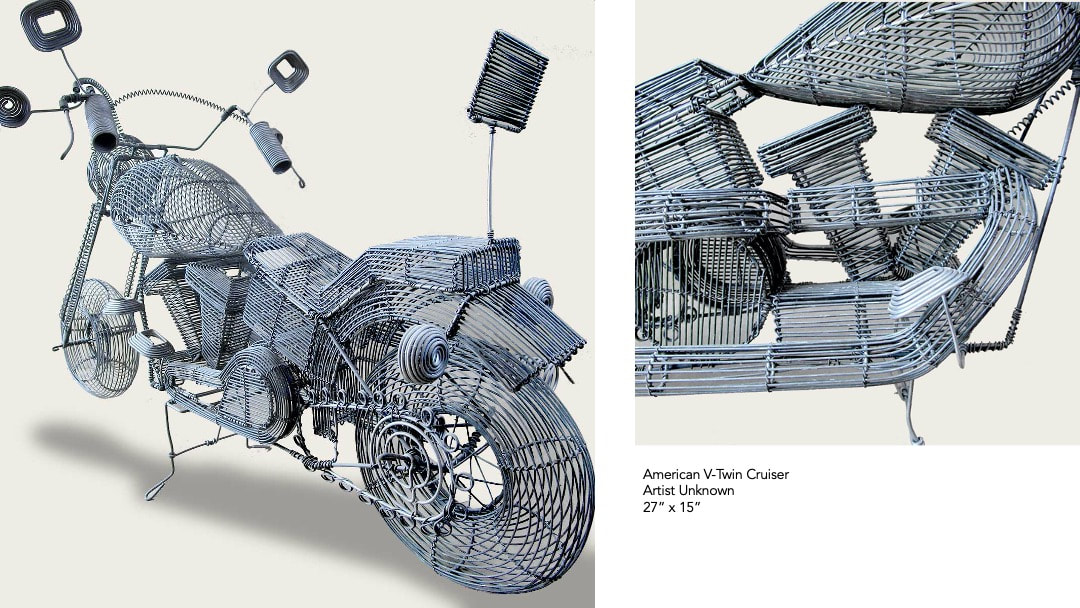 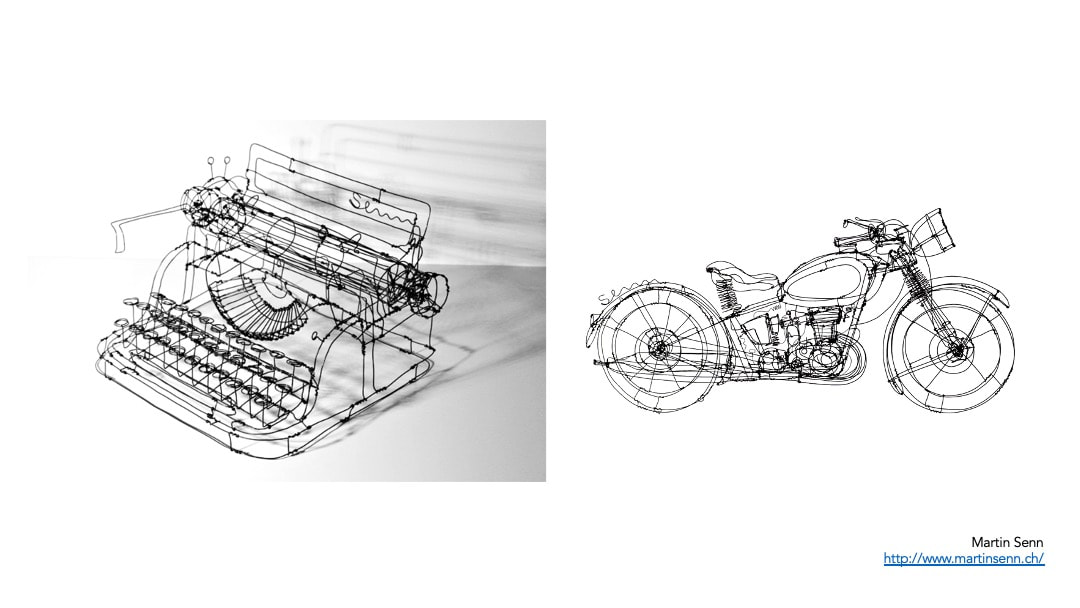 |
Composition Concepts
|
|
|
|
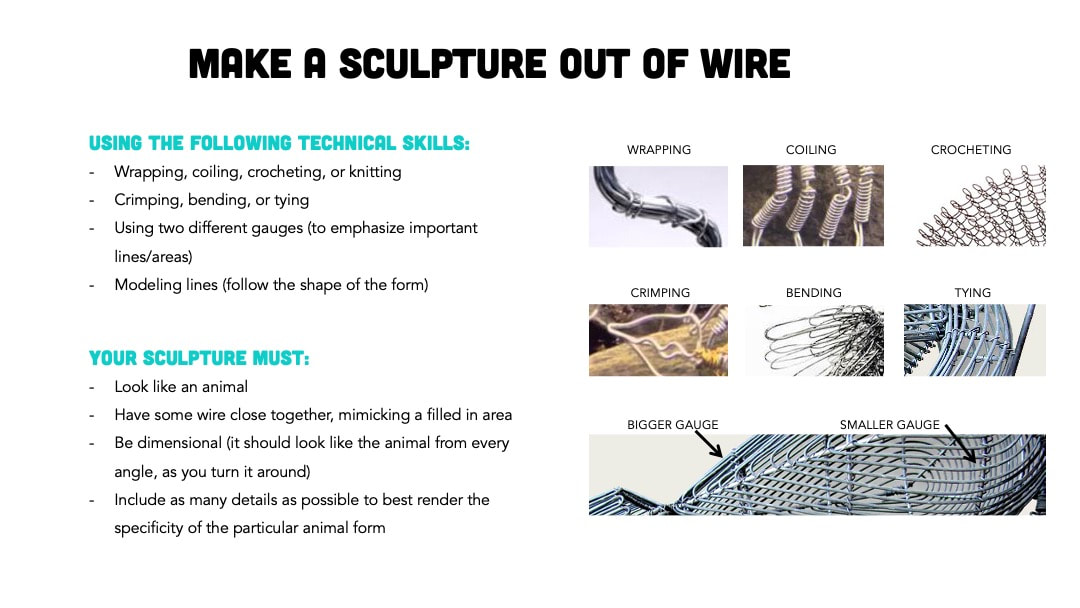
Technical Skills |
Tools & SuppliesExercises
Main Sculpture
|
Unit Components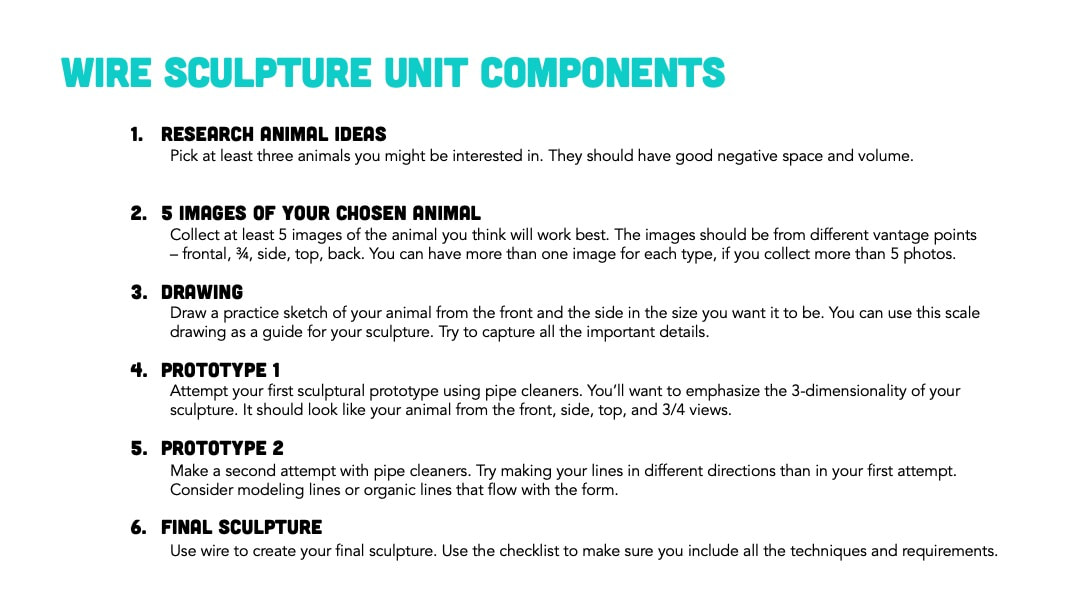
|
Research |
5 Animal Images
|
Drawing
|
Prototype 1
|
Prototype 2
|
Wire Sculpture
Grading Reflection
Email InstructionsClick here for the email instructions.
You will choose an important adult in your life to share your work with. This person should be someone you treat as an adult, not your sister who is 18 now who you treat as a peer. You'll be sending them an email of your work with some text in the body of the email describing what you are sending. Look at the full instructions for line by line advice on how to do it. Use your personal email to email someone outside of the district email system or use your school email to email to a teacher who might appreciate your work. Be sure to cc Mx. Ross - [email protected] |
Documenting your Sculpture
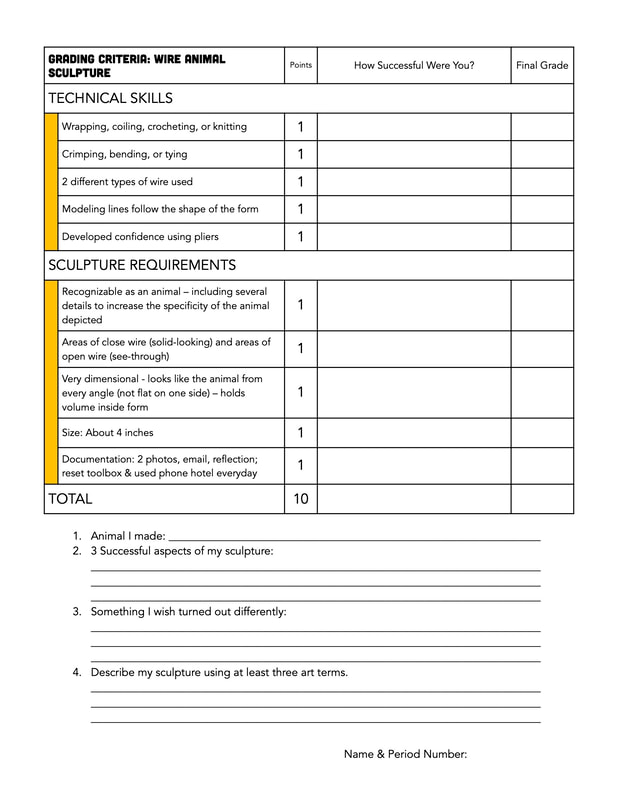
Grading Criteria
|