
|
|
WIRE BRACELETStudents will learn how to create a bracelet with wire, practice tooling techniques with wire, pliers, and snips, make a clasp and end caps, and document their work using commercial photography techniques.
This unit has four parts: design, wire bracelet, end caps and clasp, and documentation of the finished work. |
Overview Unit Goal
Composition Concepts
|
|
Composition Concepts
|
Viking Knit |
Technical Skills |
Tools & SuppliesPreparation
Bracelet
|
Unit Components1. RESEARCH - bracelet techniques
2. DRAW DESIGN - plan your bracelet design 3. BRACELET - make the bracelet 4. CLASP & END CAPS - make the bracelet functional by creating end caps and clasps 5. DOCUMENTING - photos, reflection, email, & flip video |
ResearchResearch these bracelet types (Technical skills videos can be found above):
|
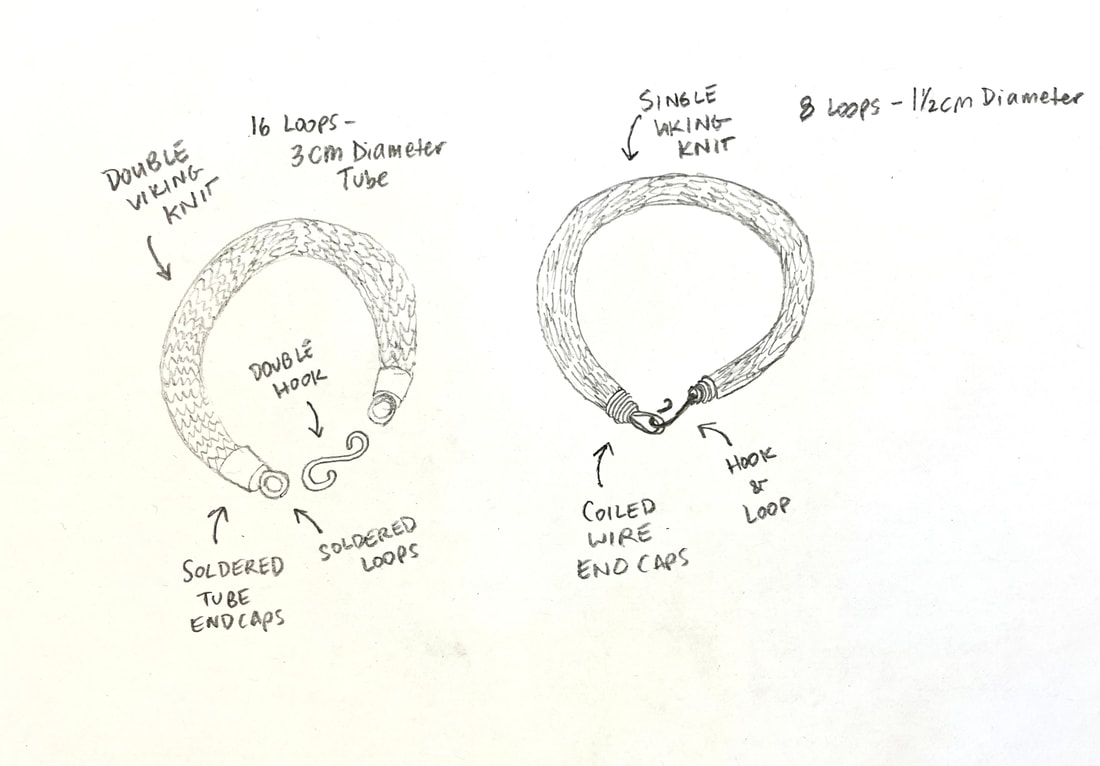
Drawing
|
|
Wire Bracelet
Clasp & End Caps
|
Viking Knit Steps
|
TURNING IN YOUR WORK - 4 STEPS
Documenting your Sculpture
Written ReflectionFill out the grading criteria form and answer the written reflection questions. Once you are finished with your email and flip video, turn in your written reflection with your project to the turn in box for your period.
Email InstructionsClick here for the email instructions - be sure you use your personal email and cc Mx. Ross to get credit for the email.
Flip VideoFollow the flip instructions on the class Flip page. Use a photo of your work with audio narration of you talking about your work. Be sure to have your written reflection filled out so that you are ready to narrate your video.
|
Grading Criteria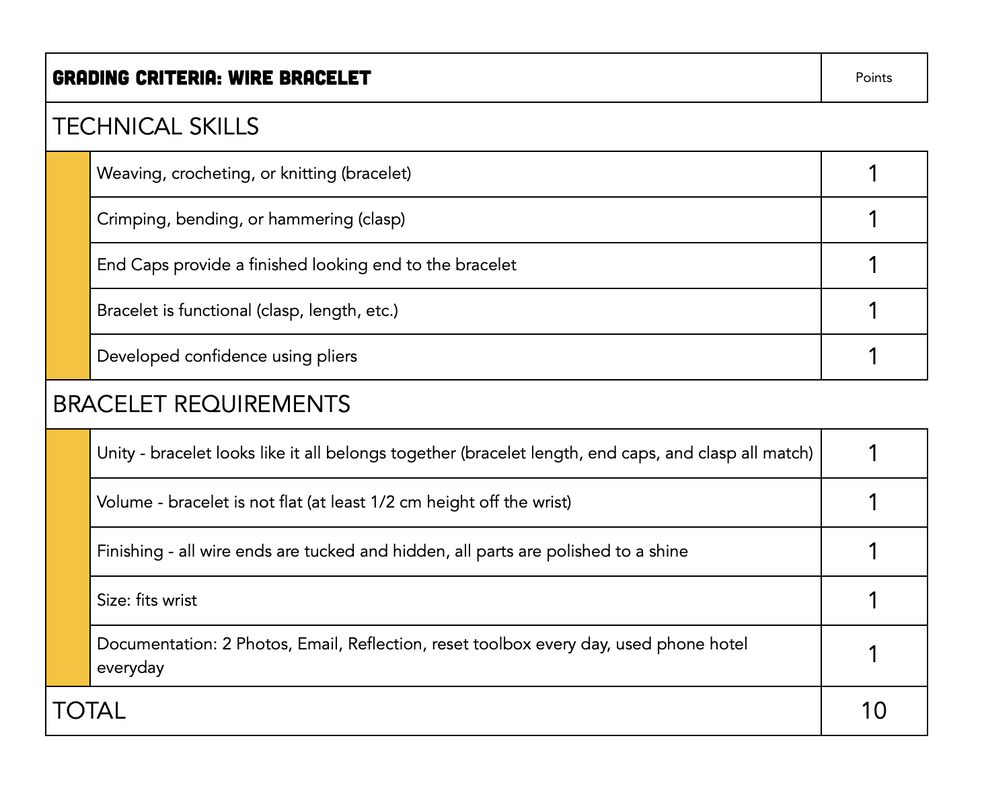

|
