
|
|
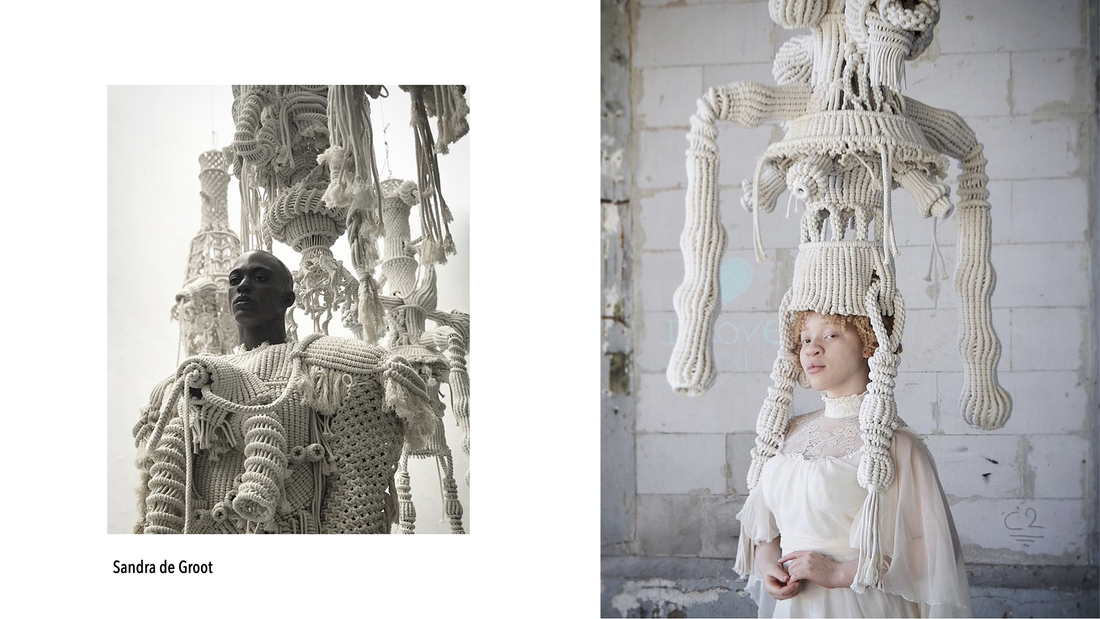
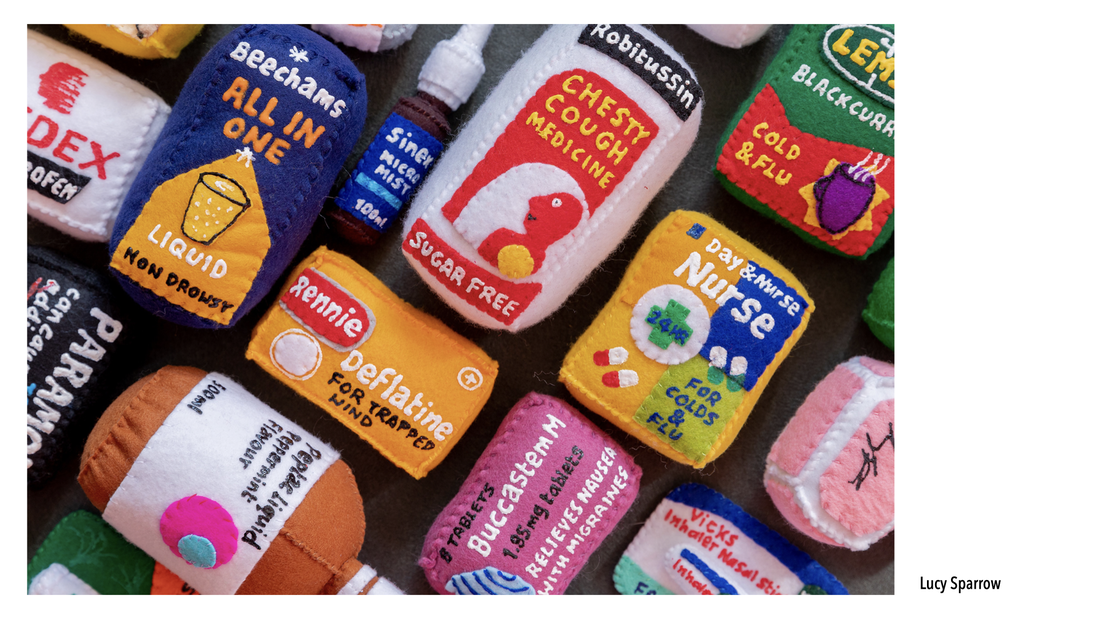
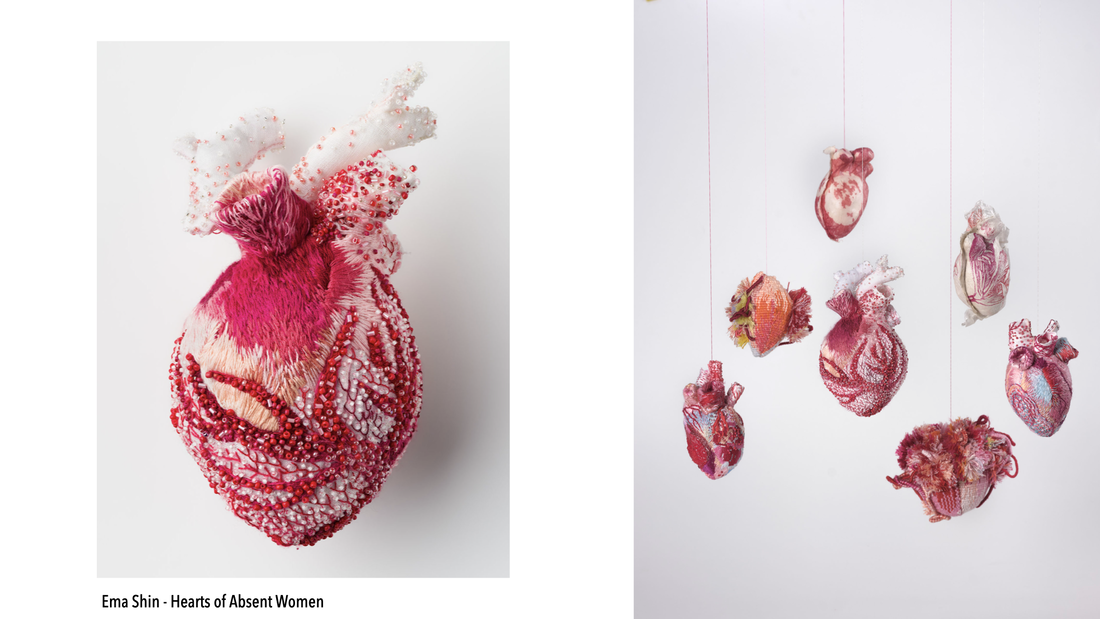
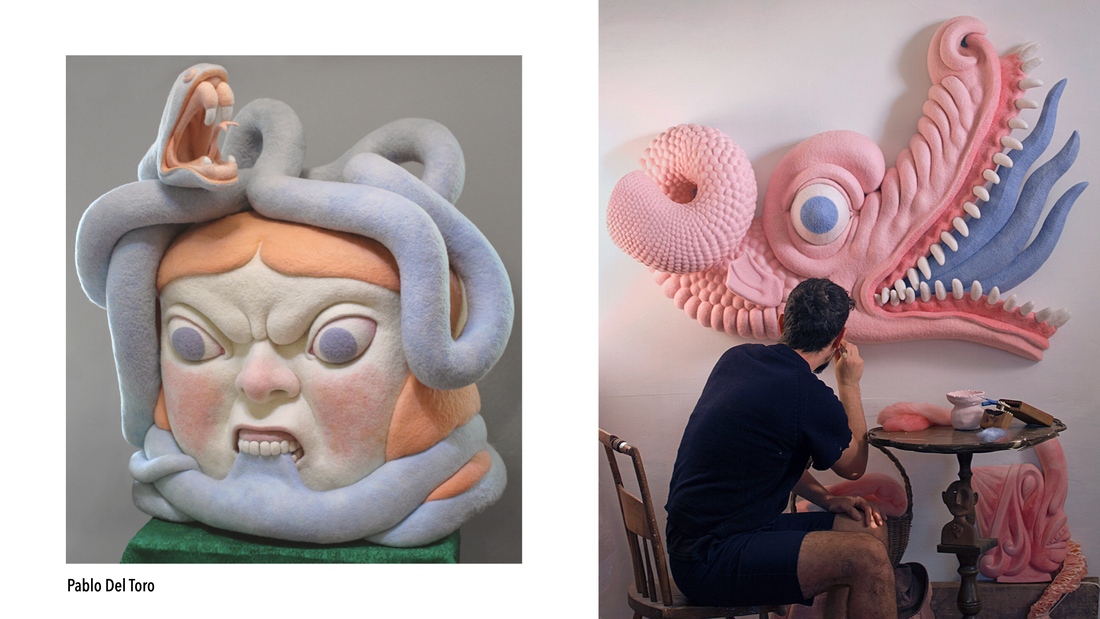
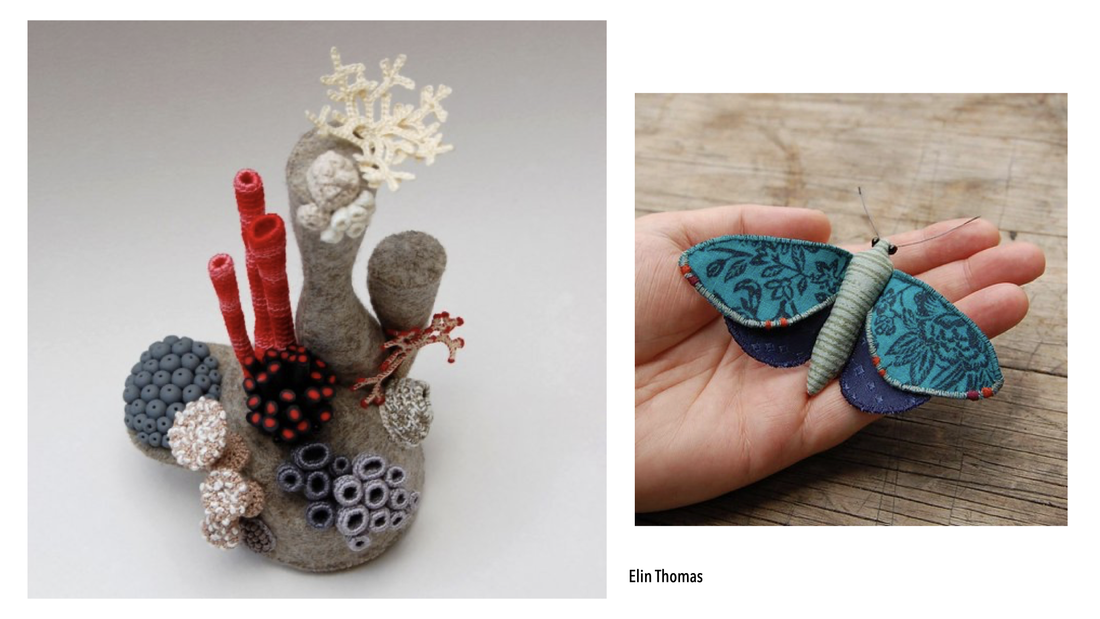
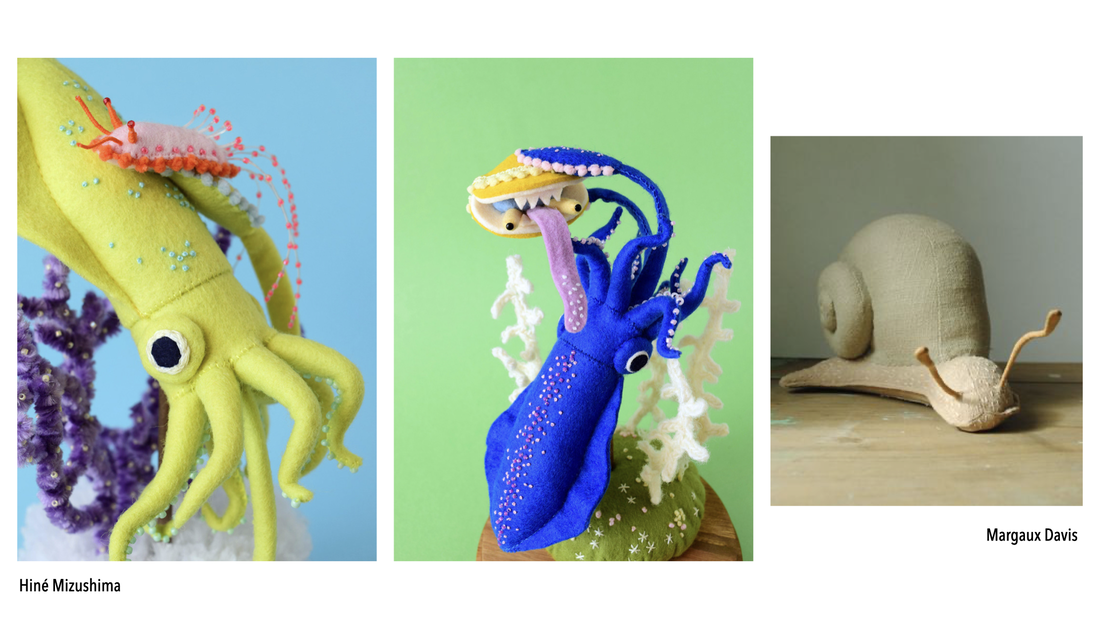
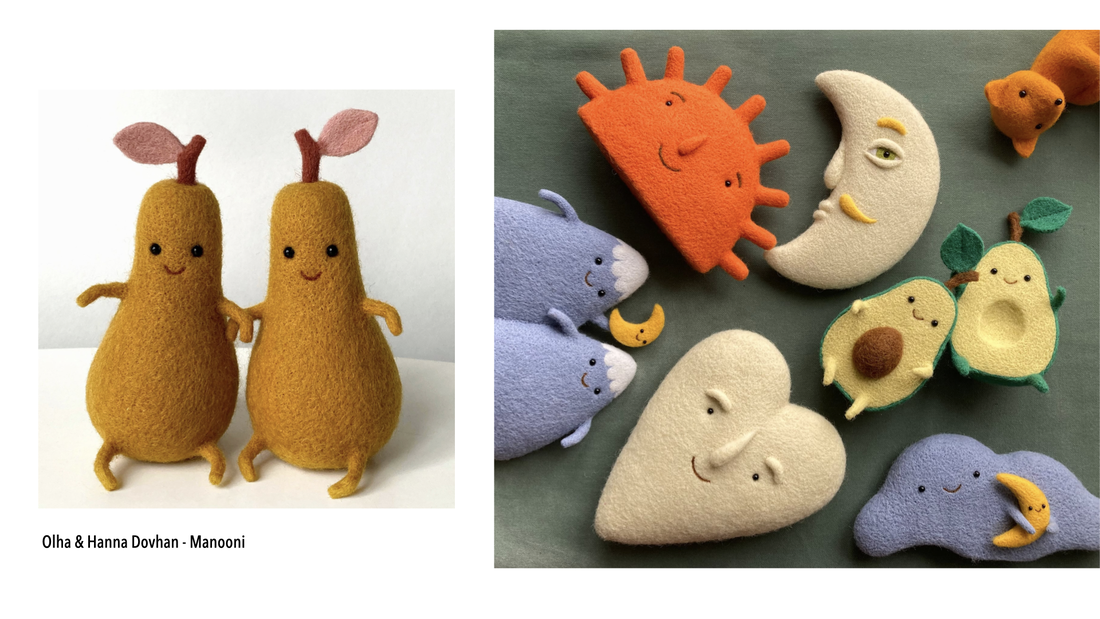
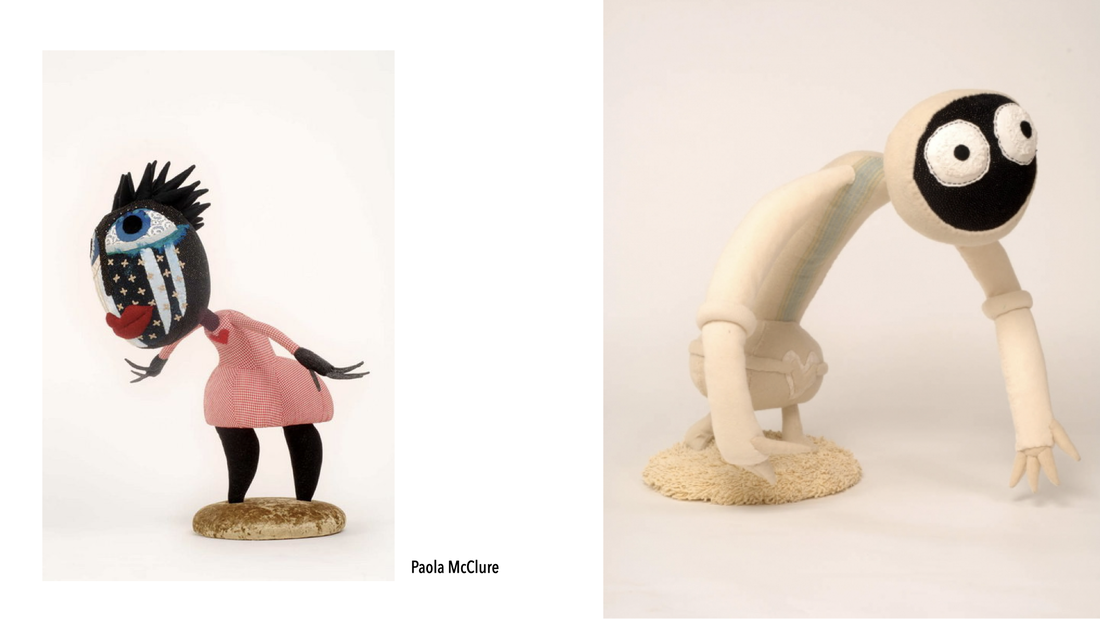
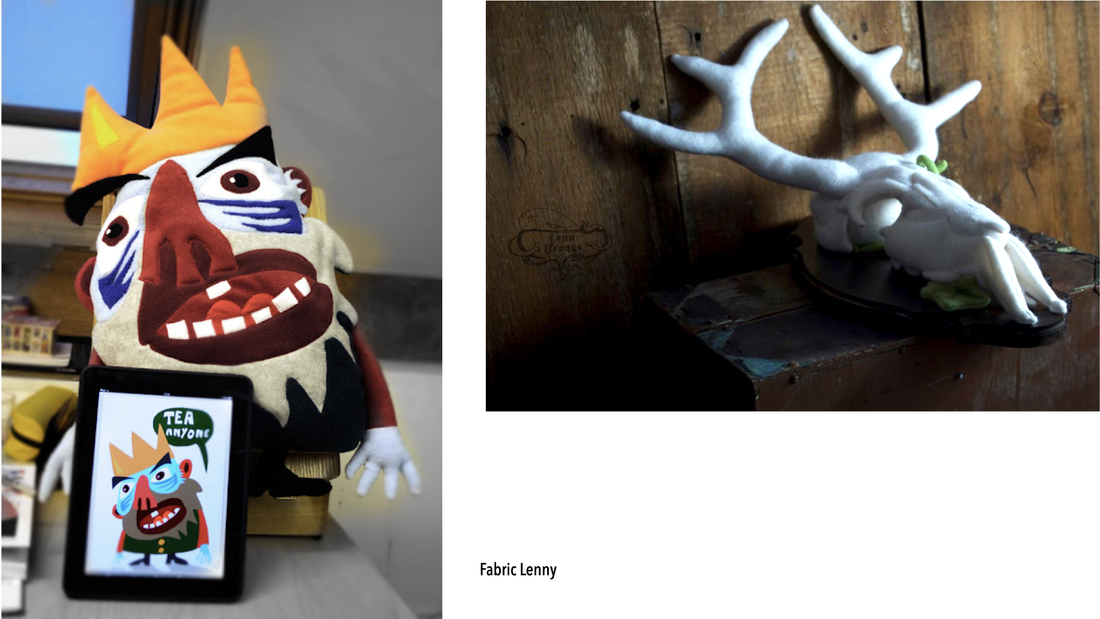
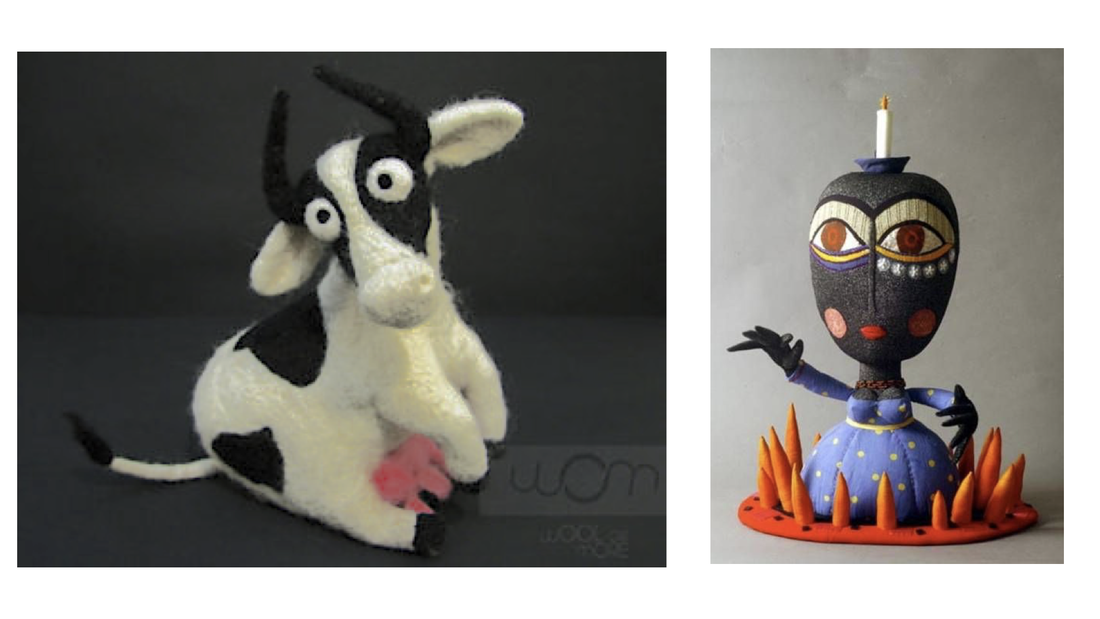
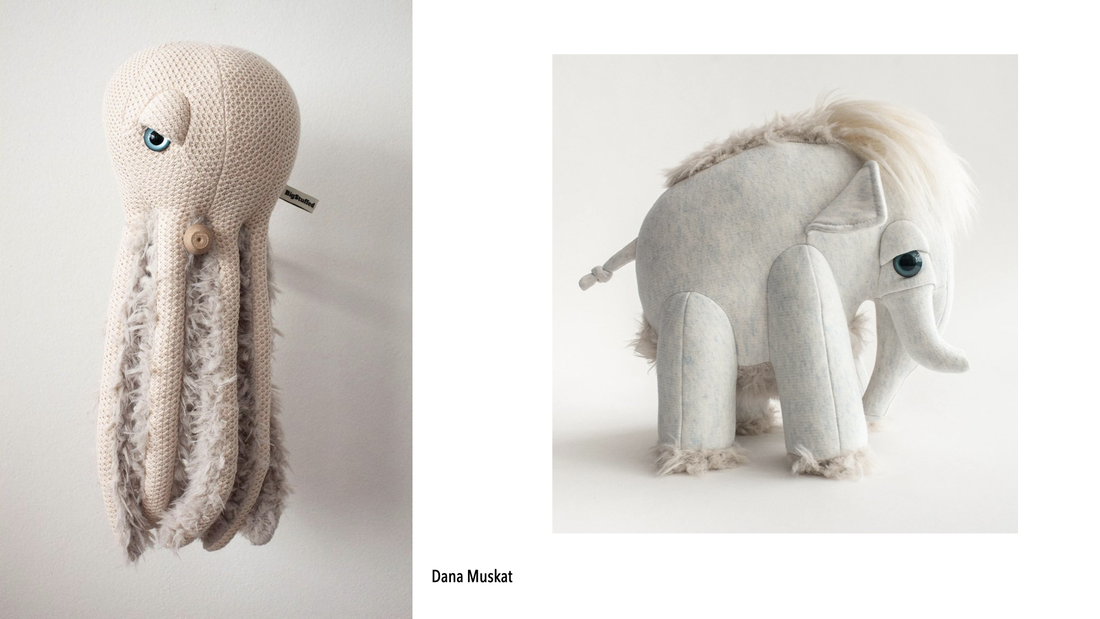
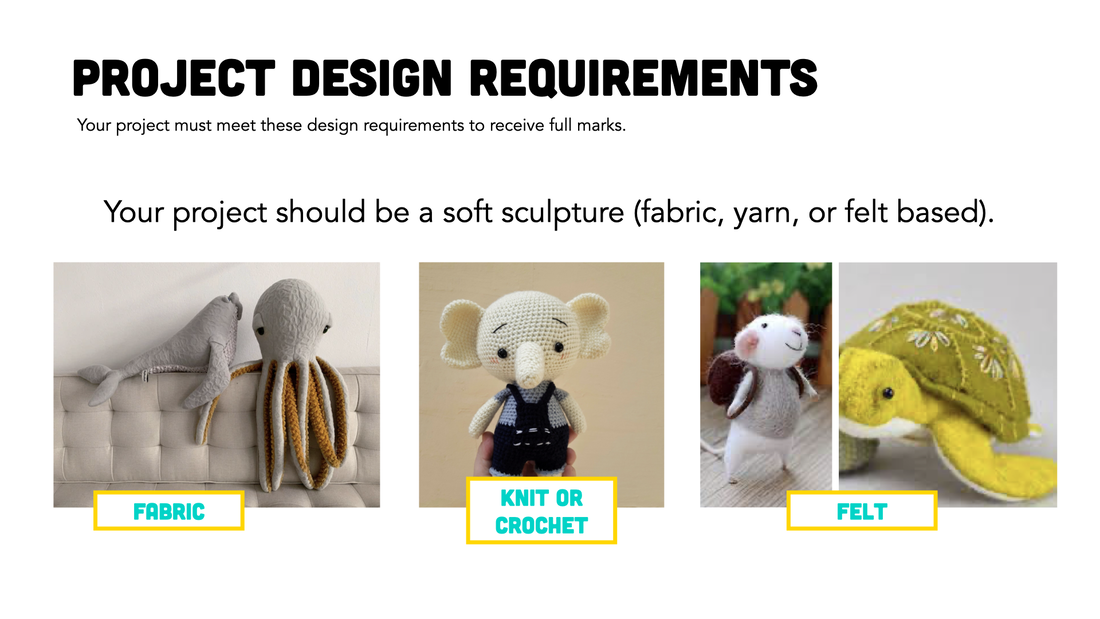
Soft Sculpture: Stuffed AnimalsStudents will create a soft sculpture stuffed animal. Students will use fabric, needles, and thread for hand sewing a unique and personality infused volumetric form.
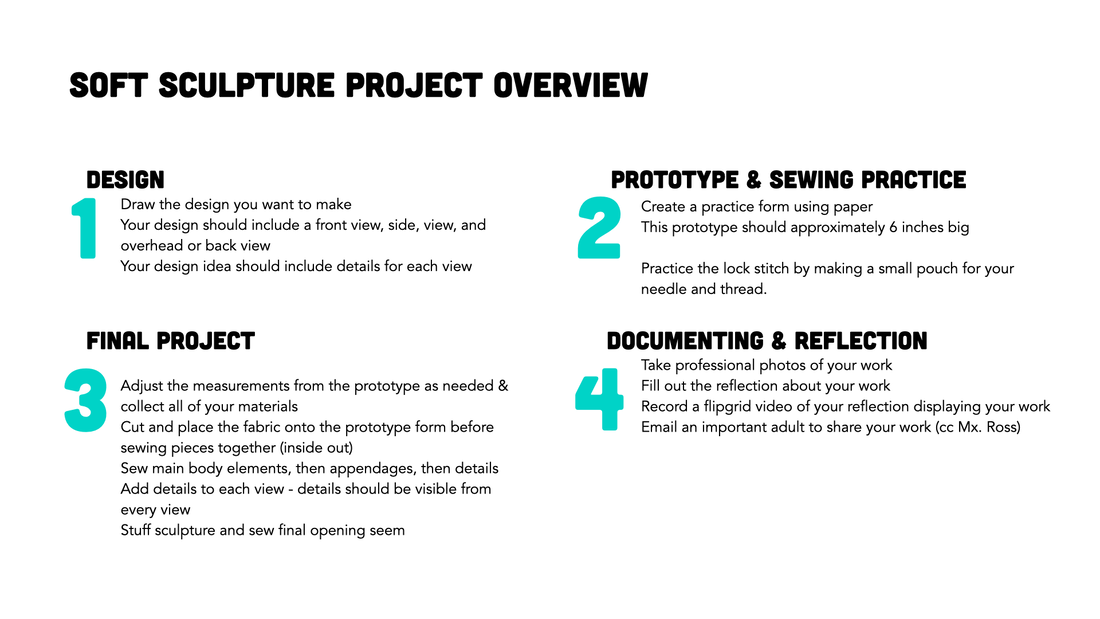
This unit has four parts: research and design (designing a project, measuring for materials), prototype (creating a volume out of paper), final project design in fabric, and documentation of the finished work (photos, email, reflection, and critique). |
Overview Unit Goal
Composition Concepts
|
|
Technical Skill VideosResource Book Page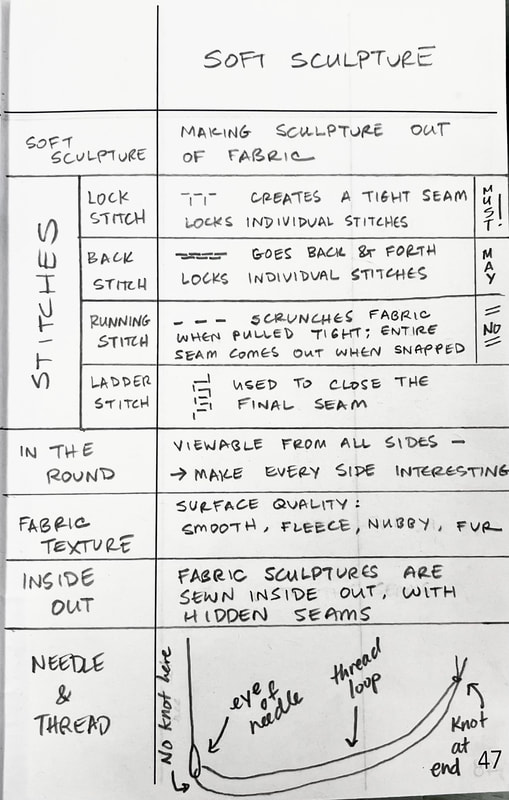
|
Order of WorkDetermine Your Design
|
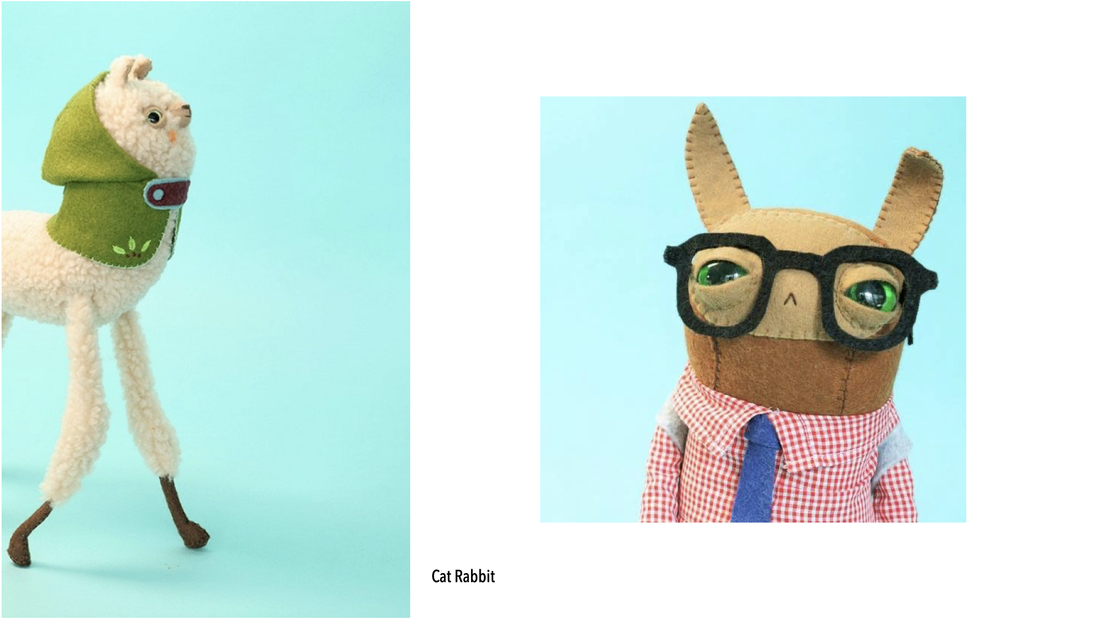
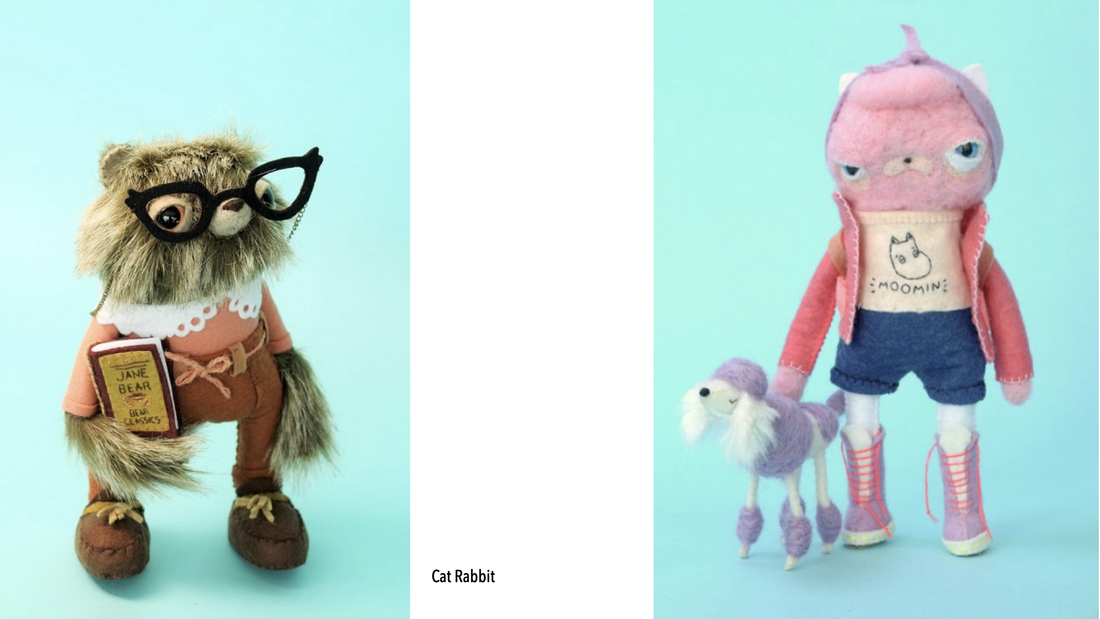
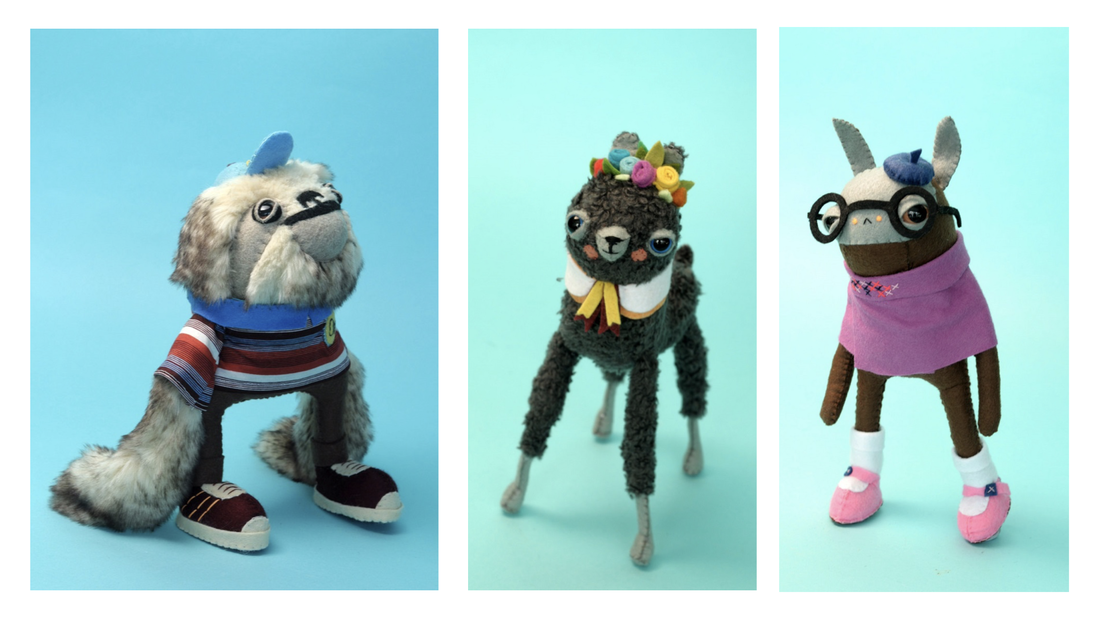
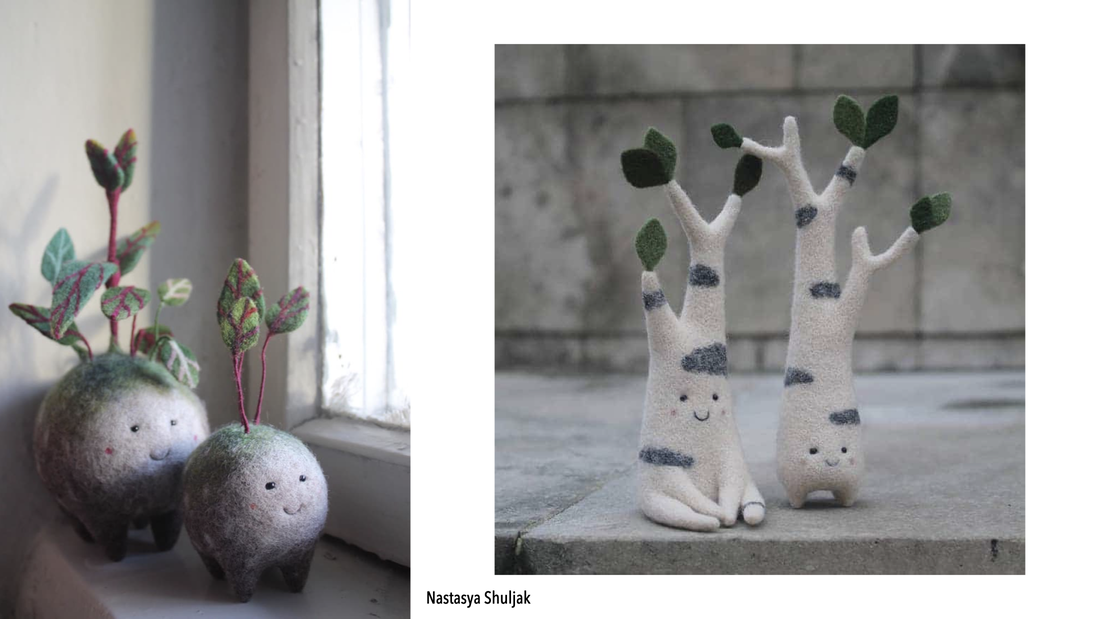
Soft Sculpture
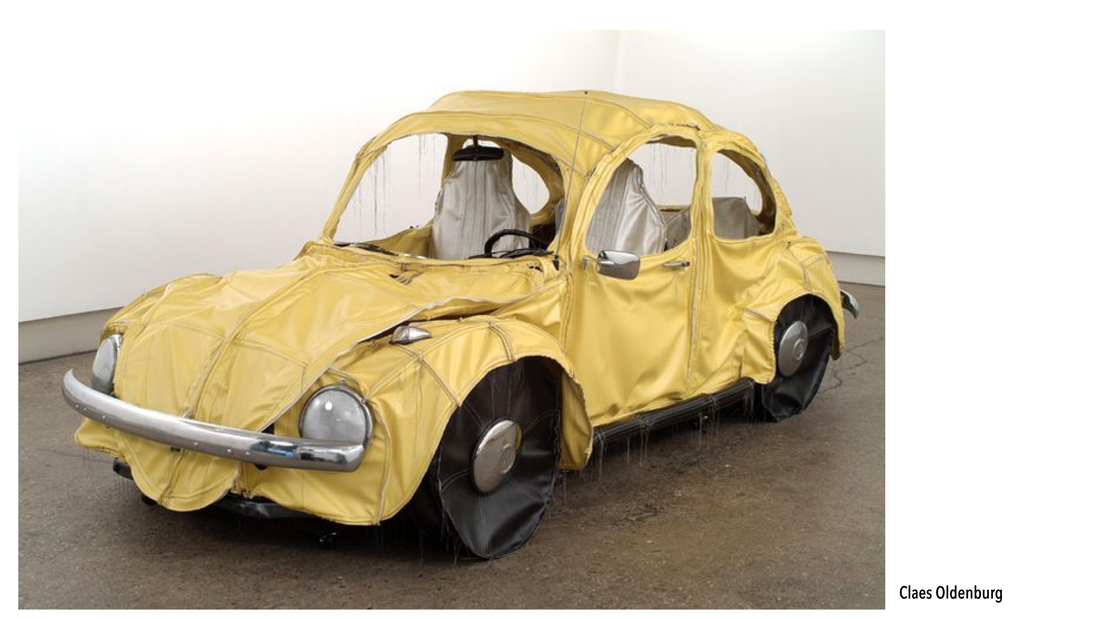
Stuffed Animals


Designing your Stuffed Animal


Step One: Designing Your Project

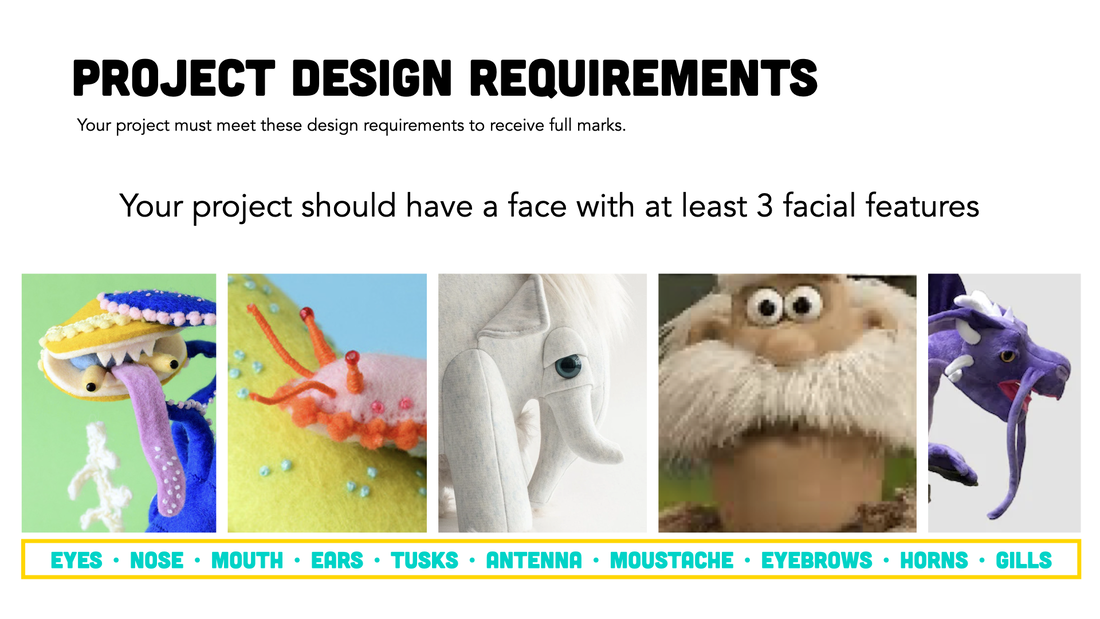
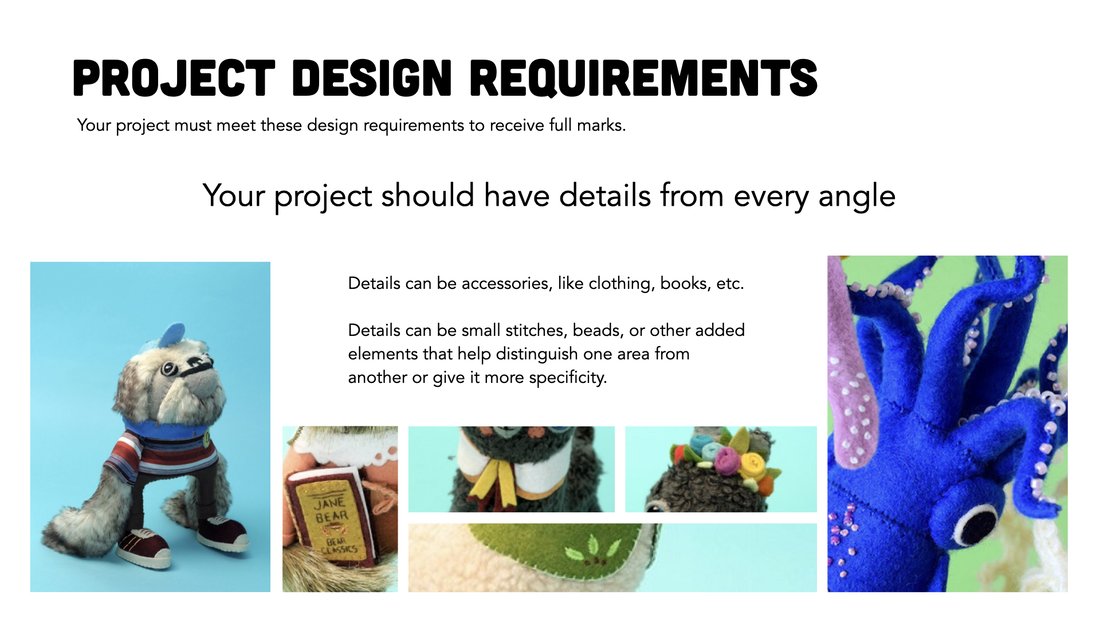
Creating a Character with Personality
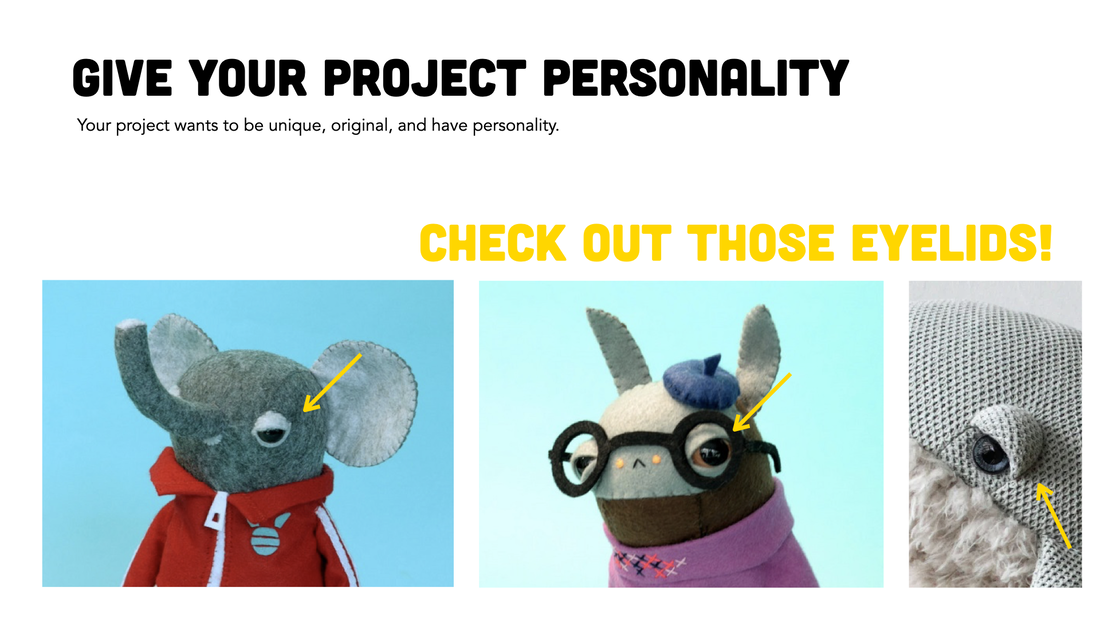

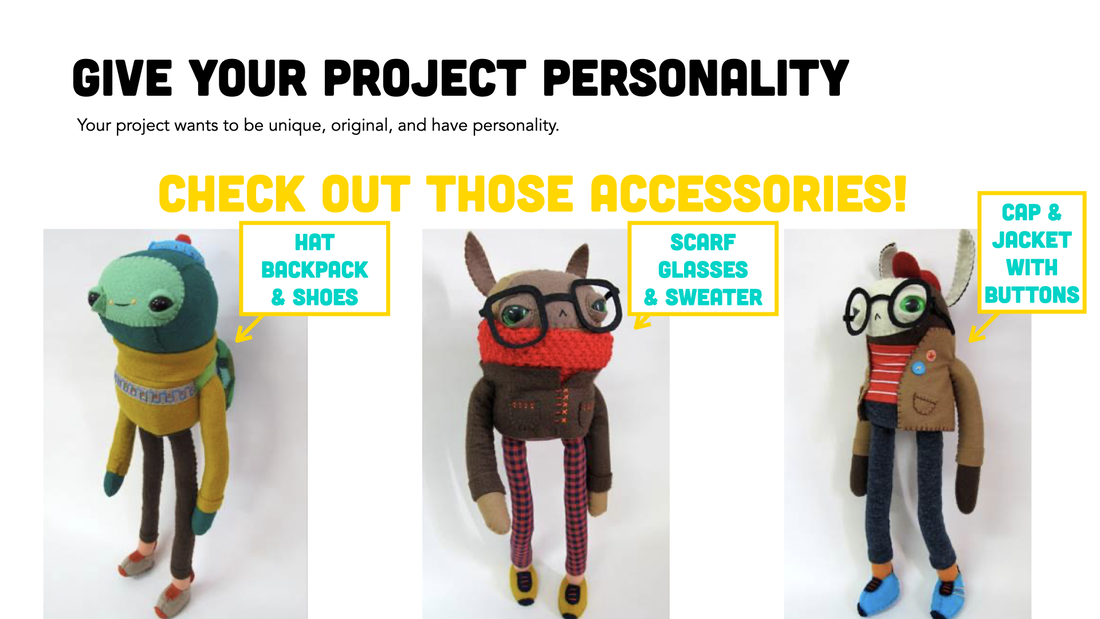
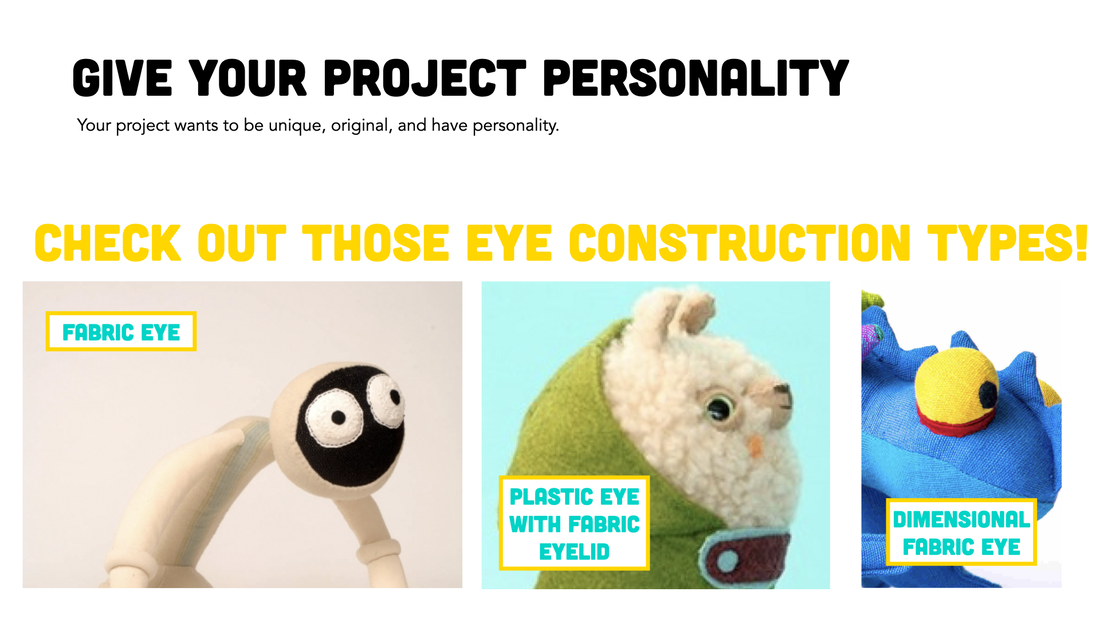

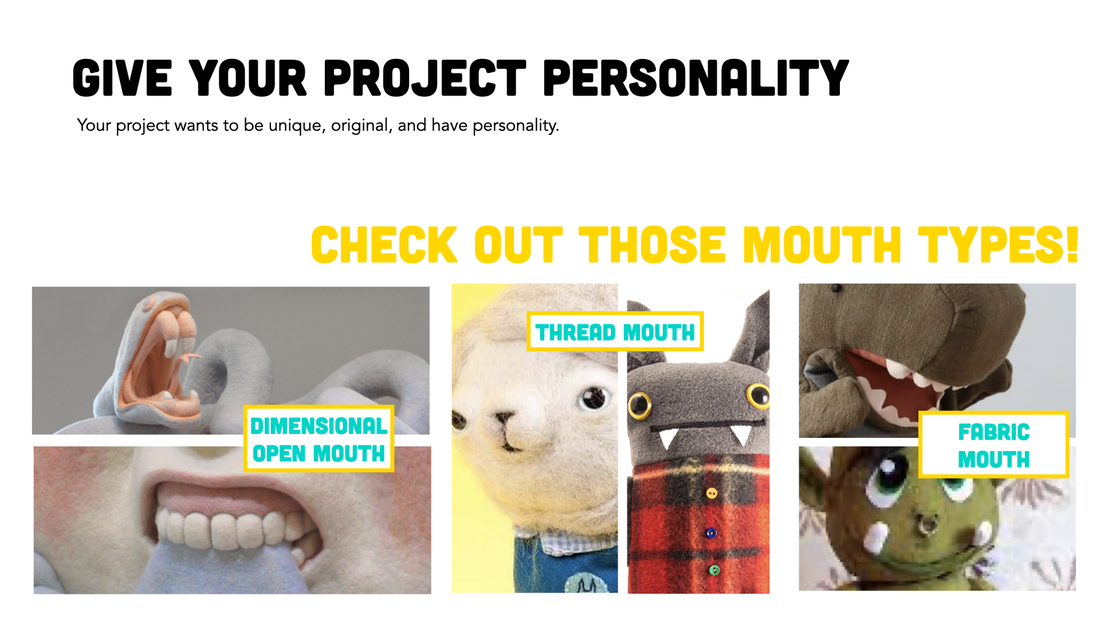
Things to Consider
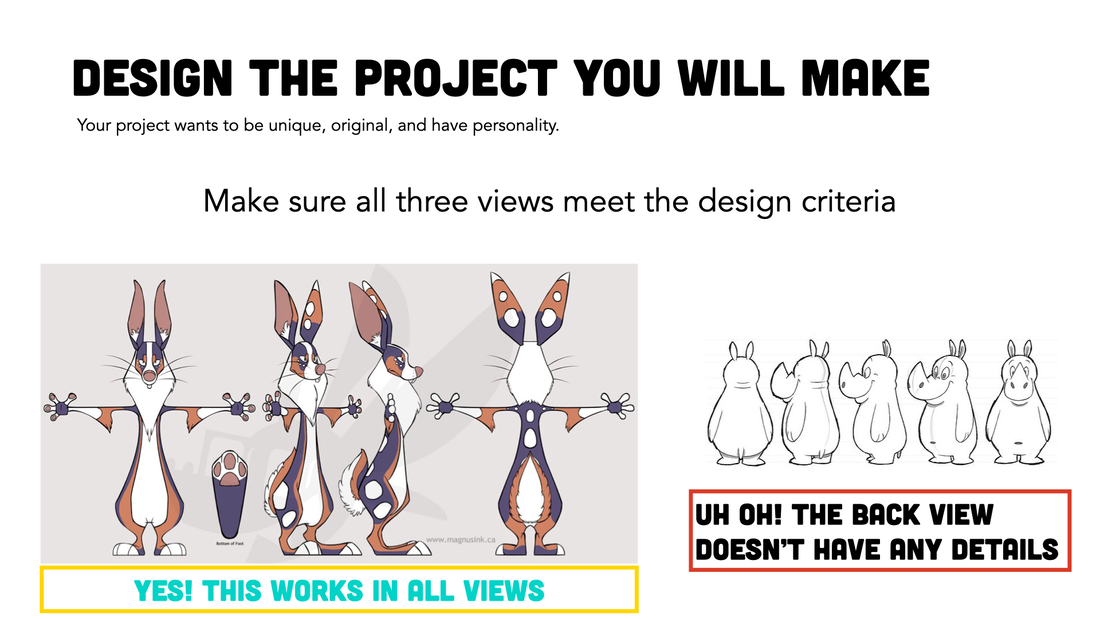
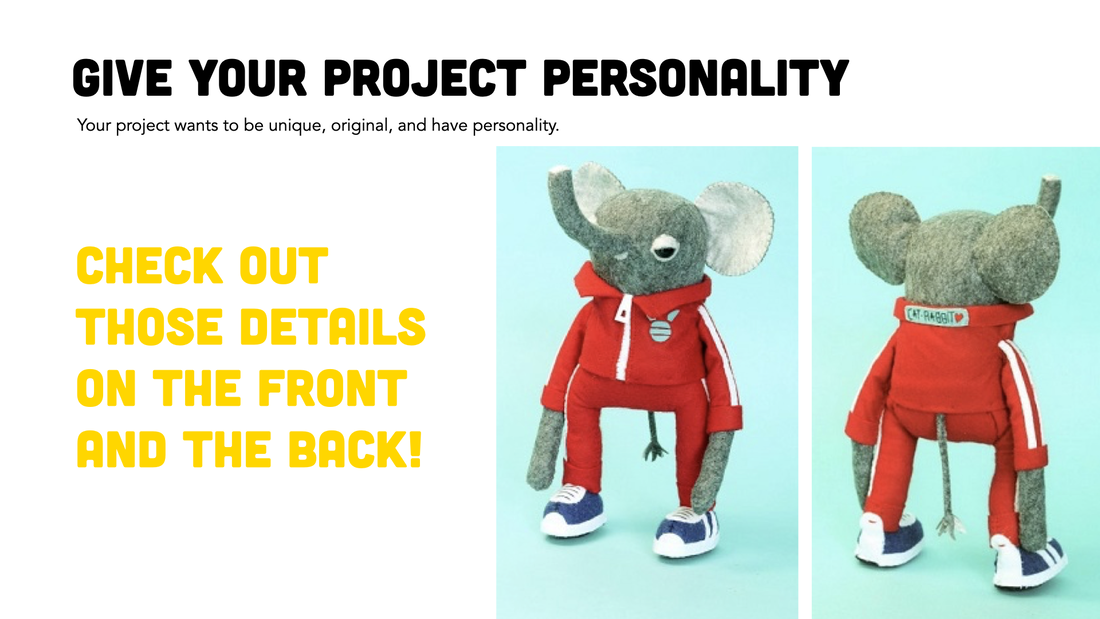
- You want to have details on all sides, so think of something that goes on your character's back side.
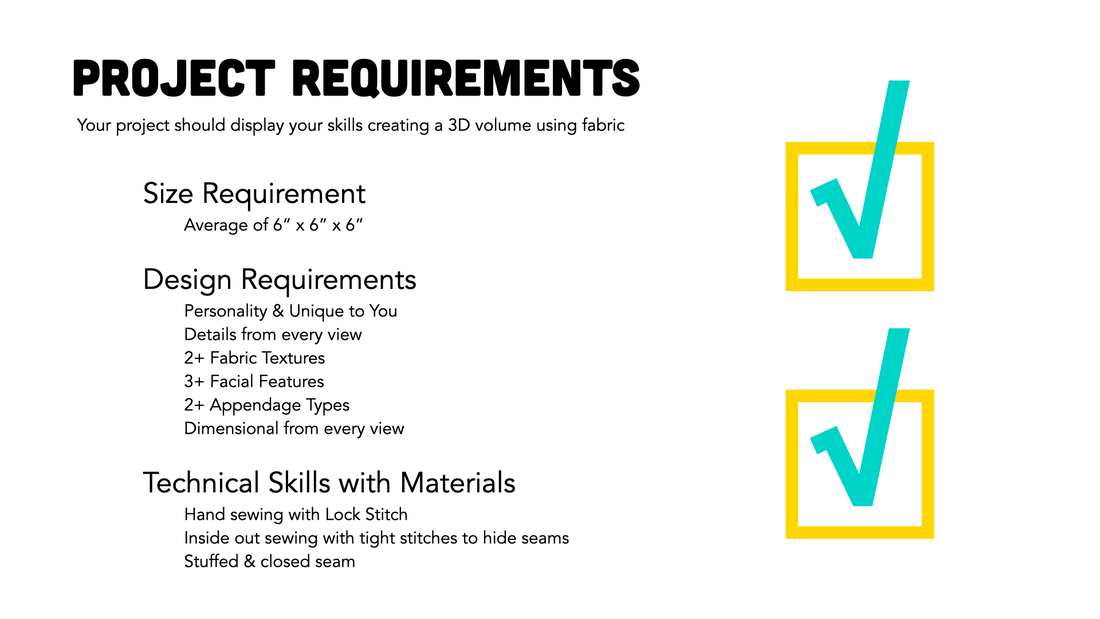
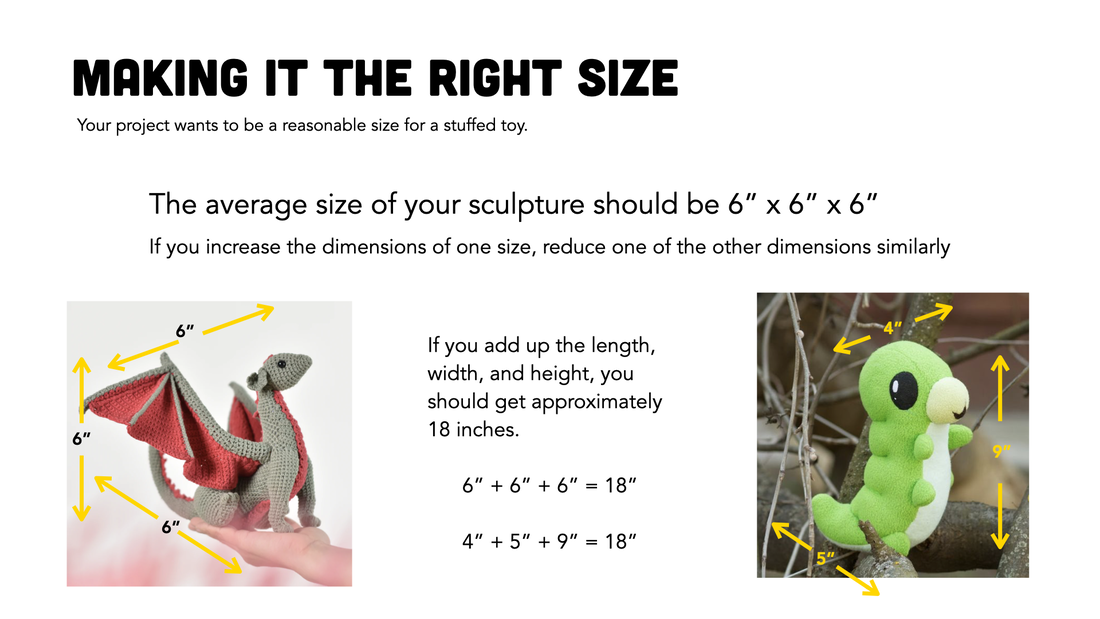
- You want the side of the sculpture to meet the 6" average, so if you want one dimension (length, width, or height) smaller or larger than 6", you should adjust the other dimensions to average out to 6" each.
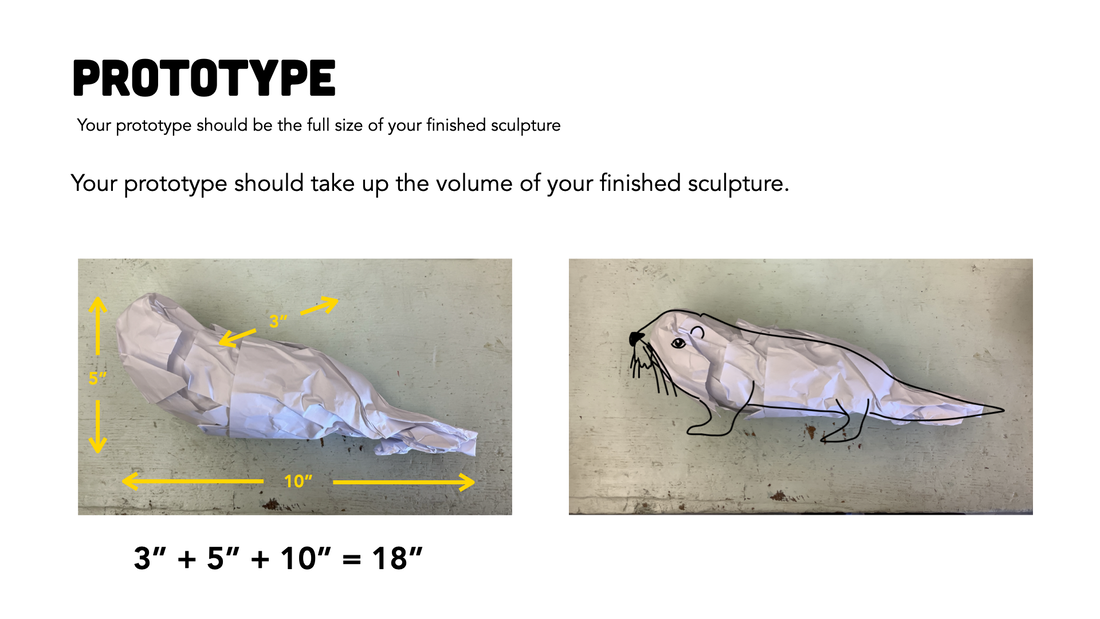
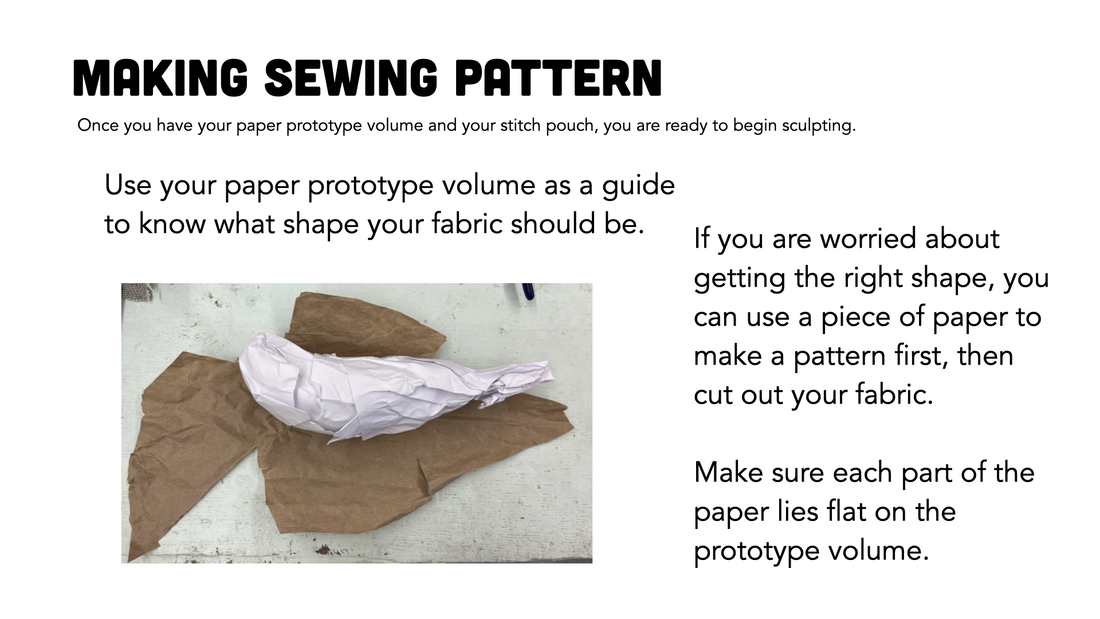
- Make sure your prototype volume is the size and form you are going for. It is much more accurate to base the final sculpture off of the prototype than to guess on the pattern.
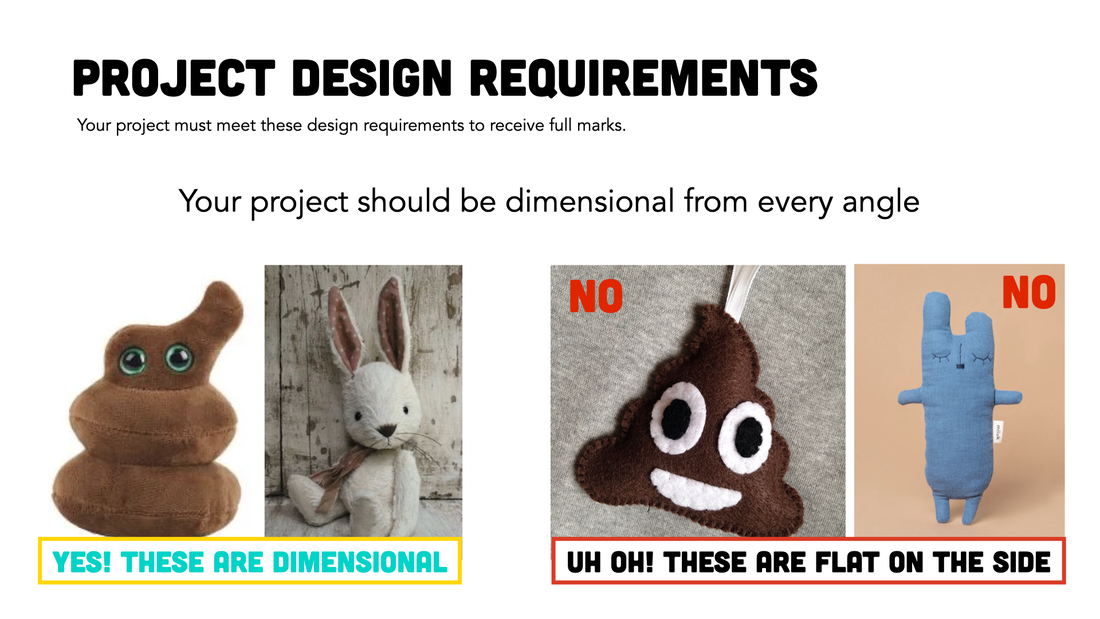
- Things that could go wrong: It's flat on the sides, but looks like it would be dimensional from the front. If you draw the shape from the front, like a chalk outline on the ground and cut that out twice, it would make a form that's flat from the side view.
- Things that could go wrong: It's too big or too small. Make sure you measure your prototype volume with a ruler to make sure it's the right size (length, width, and height).
- Things that could go wrong: The form doesn't come out the right shape. When you are measuring your fabric or making your pattern, your fabric or paper isn't flat on the volume. If you have wrinkles, you'll end up with a different shaped form. In order to get it to match the form you are aiming for, you'll need the fabric (or paper pattern) to lay flat on the prototype volume without excess.
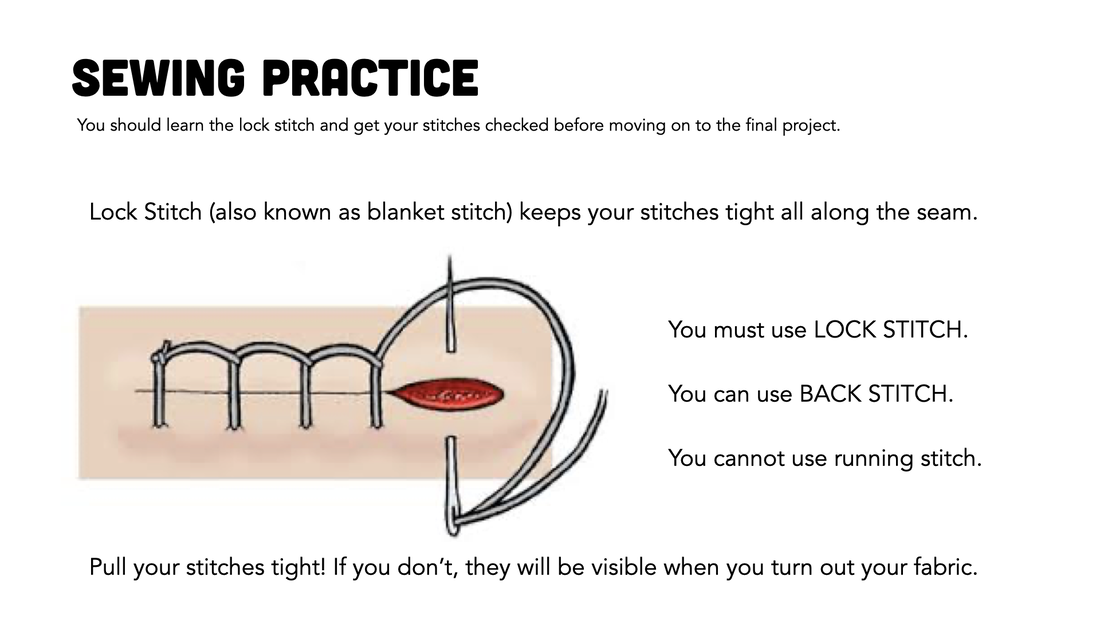
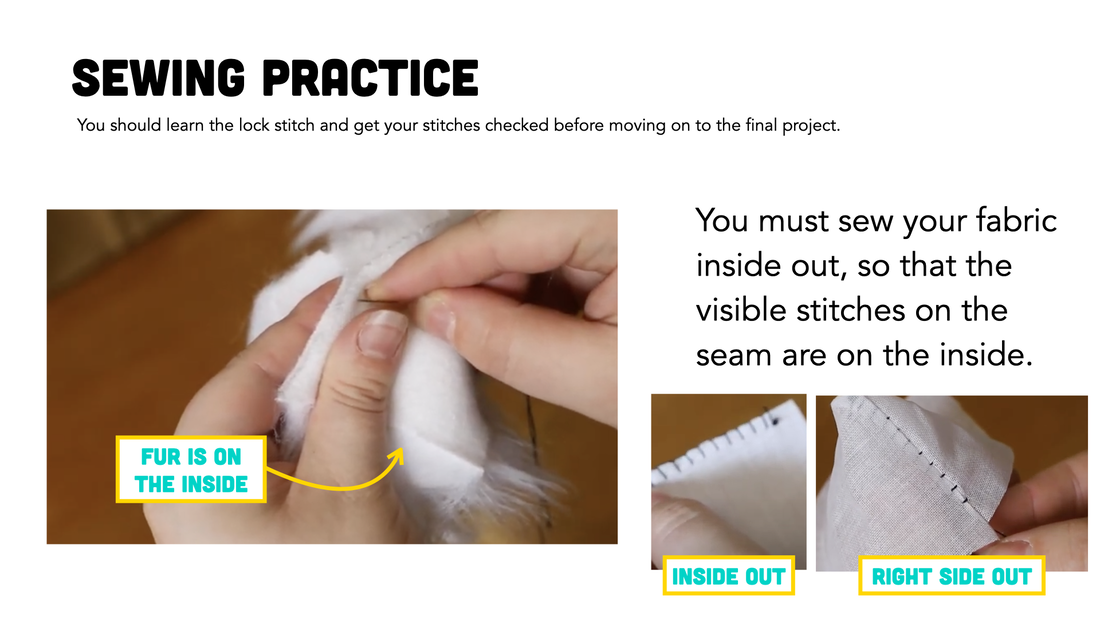
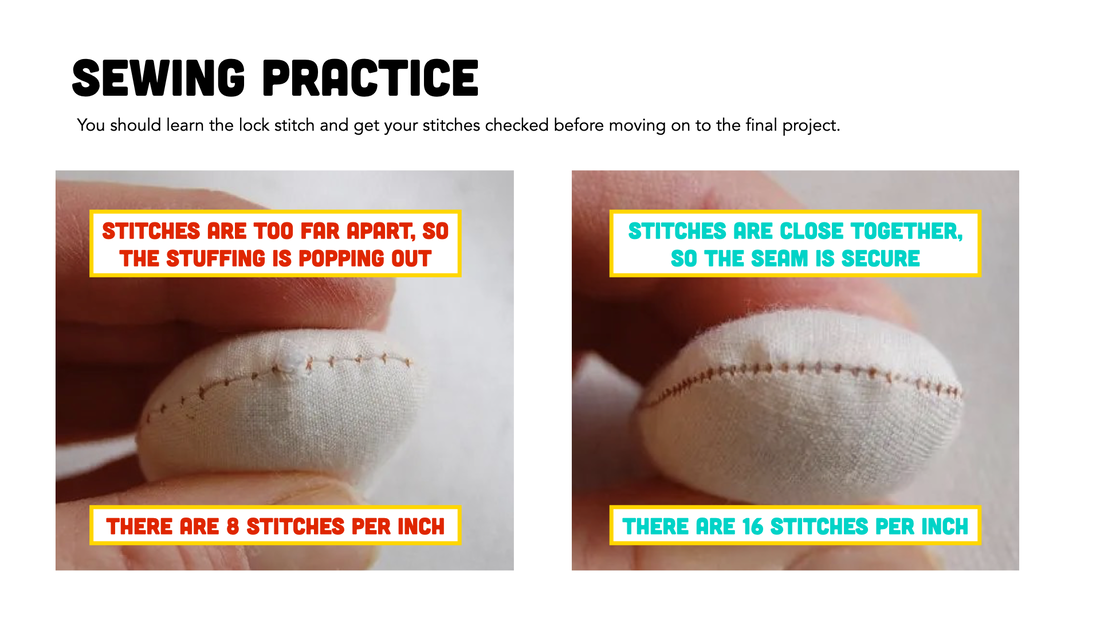
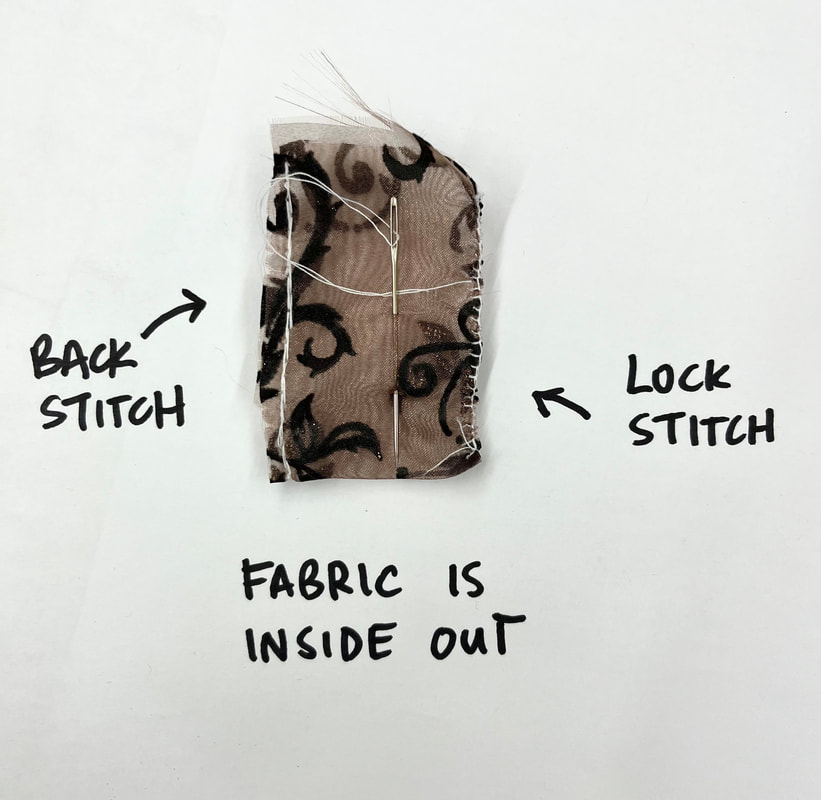
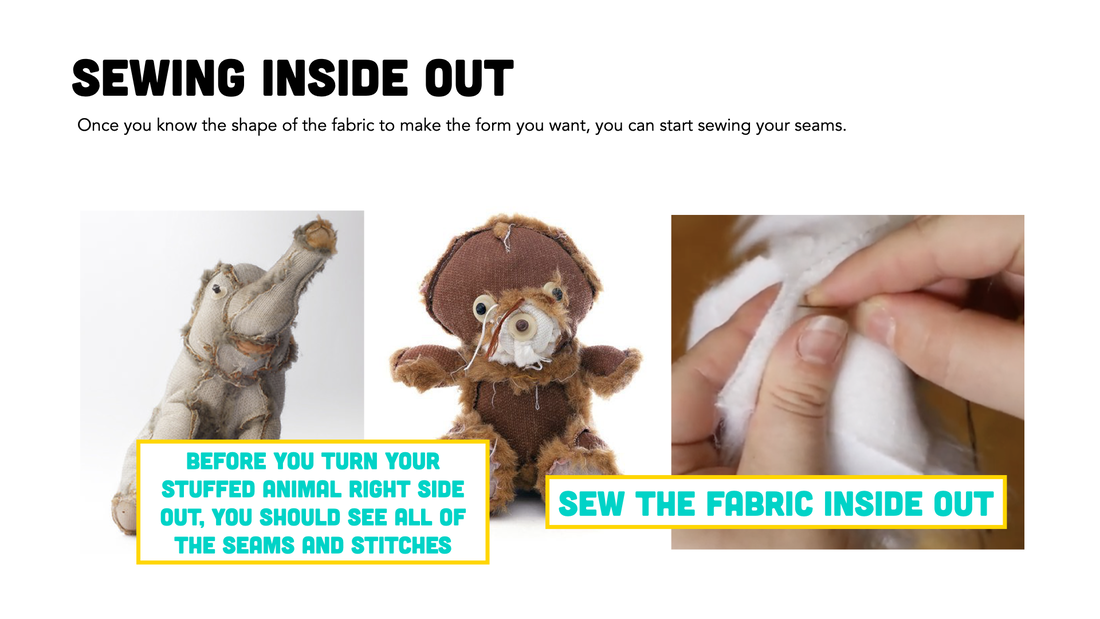
- Things that could go wrong: Your stitches aren't pulled tight enough and when you flip out your fabric the stitches are very visible or your stuffing falls out.
Step Two: Prototype Volume
Step Three: Practice Sewing a Pouch

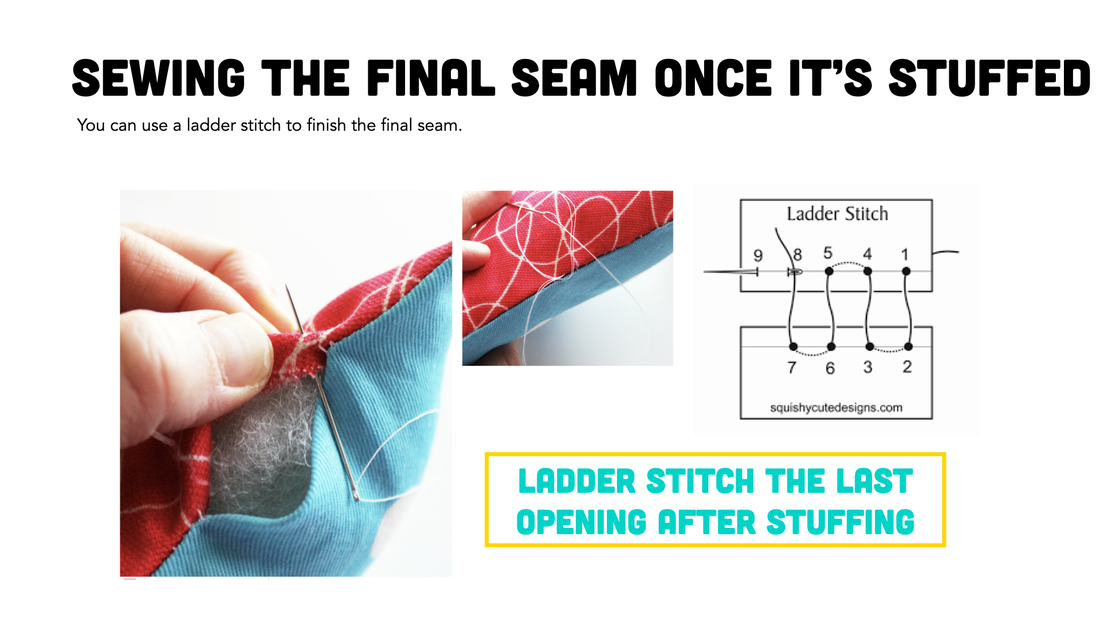
Step Four: Making your Soft Sculpture

3 Photos of your Soft Sculpture
Email an Image of Your Project
|
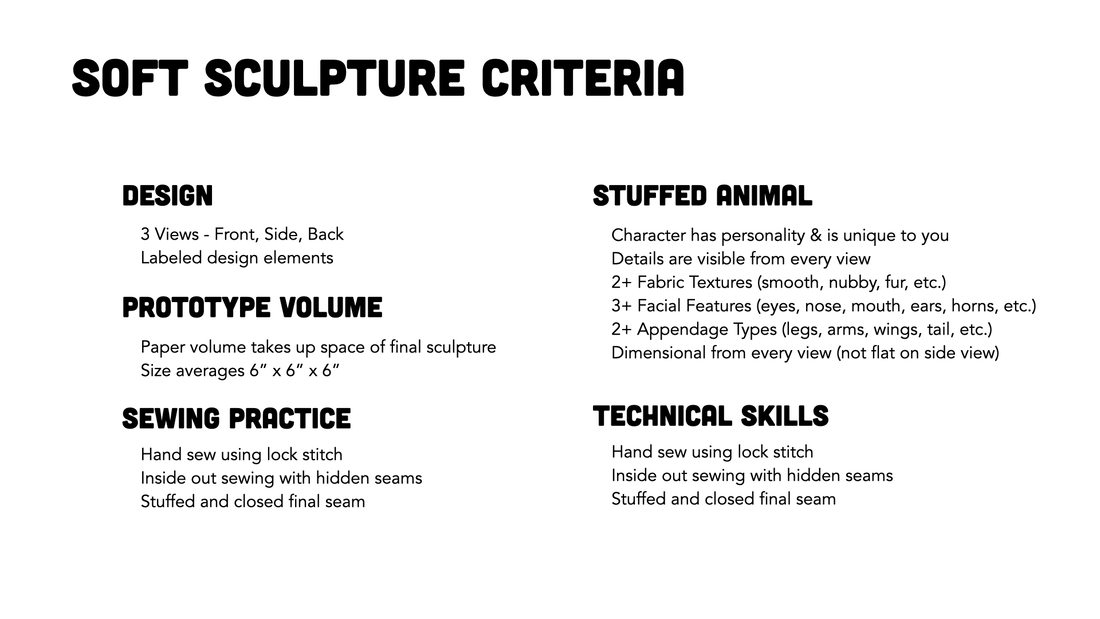
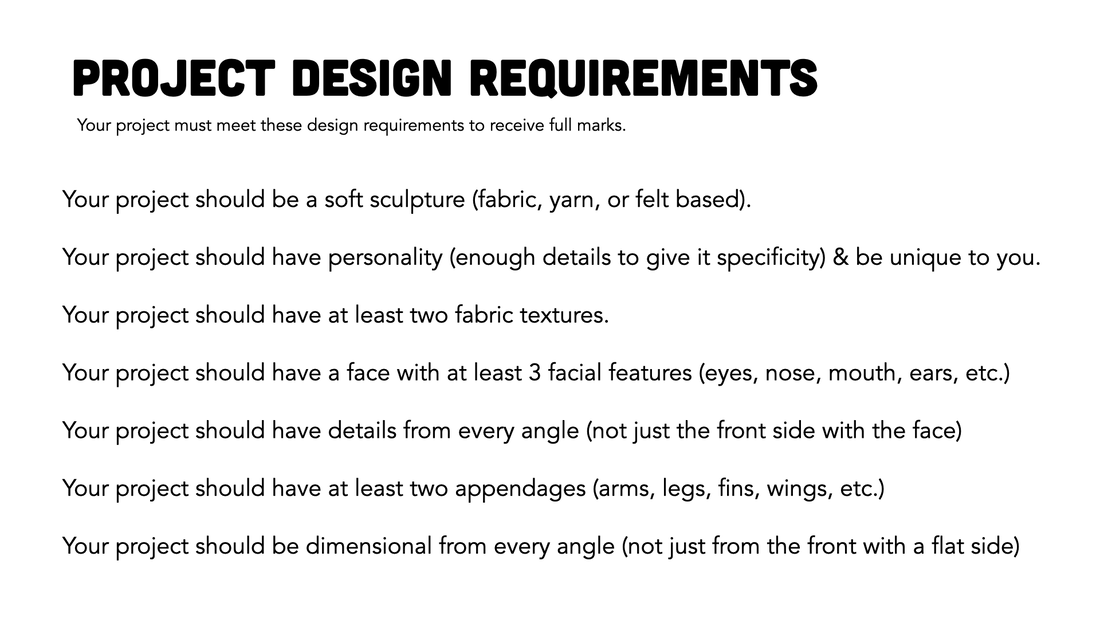
Grading Criteria
|
