
|
|
Stone CarvingStudents will create at least two bezel settings. Students will use the cutting pliers, sandpaper, solder station, hand files, buffer, polisher, ultrasonic, and jewelry saw to make the two bezel settings.
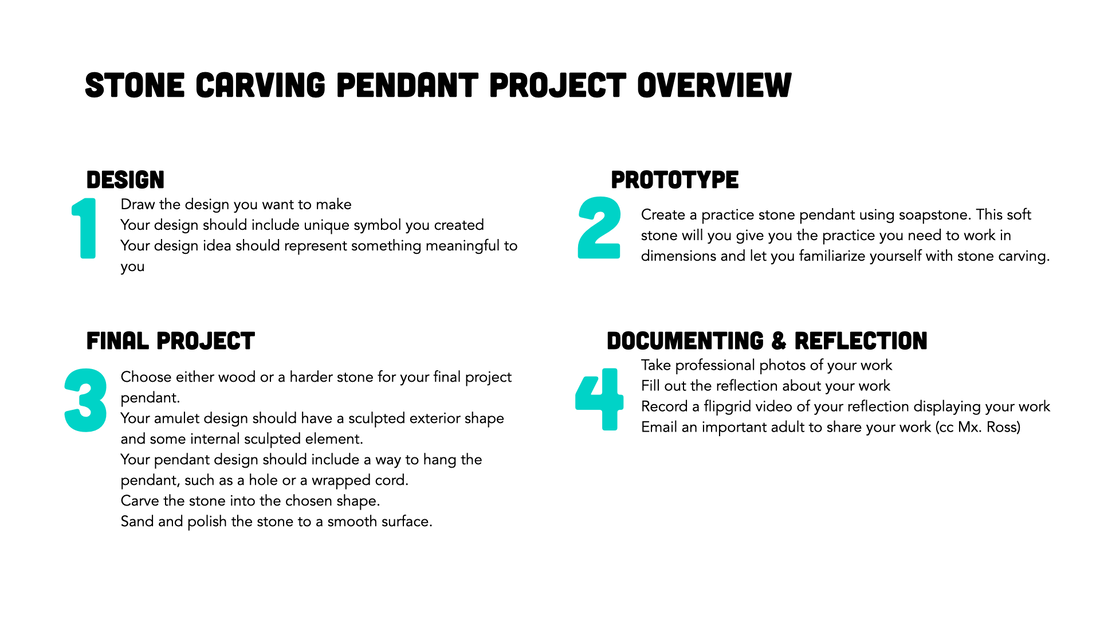
This unit has four parts: research and design (designing a project, measuring for materials), prototype (creating a project that uses a bezel setting in a base metal), final design in metal of student's choice using a stone cabochon, and documentation of the finished work (photos, email, reflection, and critique). |
Overview Unit Goal
Composition Concepts
|
|
Pounamu VideosTechnical Skill Videos |
Order of WorkDetermine Your Design
|
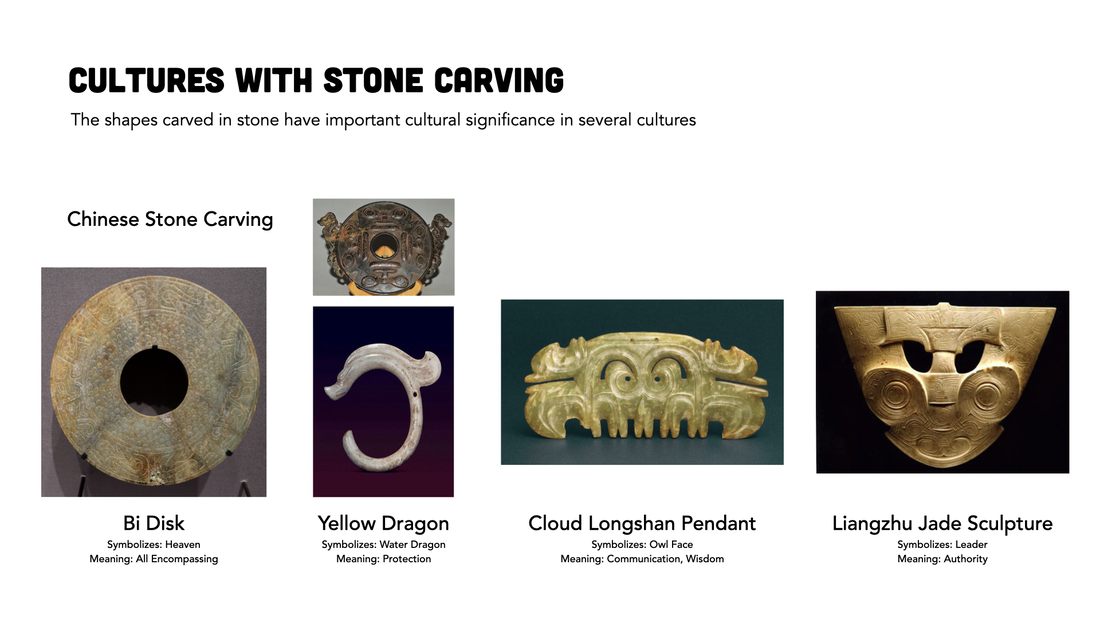
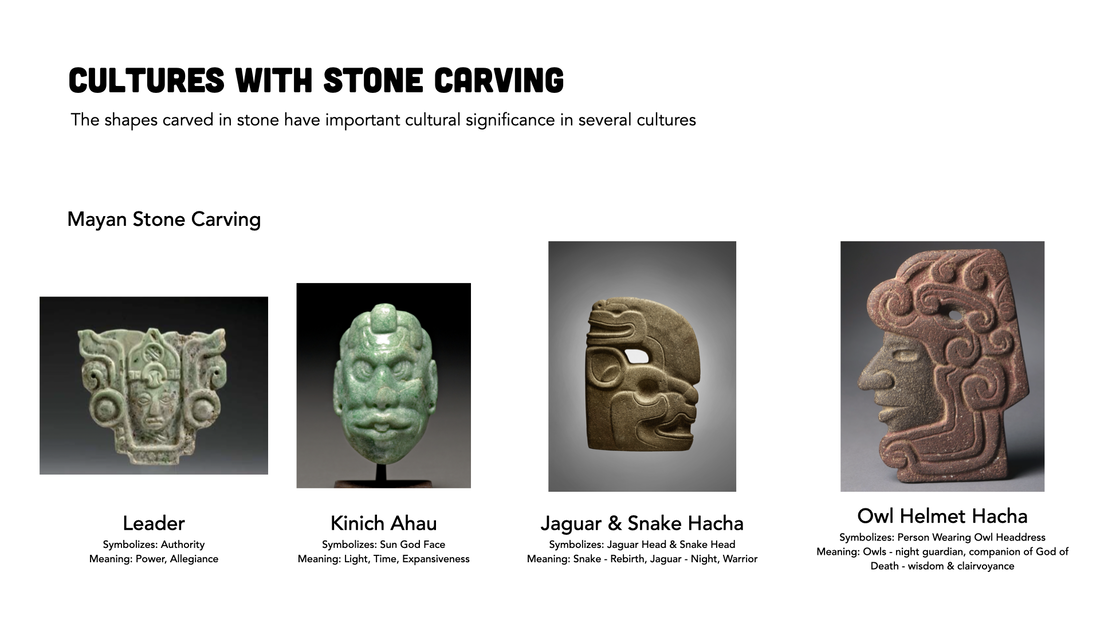
Cultures with Stone Carving
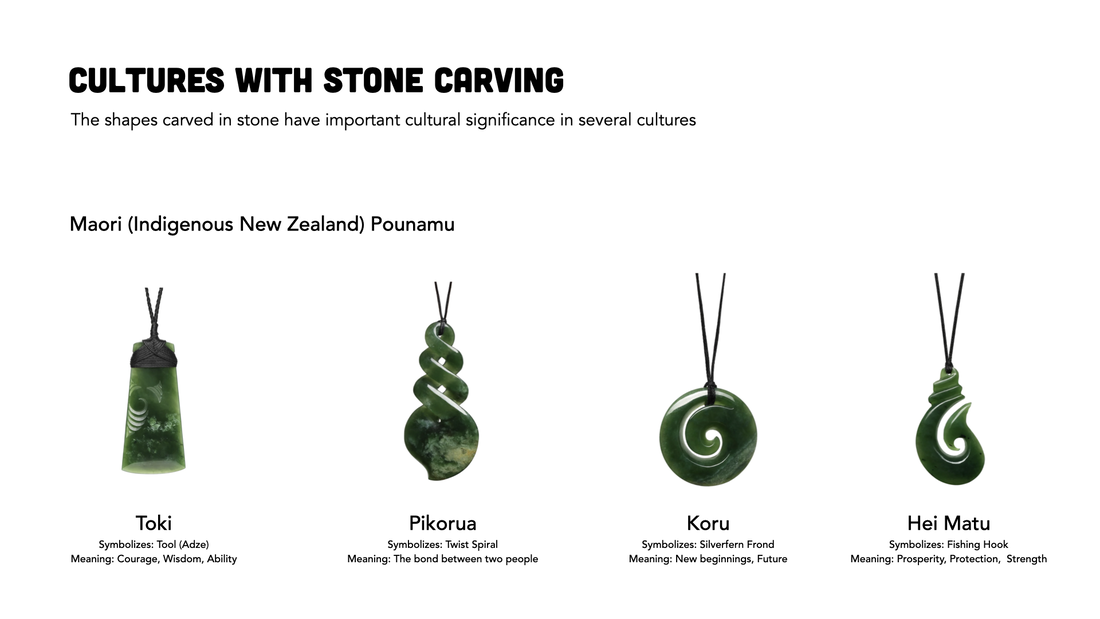
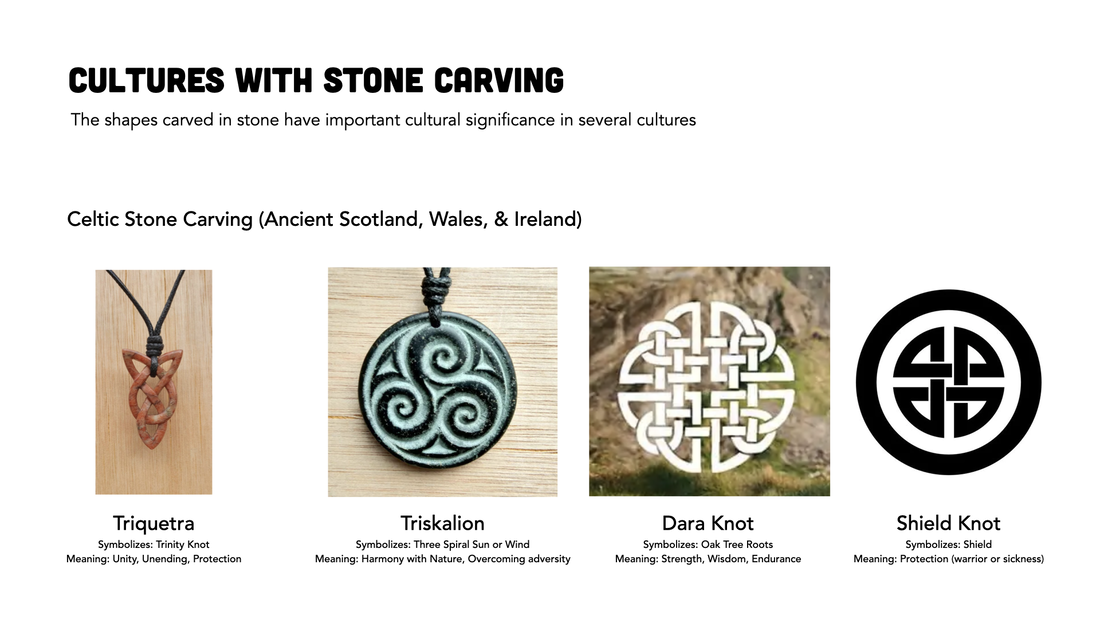
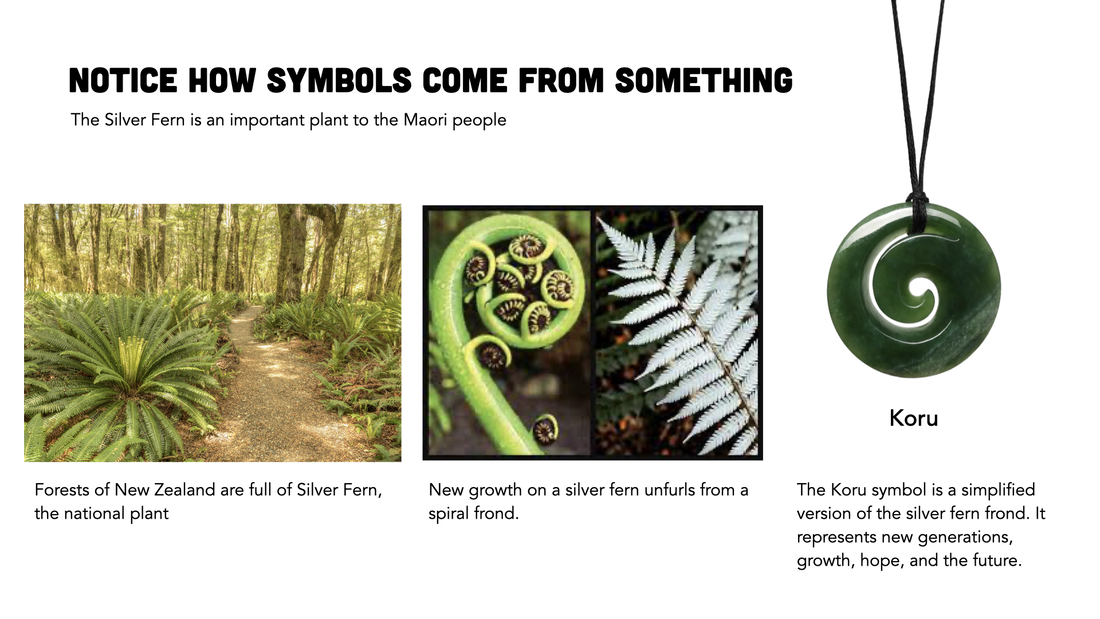
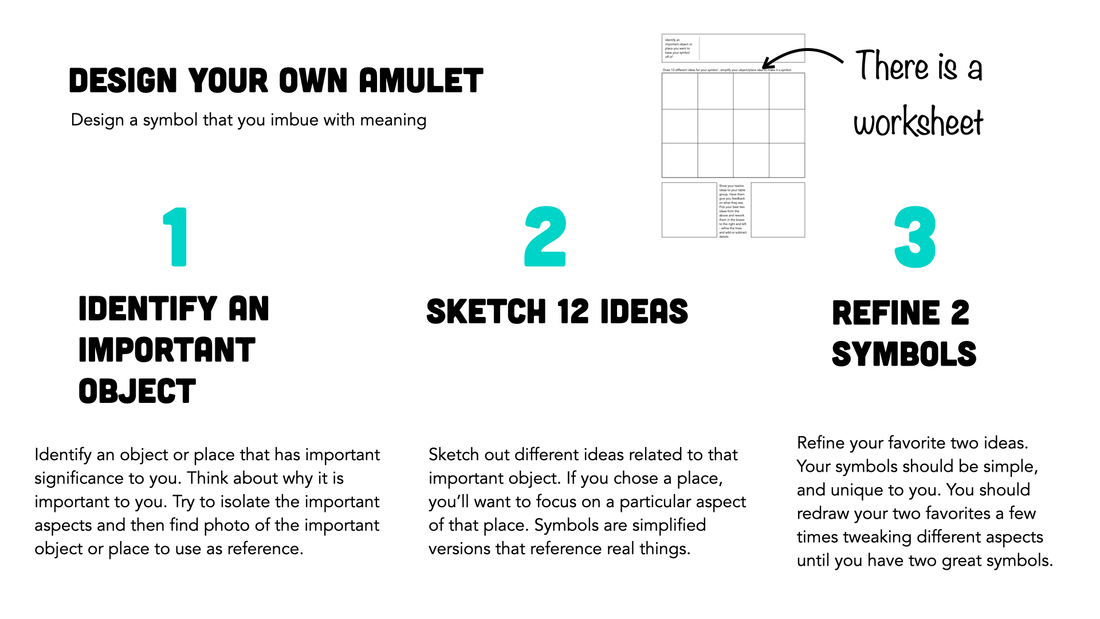
Designing your Symbol

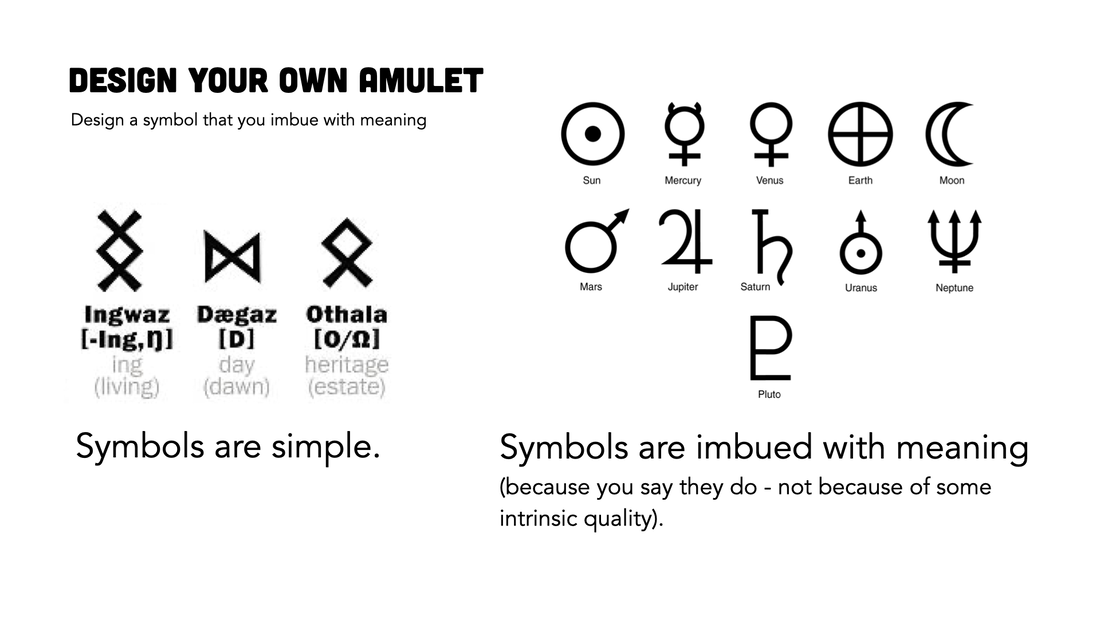

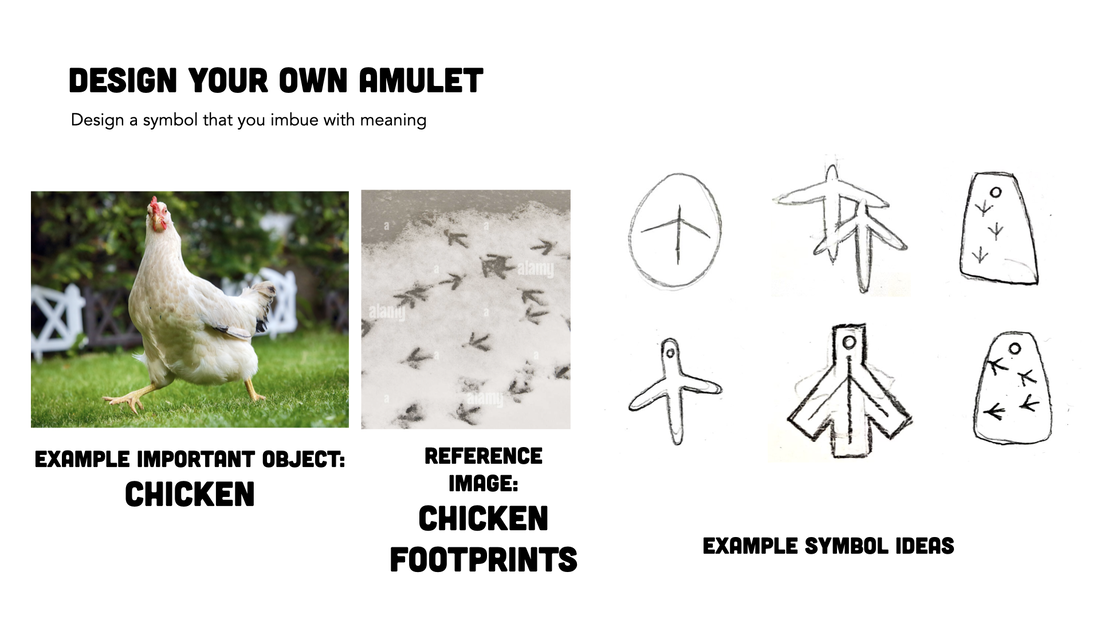
Things to Consider
|
WKST 1 - Download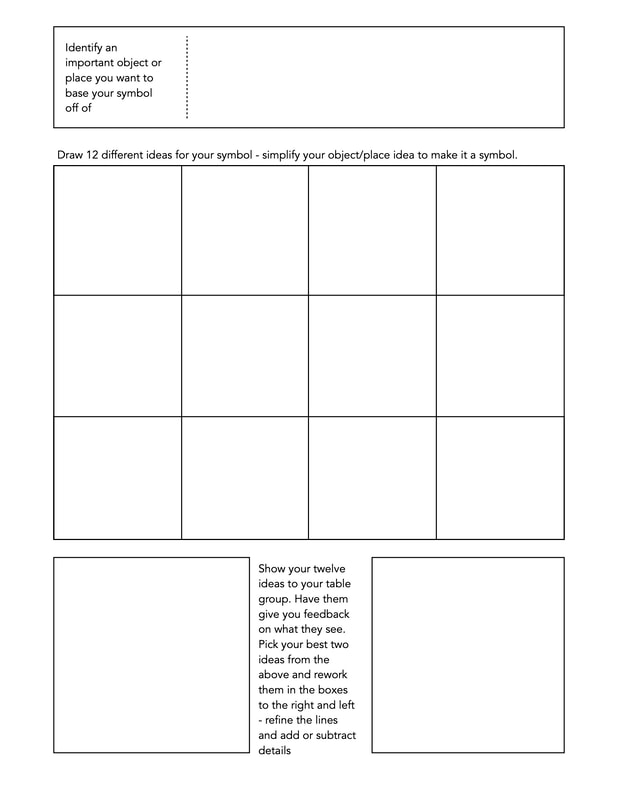
|
WKST 2 - Download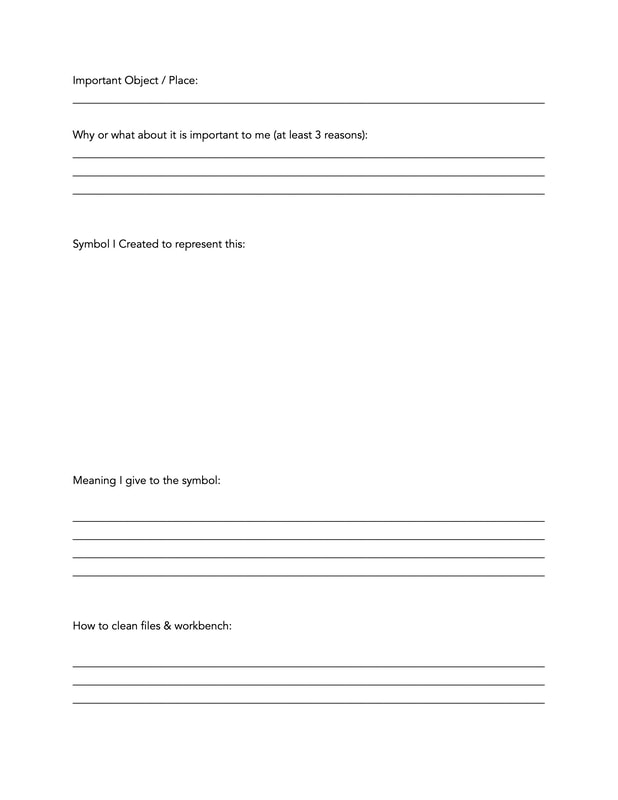
|
Soldering the Bezel Wire into a Loop
Setting the Stone in the Bezel Setting
3 Photos of your Stone Pendants
Email an Image of Your Project
|
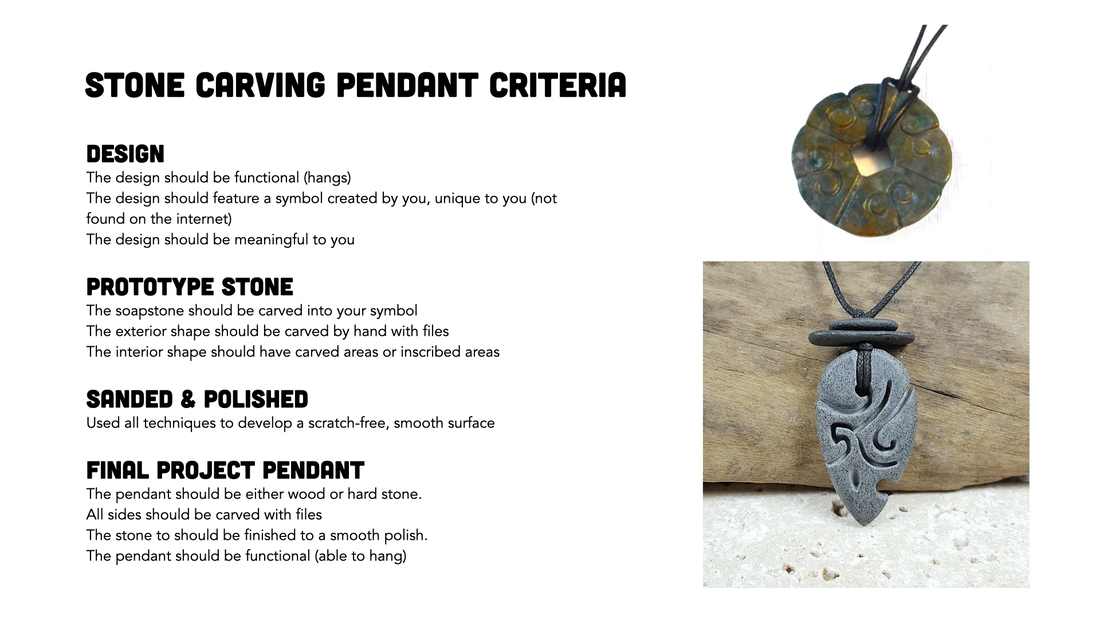
Grading Criteria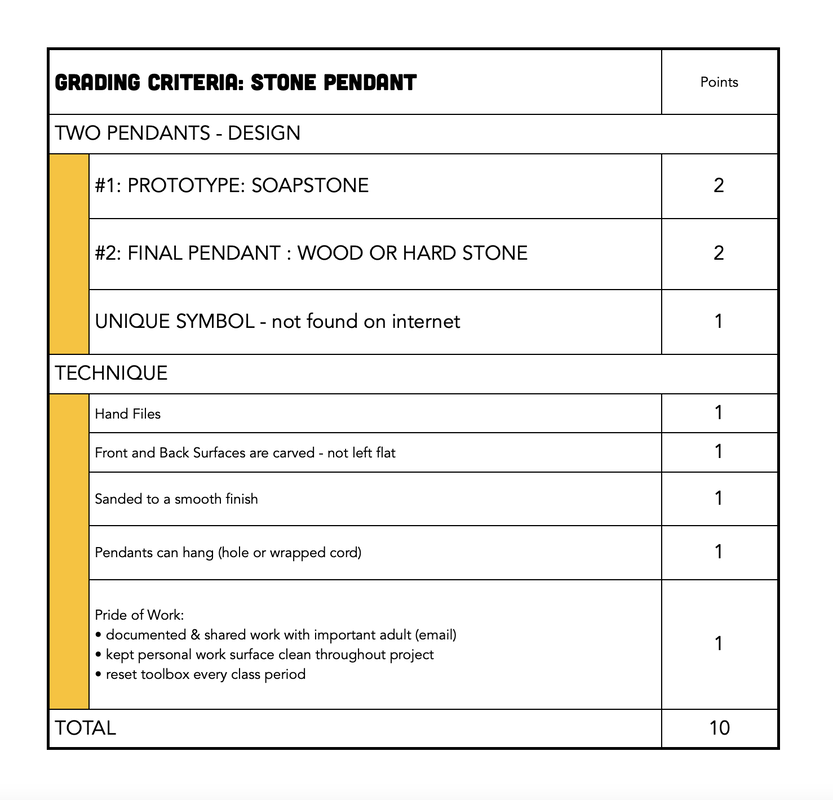
|
