art with ross
  • Home
  • Sculpture
  • Advanced Sculpture
  • Sculpture for Animation
  • Art Terminology
    • Art Term - Line
    • Art Term - Shape
    • Art Term - Form
    • Art Term - Color
    • Art Term - Value
    • Art Term - Texture
    • Art Term - Space
    • Art Term - Balance
    • Art Term - Contrast
    • Art Term - Dominance
    • Art Term - Pattern
    • Art Term - Movement
    • Art Term - Rhythm
    • Art Term - Variety
    • Art Term - Unity
    • Art Term - Style
    • Art Term - Perspective
    • Art Term - Vantage Point
    • Art Term - Graphic Design
    • Art Term - Hand Lettering
    • Art Term - Drawing Styles
    • Art Term - Shading
    • Art Term - Ceramics
    • Art Term - Painting
  • GHS
    • Field Trips
    • Intro
    • Motion
    • Printmaking
    • AP
    • Gallery
    • Other Art Classes
    • Distance Learning
    • AP 2019
    • Enrichment
Picture

Self Portrait Exercise

This exercise helps you draw a person proportionately. We will practice different shading techniques: graphite blending, colored pencil blending, colored pencil hatching, and ink pen modeling. 

   You'll need:
  • Plain white drawing paper (8.5"x11")
  • Drawing Pencil
  • Ruler
  • Tortillon (blending stick)
  • Colored Pencils (Purple, Blue, Orange, Yellow)
  • Ink Pen 

Borders

VIDEO DEMONSTRATION OF BORDERS

Picture
  •  1/4" BORDERS ON THREE SIDES
  • 2" BORDER ON SHORT SIDE
  • LONG SIDE MARKS AT:
    • 2 1/2"
    • 4 5/8"
    • 6 3/4"
    • 9"
  • YOUR NAME IS IN THE BOTTOM RIGHT CORNER BORDER AREA
  • VERY LIGHTLY - USING LIGHT PRESSURE ONLY - DRAW A 3/4" GRID INSIDE THE BORDERS (the right and bottom edges will have 1/2" boxes instead of 3/4" boxes).
This is a three quarter inch grid inside a box that is 8" x 8 3/4".

The four boxes that separate the sections are:
Box 1 is 2 1/2" wide: measure 2 1/2" from the top border
Box 2 is 2 1/8" wide: measure 4 5/8" from the top border
Box 3 is 2 1/8" wide: measure 6 3/4" from the top border
​Box 4 is 2 1/4" wide: measure 9" from the top border
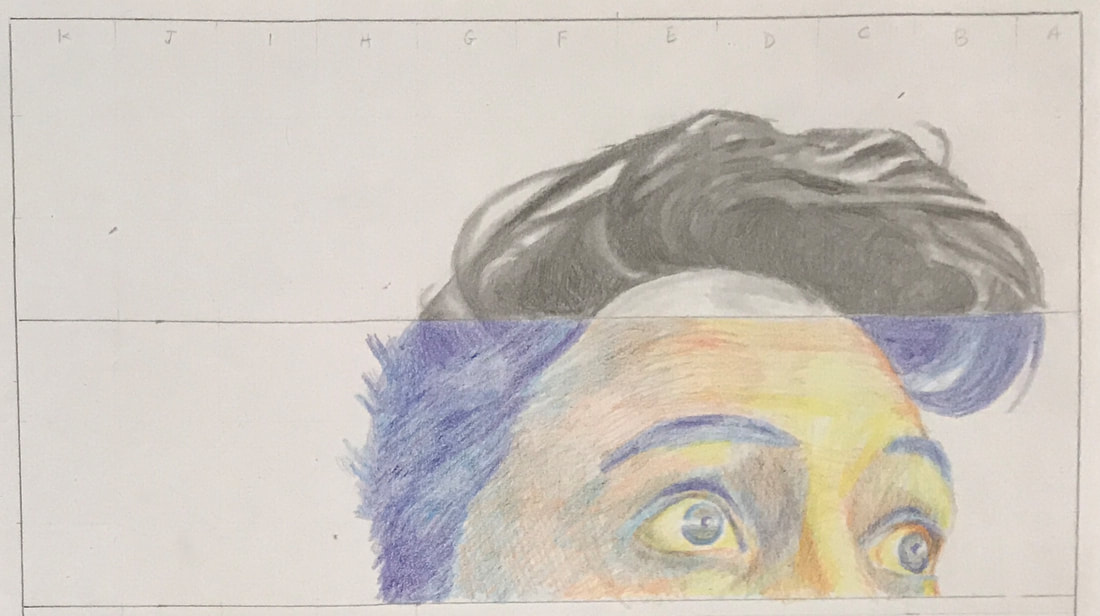
Selfie & Photo Grid

VIDEO DEMONSTRATION OF PHOTO GRID

Picture
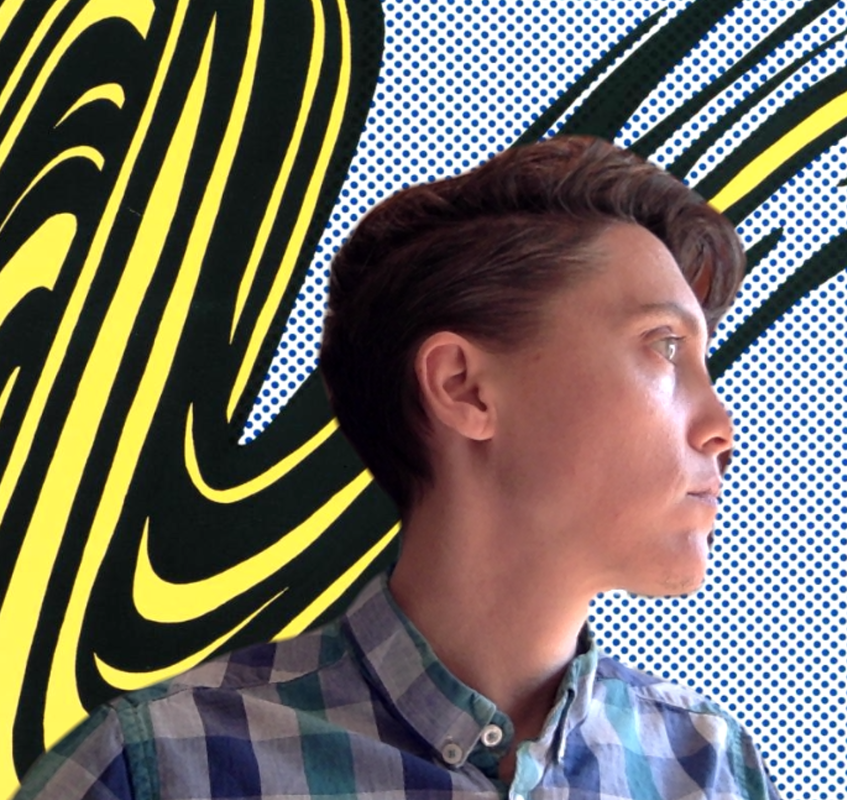
Take a selfie of your own face in 3/4 position. Use the grid template provided in google classroom to place a grid on top of your photo.
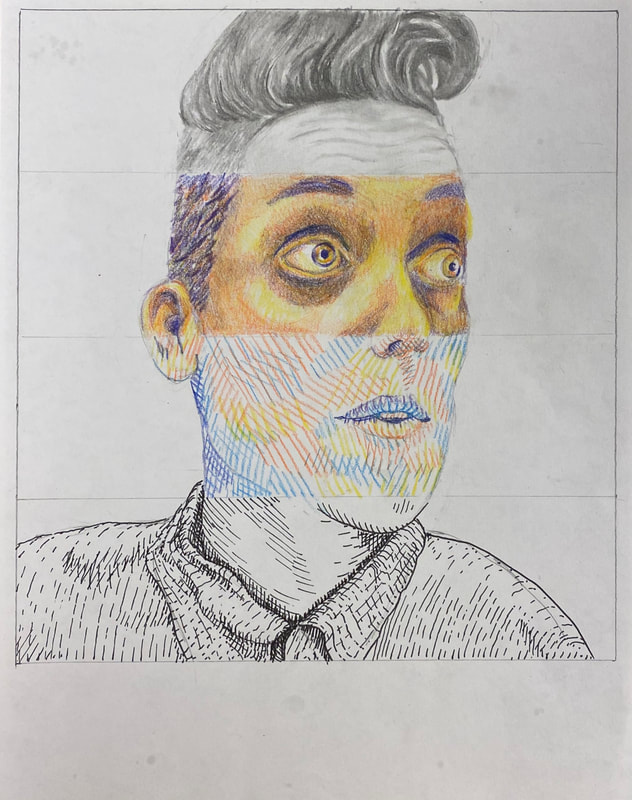
YES
Picture
3/4 POSITION
NO
NO
Picture
STRAIGHT ON
Picture
PROFILE
  • PLACE THE IMAGE ONTO THE SLIDE
  • CHANGE THE SIZE OF THE IMAGE SO THAT THE FOREHEAD TO THE CHIN MEASUREMENTS MATCH THE MARKS ON THE SIDE OF THE SLIDE (notice the hair is above the forehead)
  • CHANGE THE COLOR OF THE IMAGE TO GRAYSCALE
  • COPY THE PHOTO ONTO THE SECOND SLIDE
  • CHANGE THE ORDER OF THE GRID, SO THAT THE GRID IS SITTING ON TOP

Pencil Blending

Picture
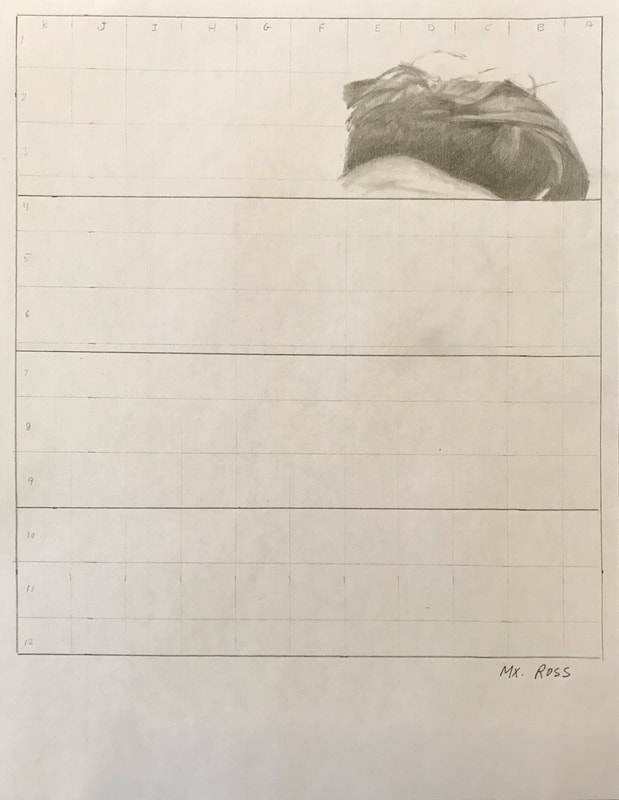
IN PROGRESS - NOTICE THE GRID IS ERASED AS THE BOXES ARE DRAWN

VIDEO DEMONSTRATION OF PENCIL BLENDING

  • USE THE GRID TO DRAW THE VALUES IN EACH BOX.
  • ERASE THE GRID FOR THE BOX YOU ARE WORKING ON.
  • PAY ATTENTION TO THE VALUES, NOT THE OBJECT.
  • MARK WHERE VALUES ENTER AND EXIT THE GRID BOX.
  • BLEND WITH THE TORTILLON TO REMOVE VISIBLE LINES.
Picture
NOT BLENDED
Picture
BLENDED WITH TORTILLON

Colored Pencil Blending
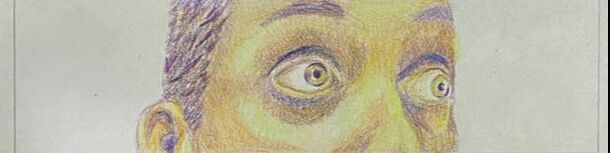
Picture
Picture

VIDEO DEMO OF COLORED PENCIL BLENDING

Use four colored pencils: purple, blue, orange, yellow.

USE PURPLE FOR DARKEST VALUES.
USE BLUE FOR MEDIUM DARK VALUES.
USE ORANGE FOR MEDIUM VALUES.
USE YELLOW FOR LIGHT VALUES.
LEAVE WHITES EMPTY.

USE LIGHT PRESSURE TO REDUCE THE APPEARANCE OF VISIBLE PENCIL LINES.

Colored Pencil Hatching
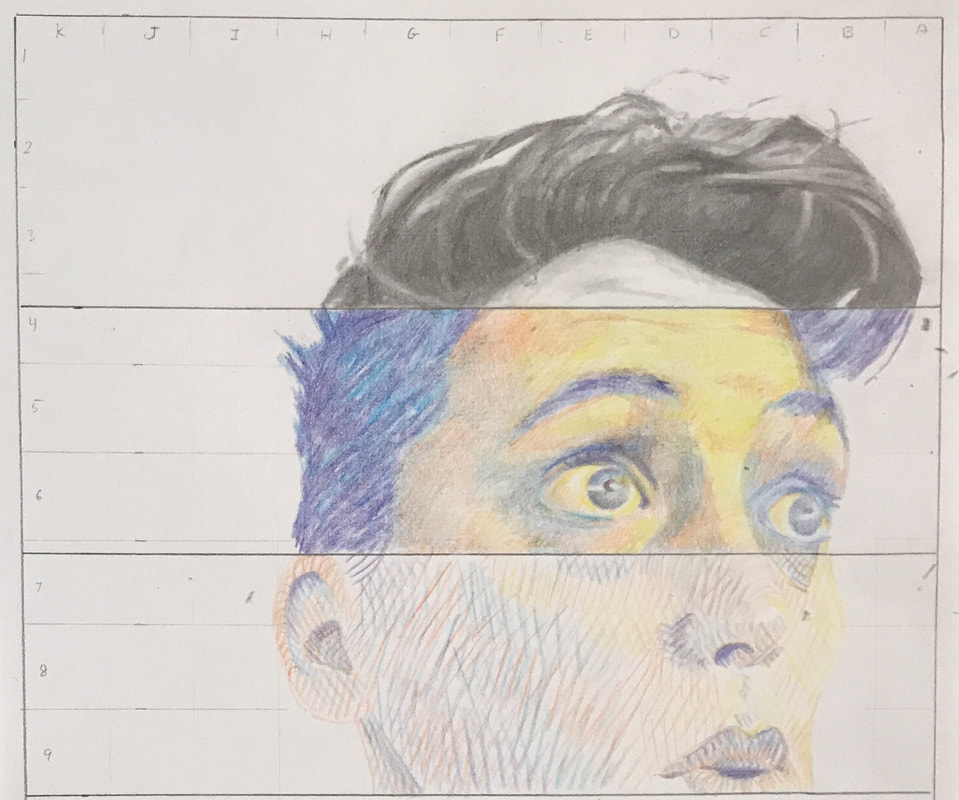
Picture

VIDEO DEMO OF COLORED PENCIL HATCHING

Use the same four colored pencils: purple, blue, orange, and yellow.
  • DARK VALUES: PURPLE
  • MEDIUM-DARK VALUES: BLUE
  • MEDIUM-LIGHT VALUES: ORANGE
  • LIGHT VALUES: YELLOW
Draw patches of hatching lines in the direction of the object.
  • Lines closer together make darker values.
  • Lines further apart make lighter values.
  • You can overlap patches of value to get more accurate values.
Draw the lightest values first - YELLOW.
Draw the darkest values next - PURPLE.
Draw the medium-light values third - ORANGE.
Draw the medium-dark values last - BLUE.
Picture

Ink Pen Modeling

VIDEO DEMO OF INK PEN MODELING

Picture
Modeling is similar to hatching, but the lines follow the shape of the form.

USE PENCIL TO TRACE THE OUTLINES OF KEY AREAS.

USE THE PEN TO ADD VALUE TO THOSE AREAS.

THE LINES SHOULD FOLLOW THE SHAPE OF THE FORM, TURNING AND CURVING AS THE FORM TURNS AND CURVES. STRAIGHT LINES WILL MAKE THE VOLUME LOOK FLAT, LIKE CARDBOARD. CURVED LINES WILL HELP THE VOLUME LOOK DIMENSIONAL.

YOU CAN USE HATCHING AND CROSSHATCHING CONCEPTS WITHIN THE FRAMEWORK OF MODELING. MODELING TAKES THOSE HATCHING AND CROSSHATCHING LINES AND BENDS THEM AROUND THE FORM.

THINK OF IT AS A WIRE MESH FRAME. THE VOLUME IS CREATED BY THE CURVES IN THE LINES. THE MORE LINES IN ONE AREA, THE MORE VALUE AND THE DARKER THE AREA.
Powered by Create your own unique website with customizable templates.