
|
Pysanky: Ukrainian Egg DyingStudents will design and create a dyed egg using a wax resist method. Students will use batik dye, wax, a kistka, and an egg.
This unit has four parts: research and design (creating an intricate design), dye plan (drawing out how the color layers will work separately), final project egg dying, and documentation of the finished work (photos, looping GIF, email, reflection, and critique). |
Overview Unit Goal
Composition Concepts
|
|
Technical Skill VideosResource Book Page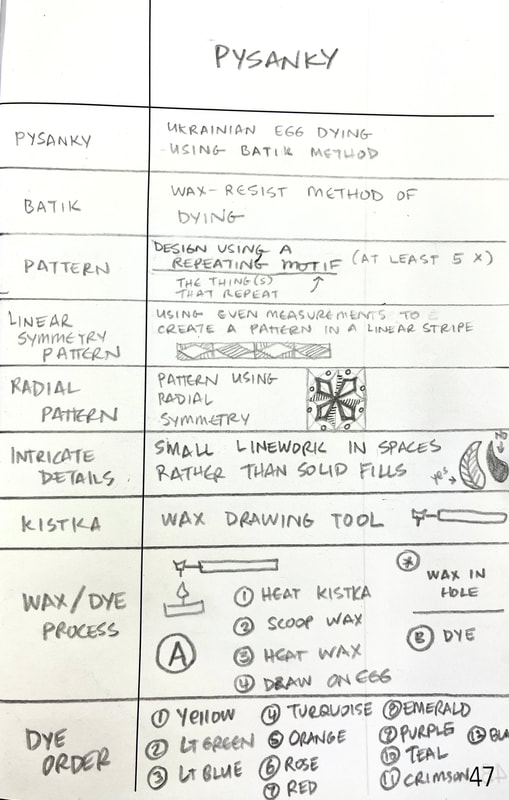
|
Order of WorkDetermine Your Design
|
Pysanky Eggs

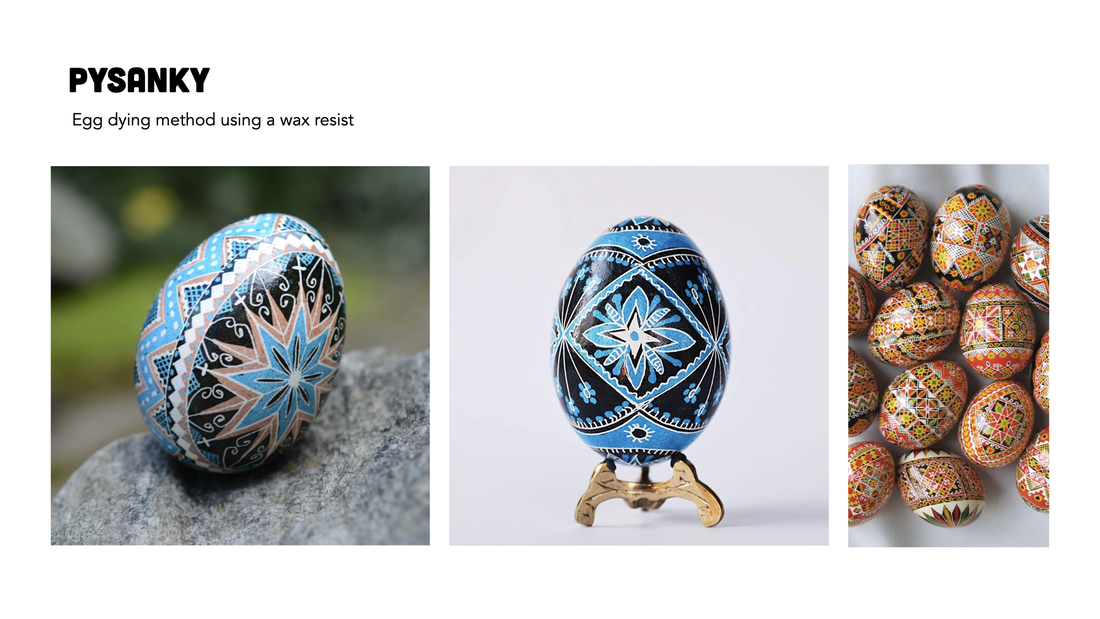
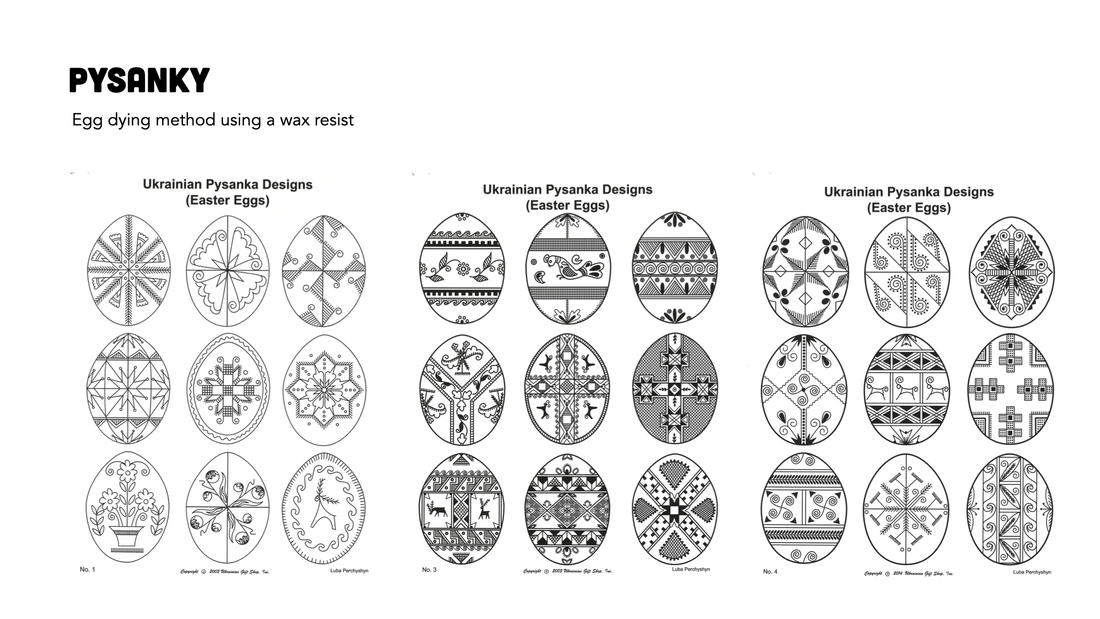


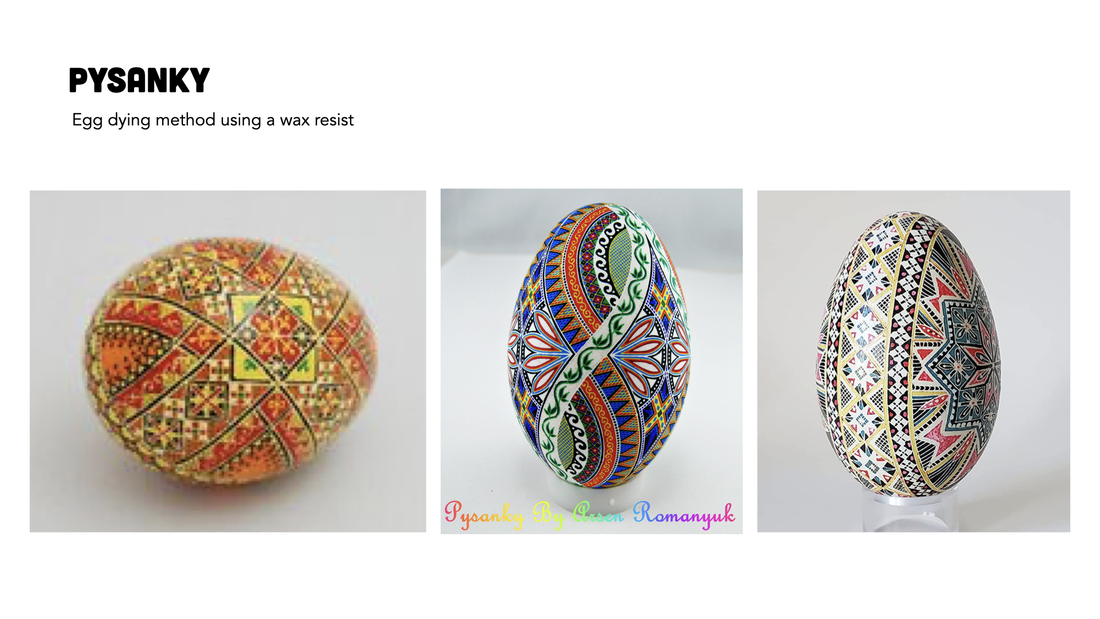
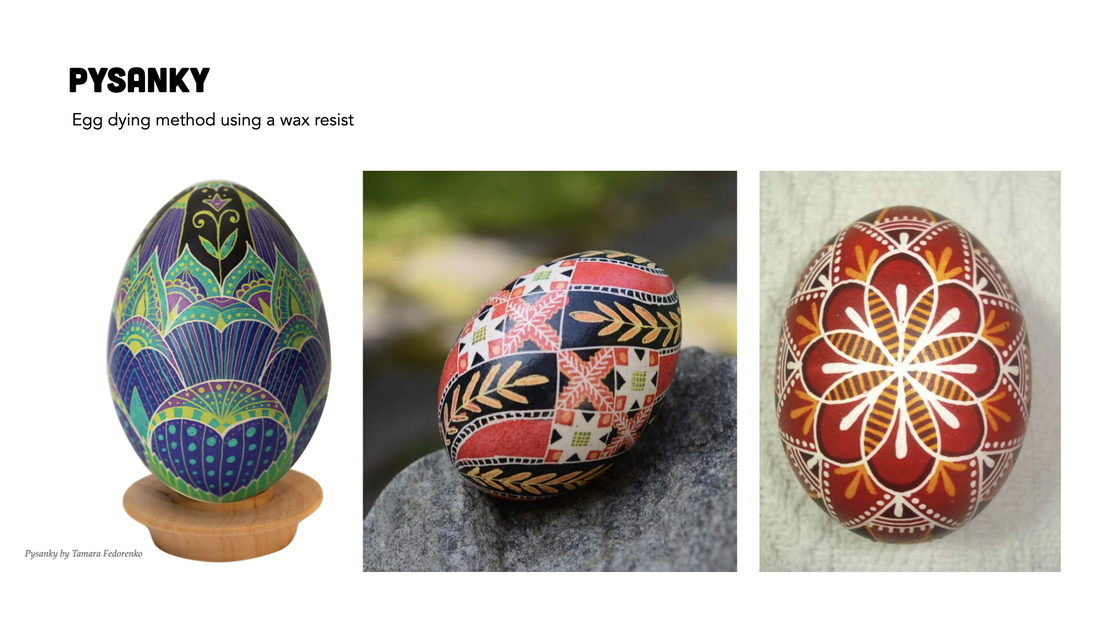
Designing your Egg
Step One: Designing Your Project
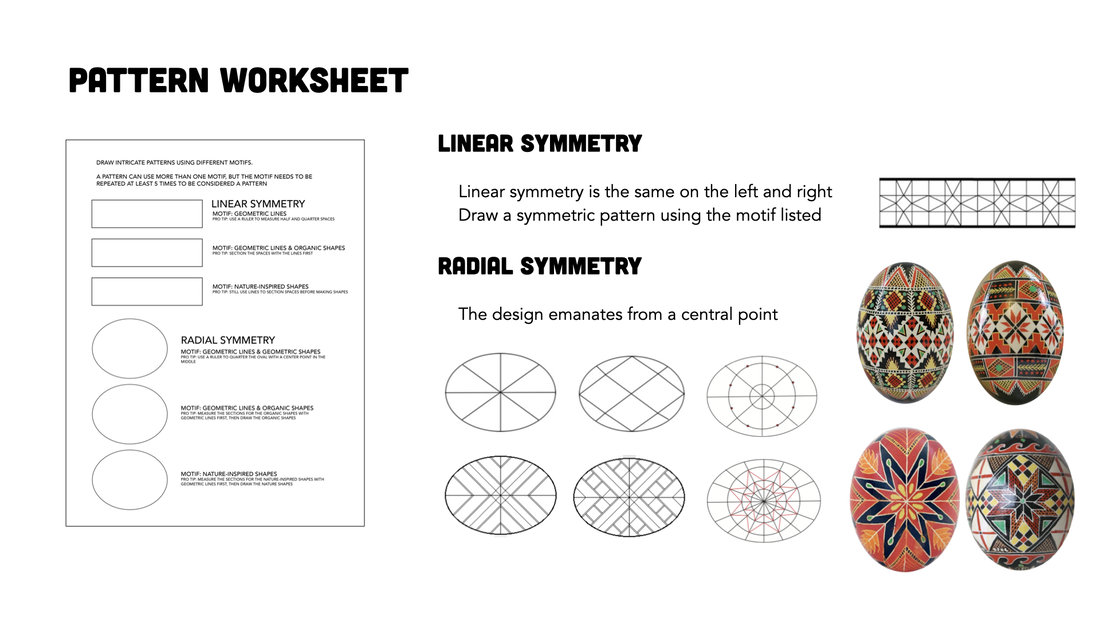
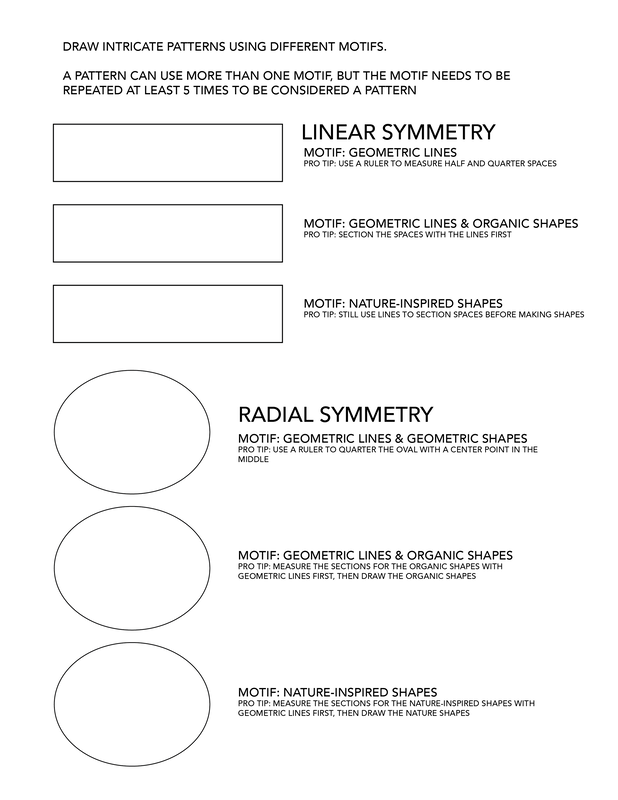
WORKSHEET 1 : PRACTICING PATTERNS
|
|
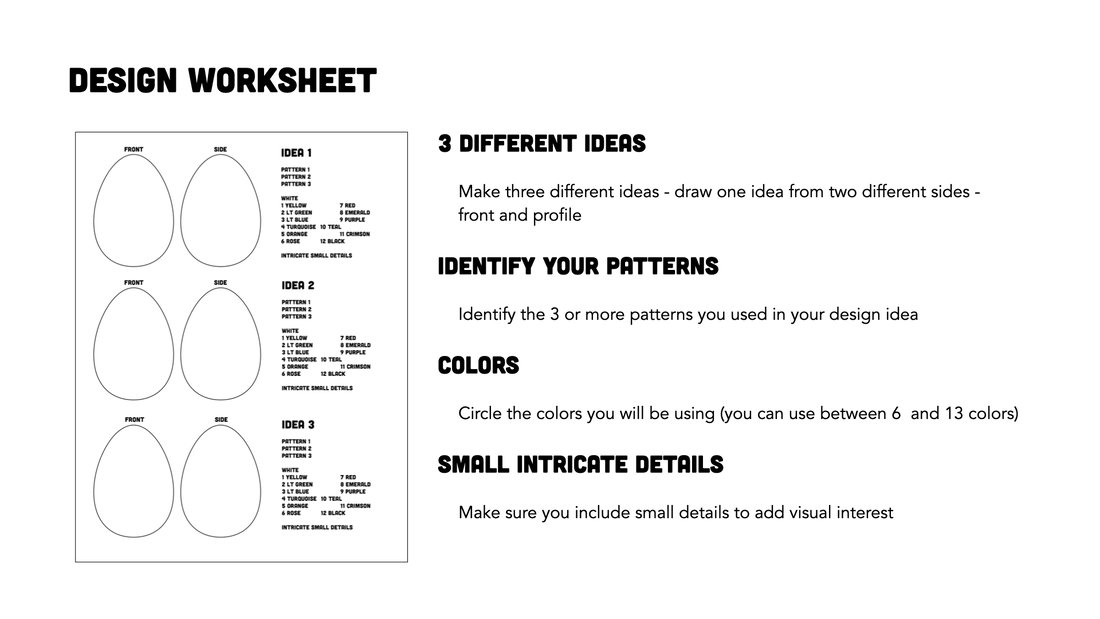
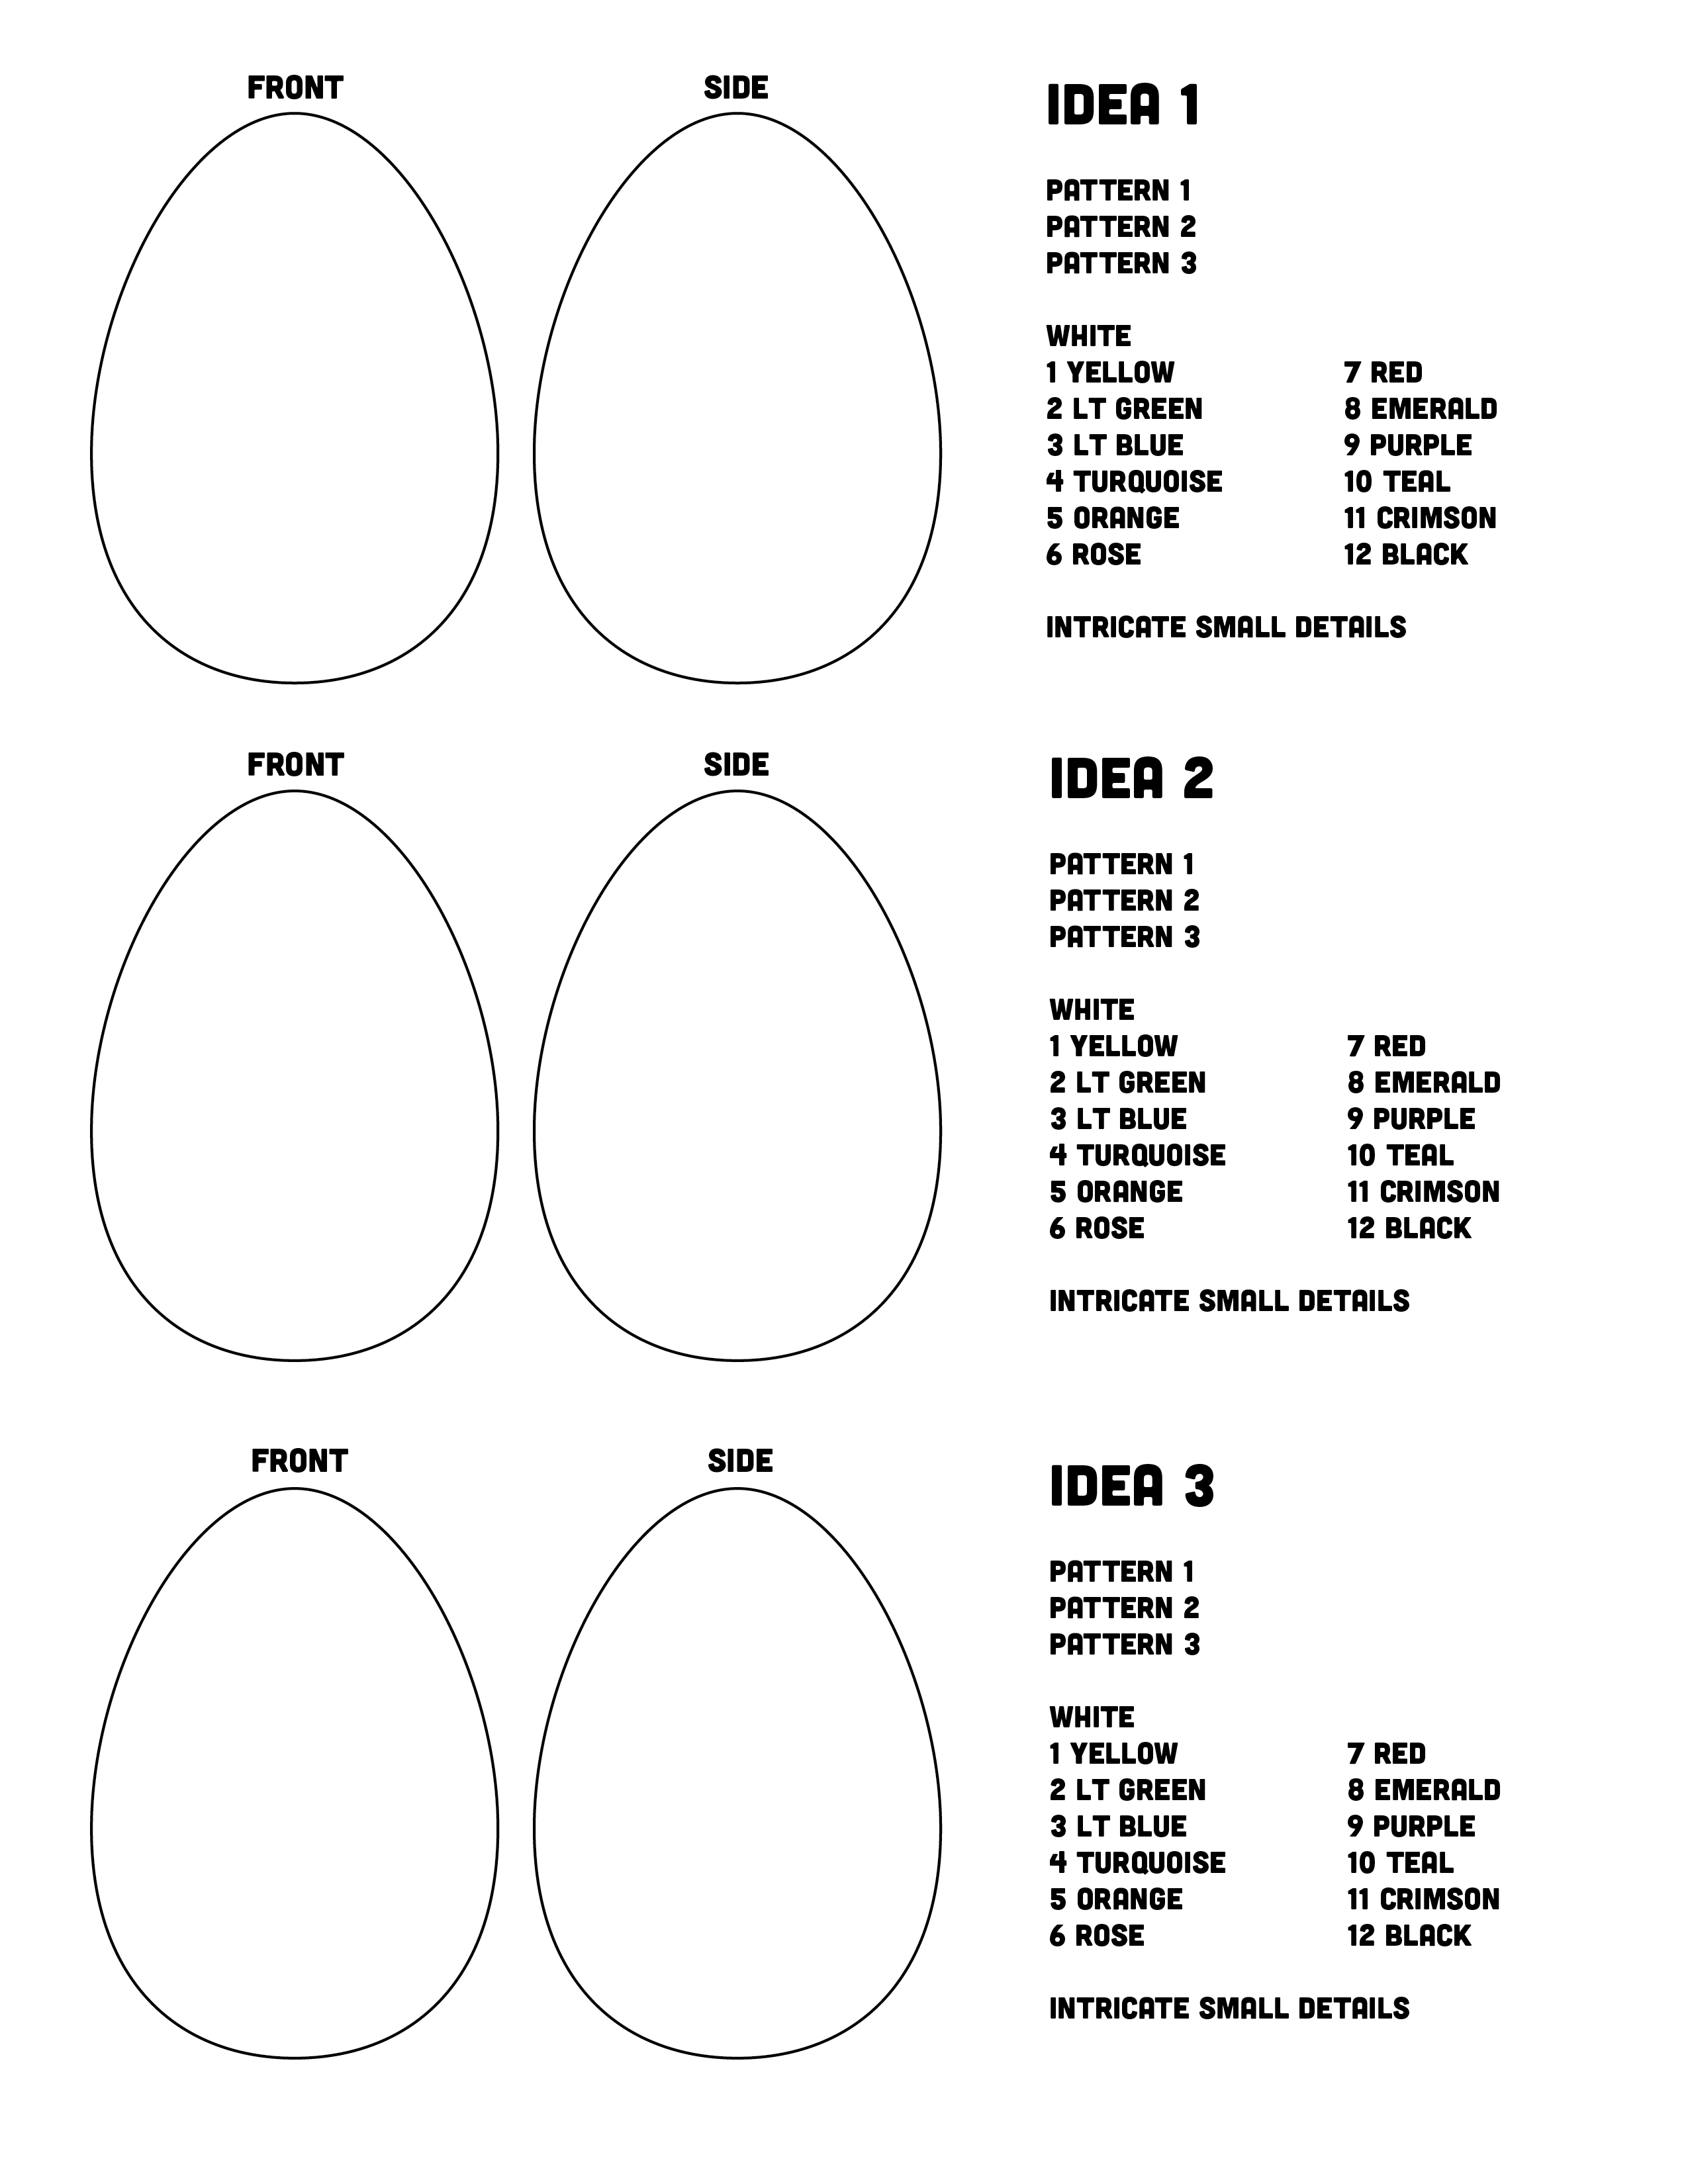
WORKSHEET 2 : PRACTICING DESIGNING AN EGG IN THE PYSANKY STYLE
|
|
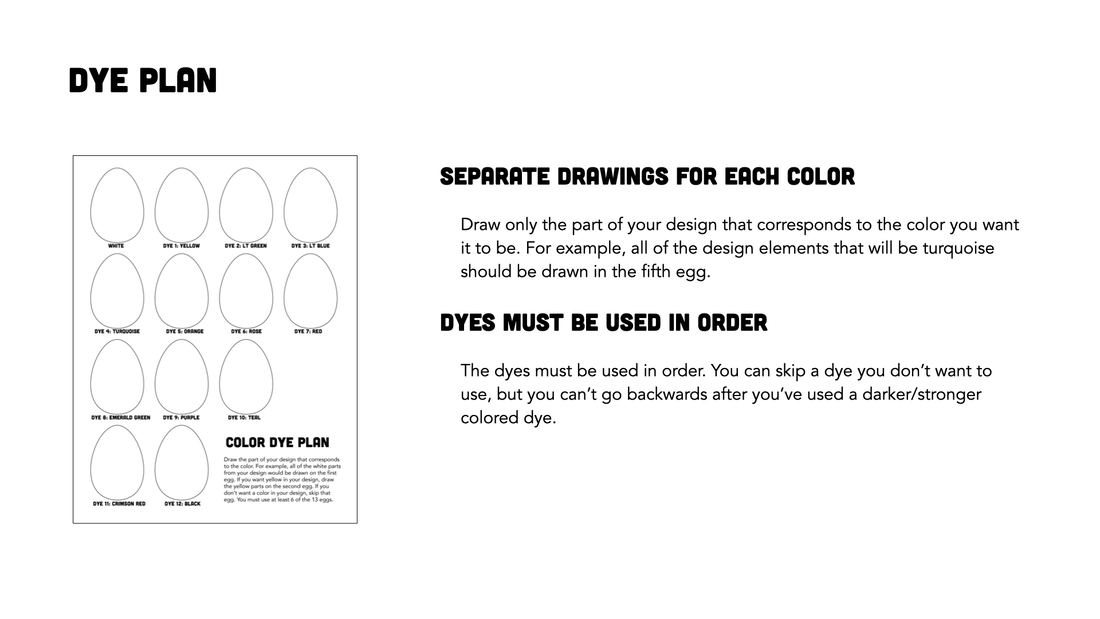
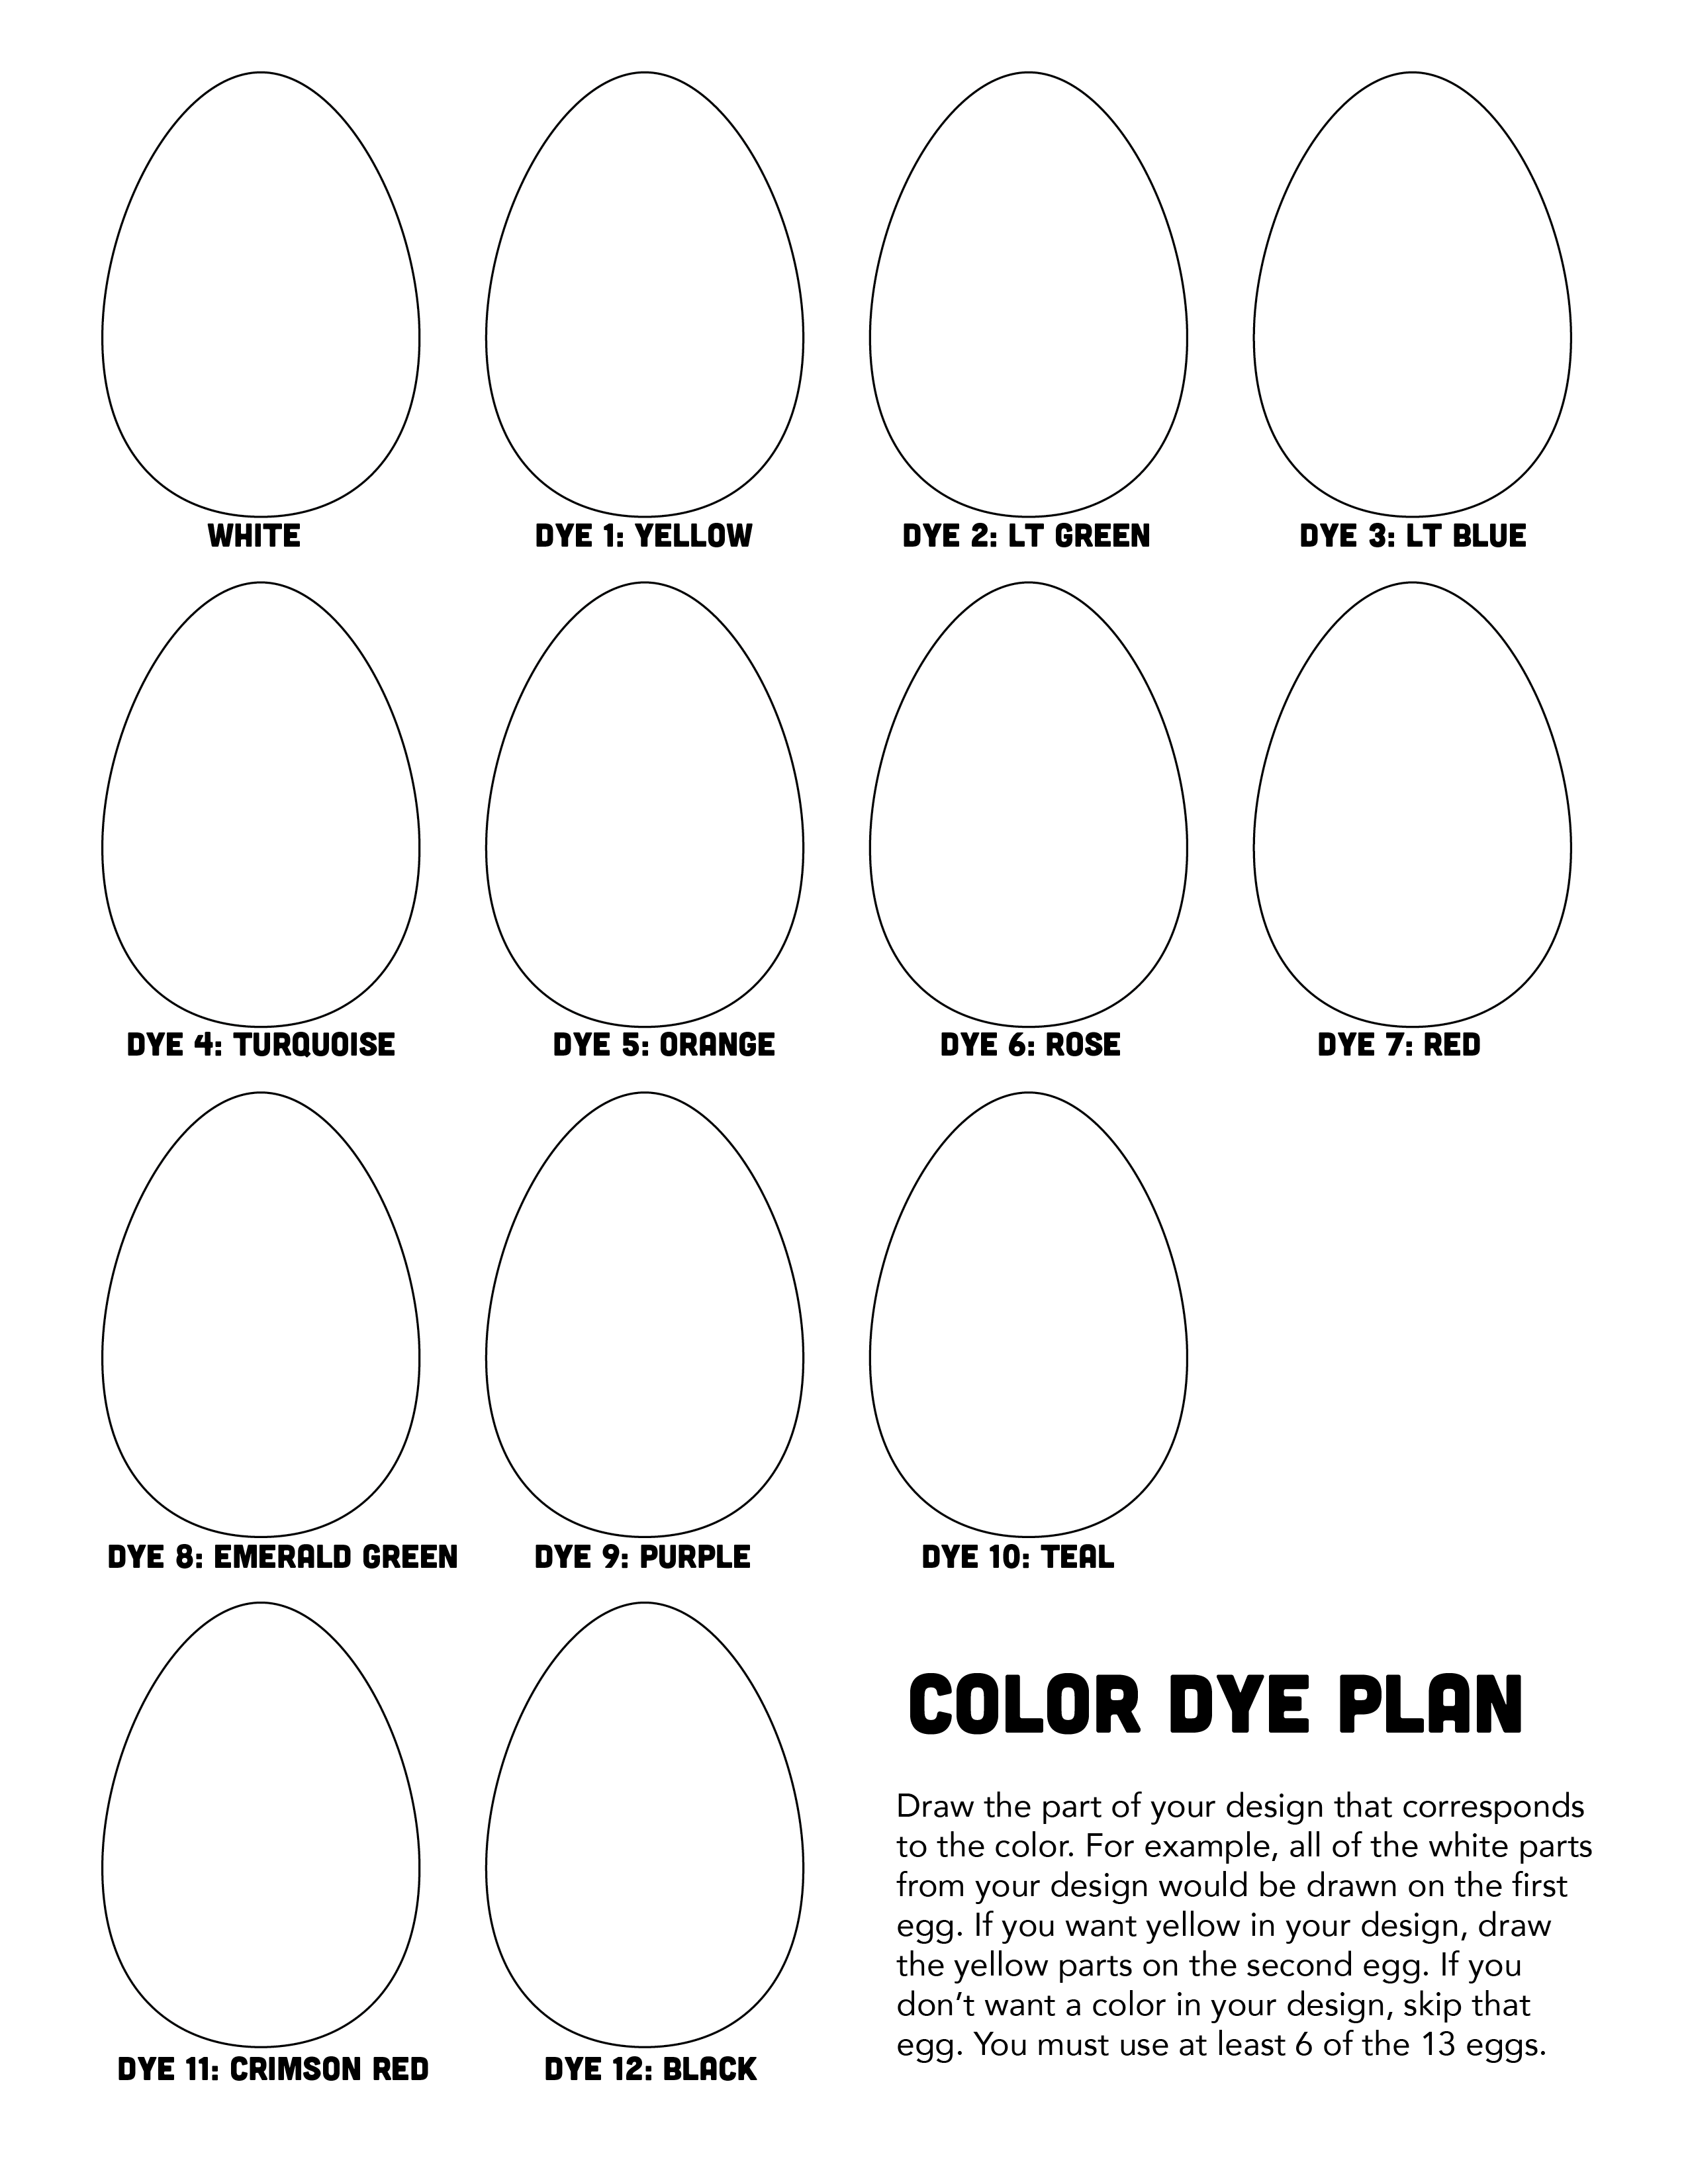
Step Two: Dye Plan
USING YOUR FAVORITE EGG PATTERNS, DRAW OUT YOUR DESIGN PLAN ON THE COLOR SEPARATION DYE PLAN WORKSHEET
|
|
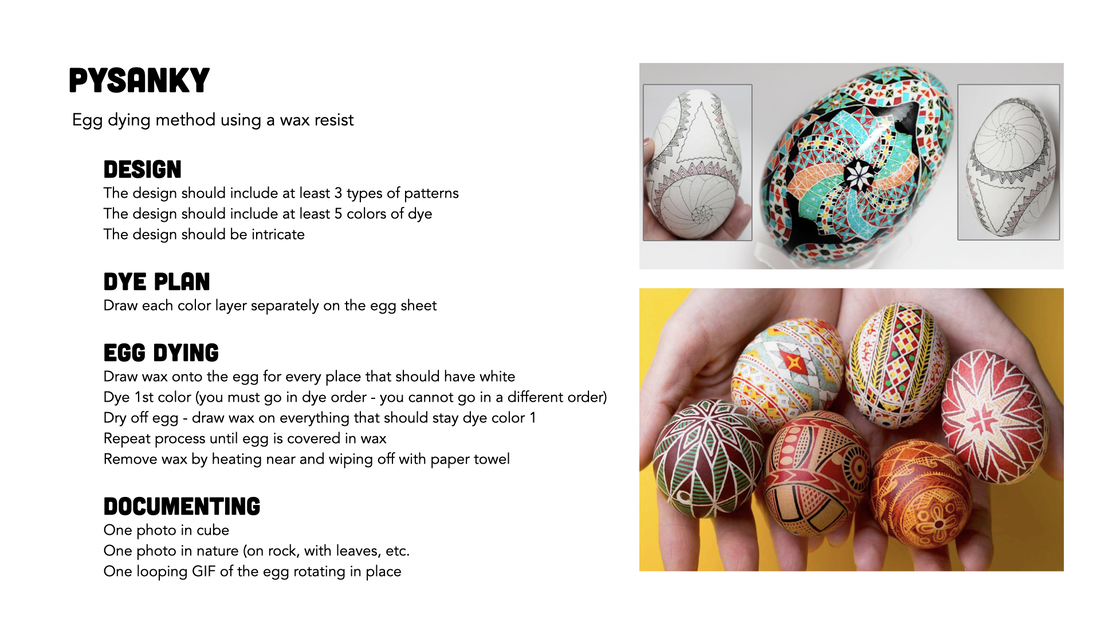
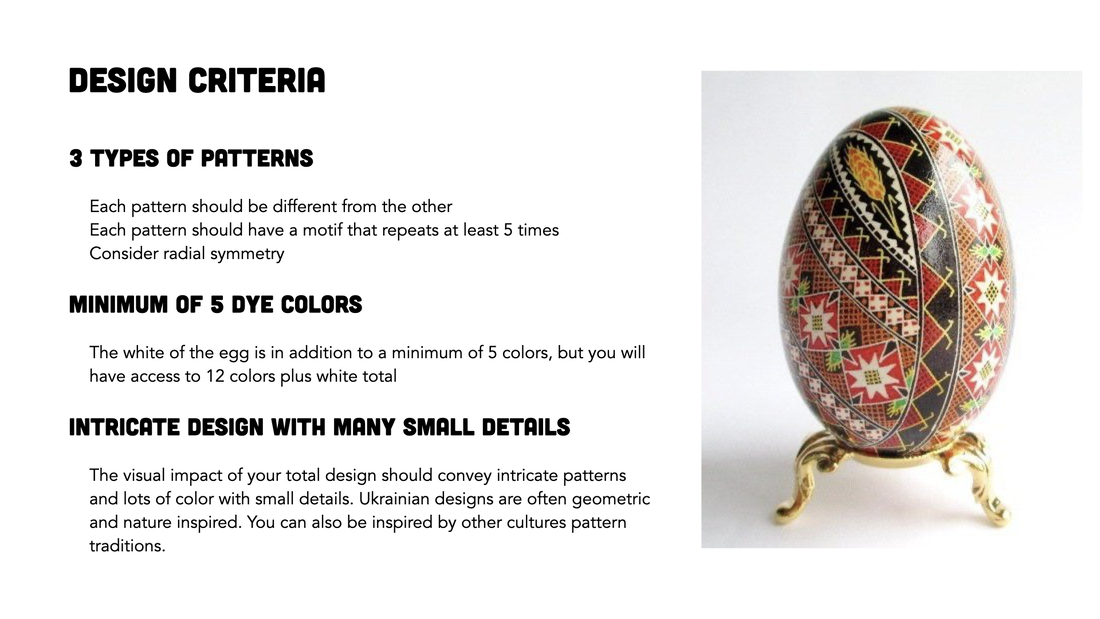
Things to Consider
- You want to have an intricate design, so minimize the areas of one color - it is easier to make a single line than to fill in a large space
- You want at least 3 repeating patterns. Your pattern must have a motif that repeats at least 5 times to be counted as a pattern.
- You can change line thickness to add visual interest.
- Things that could go wrong: You could forget to seal the hole at the bottom before you put the egg in the dye. The egg would start to fill with dye and will leak dye as you heat the egg when removing the wax. That can have a big impact on your finished design.
- Things that could go wrong: Your design has too much empty space of one color, and does not appear intricate. You can make bigger shapes, but you should fill them with a pattern to add more visual interest.
- Things that could go wrong: You crack the egg when you put it in the dye. You should set the egg into the dye carefully. You can easily crack an egg and you might not know about the crack until the very end when you wipe off all the wax.
- Things that could go wrong: Your egg could explode if you put it directly above the flame when removing the wax. Instead, place the egg to the side of the flame.
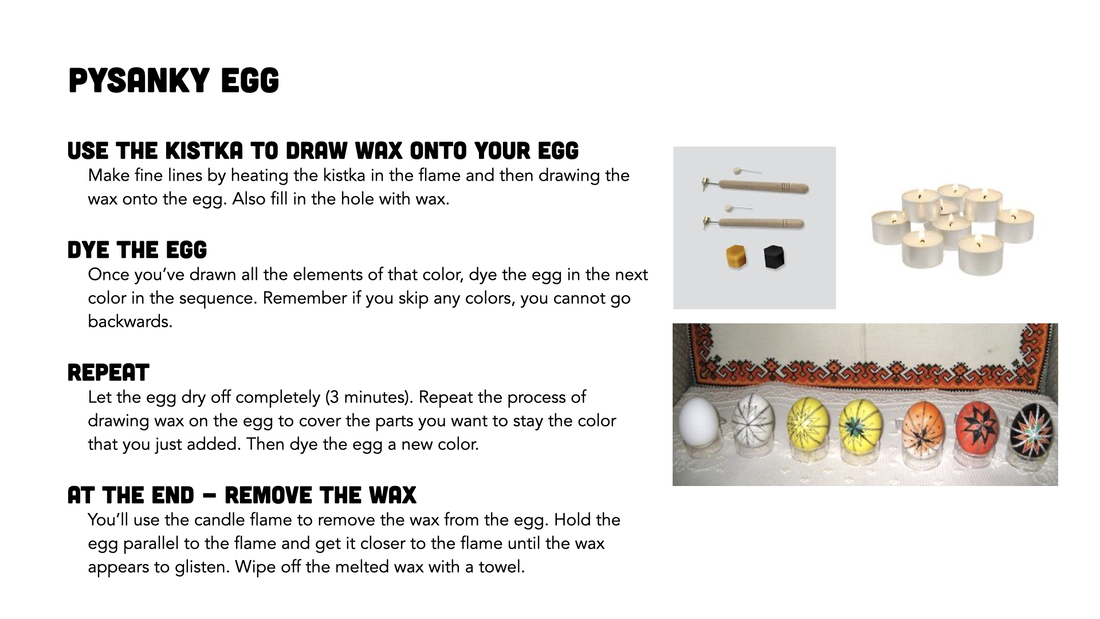
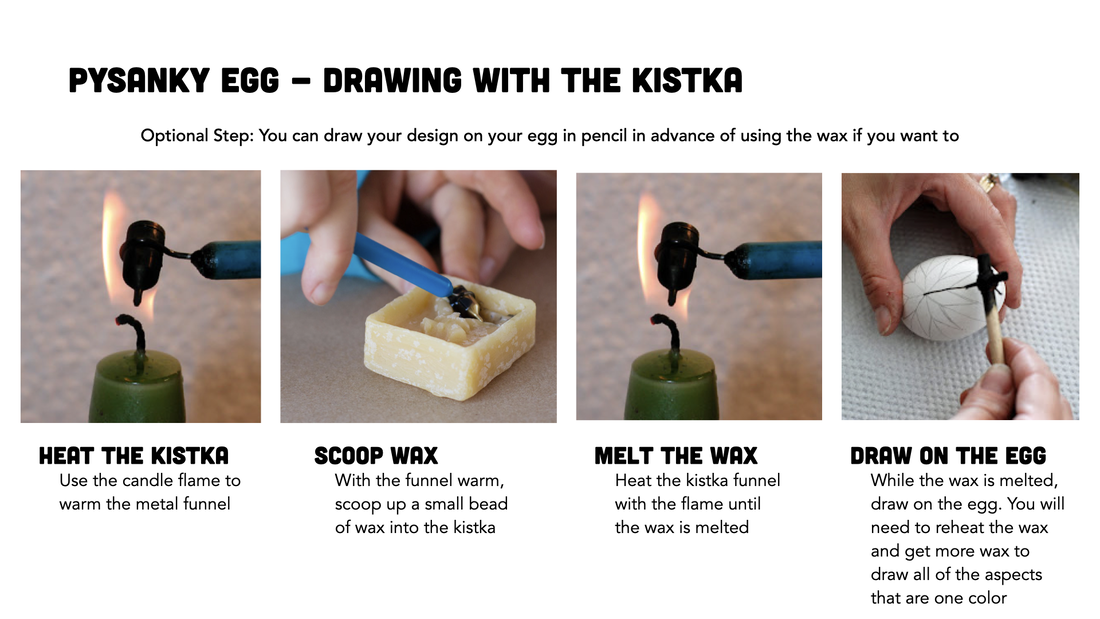
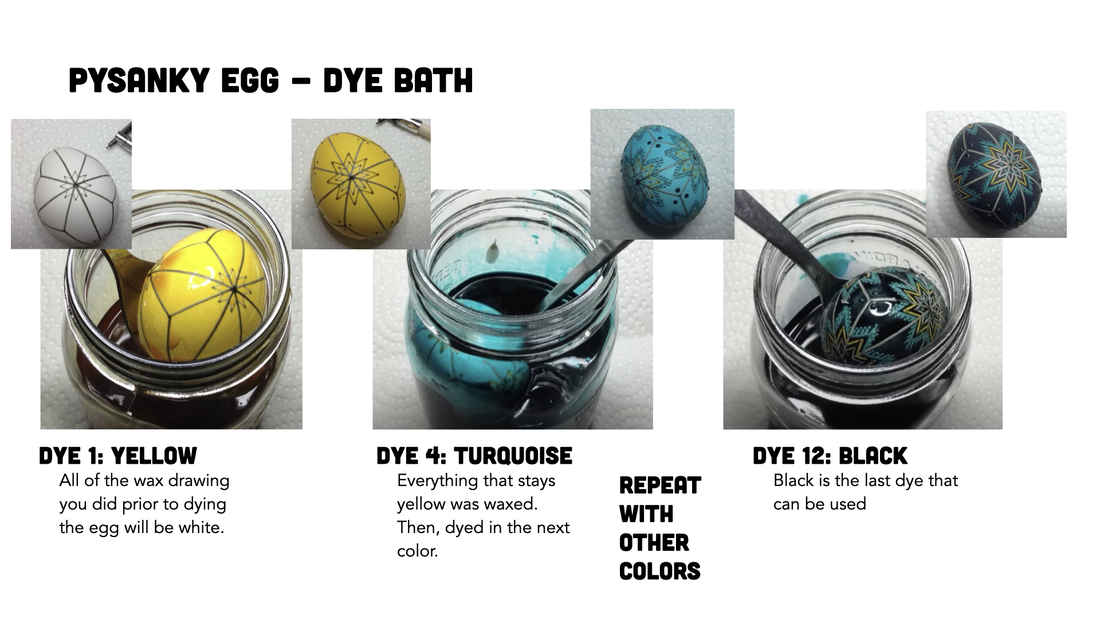
Step Three: Batik Egg Dying Process

Step Four: Documenting your Egg
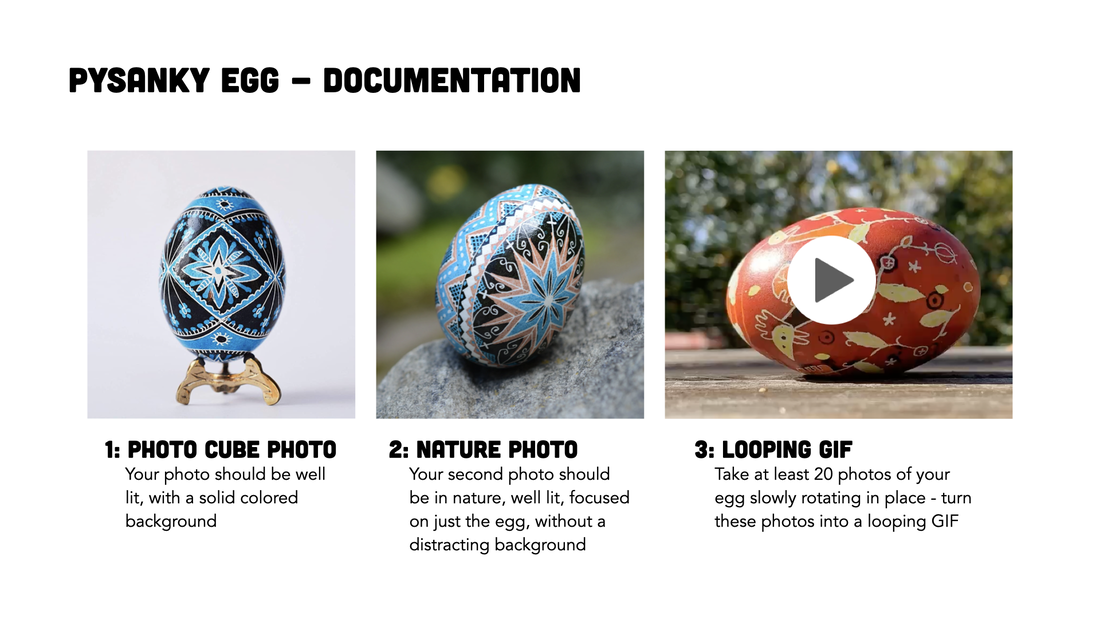
LOOPING GIF:
|
|
2 Photos & Looping GIF of your Egg
Email an Image of Your Project
|
Grading Criteria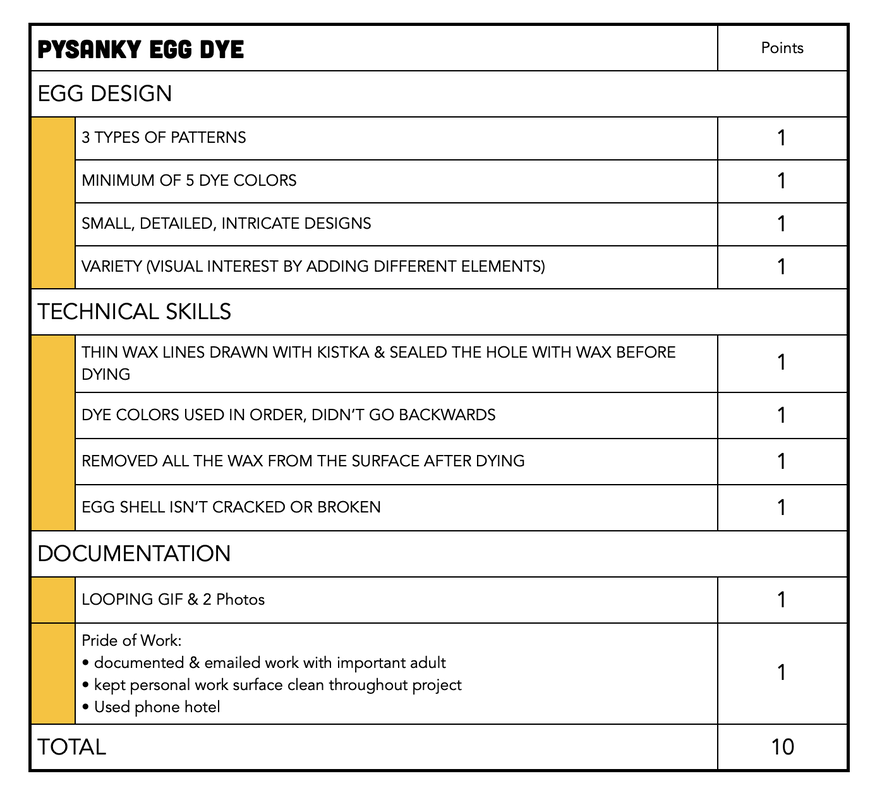
|
