
Sculpture for Animation
Sculpture is a three dimensional art form. It can be used for stop-motion animation (puppet making, sets, etc.), modeling for character development in traditional animation, as kinetic sculpture, or in its own right as a stand alone work of art.
Puppet for Walk Cycle
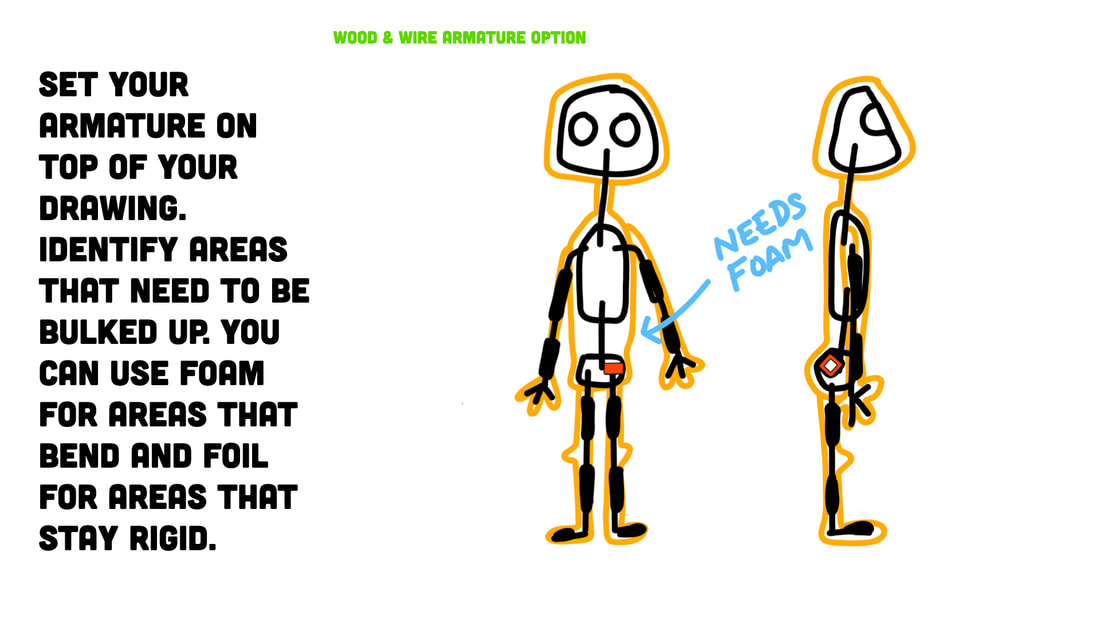
Students will make a puppet with moving limbs and head for use in a walk cycle animation. This project has four parts: design (character personality development), armature (interior skeletal structure with moving joints), surface design (skin, clothing, details, etc.), and documentation (email, photos, reflection, and presentation).
|
|
Introduction to Stop-Motion PuppetsStop-motion Animation uses puppets that are moved in small increments to create the illusion of movement. These puppets have moveable joints and changing facial features to give their characters life and personality. The puppets used in stop-motion animation can be very simplistic (a blob of clay or an inanimate object that doesn't change shape) to very complex (mechanically controlled motors inside the puppet that control gears).
|
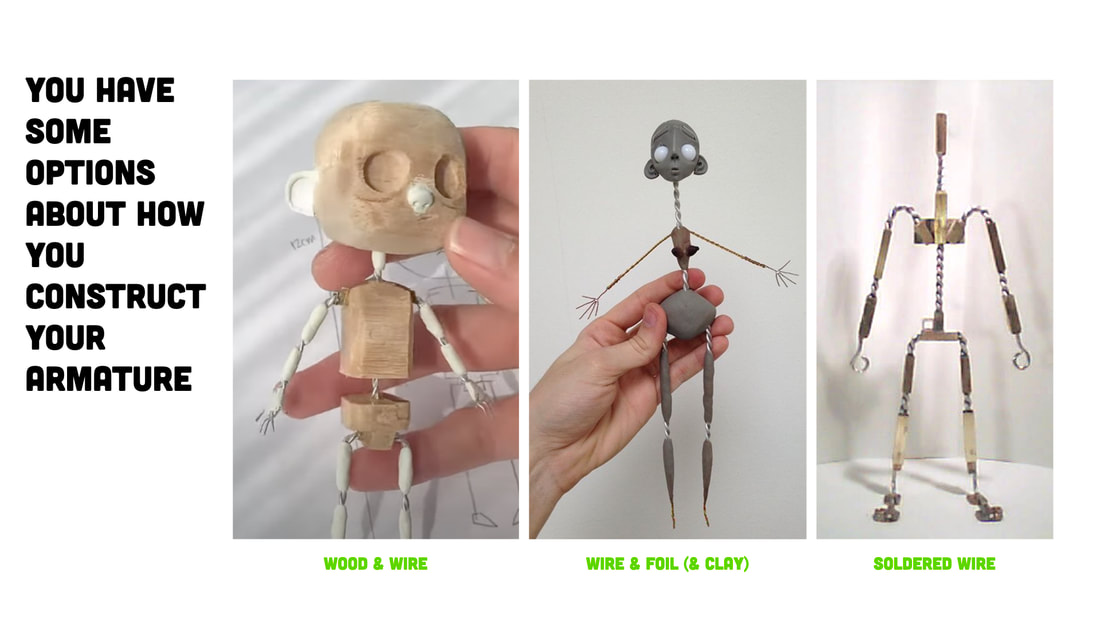
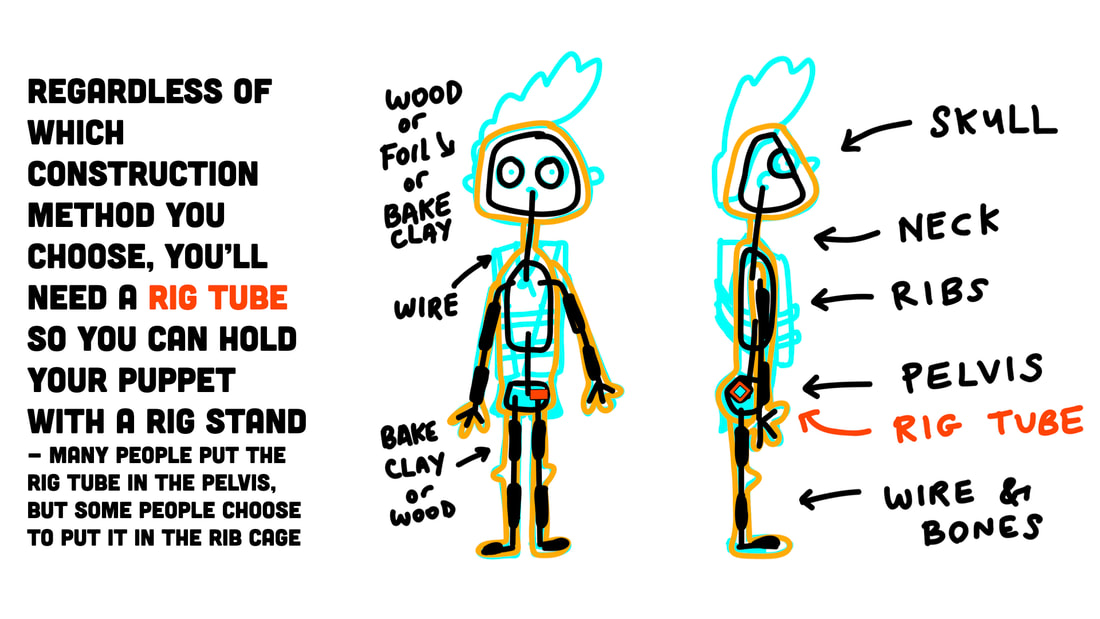
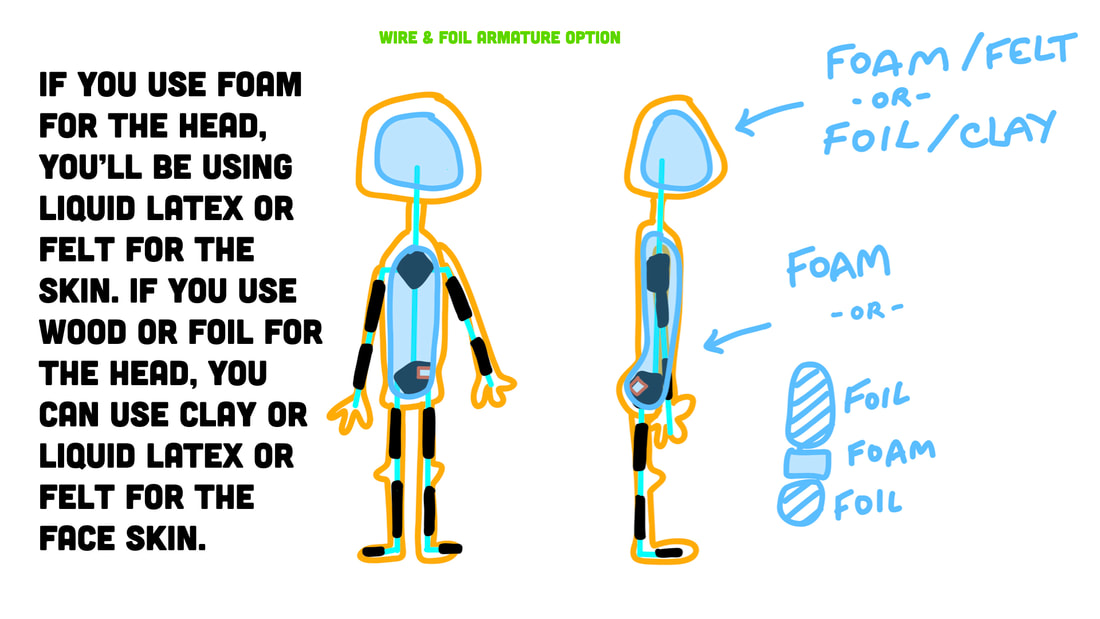
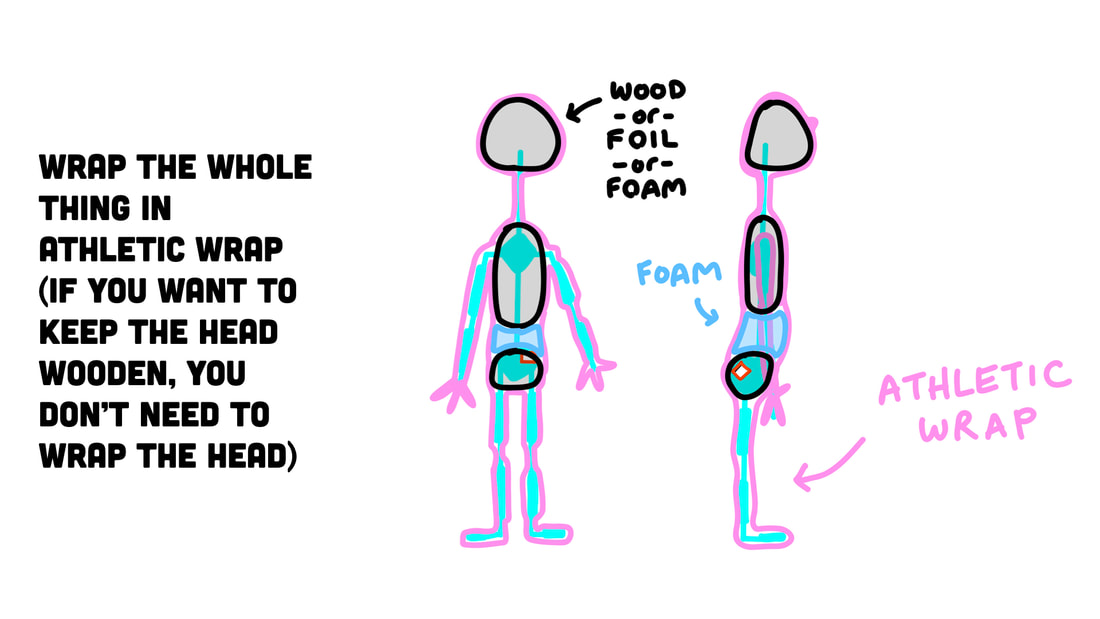
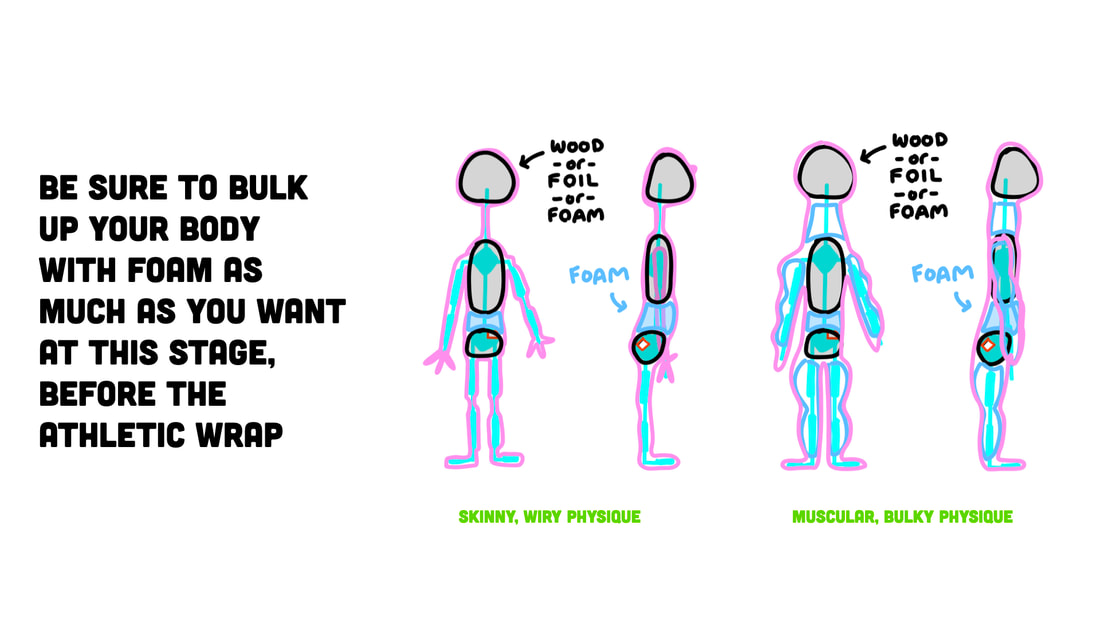
Armature Types
|
Wire armature with expoy bones and foam body
|
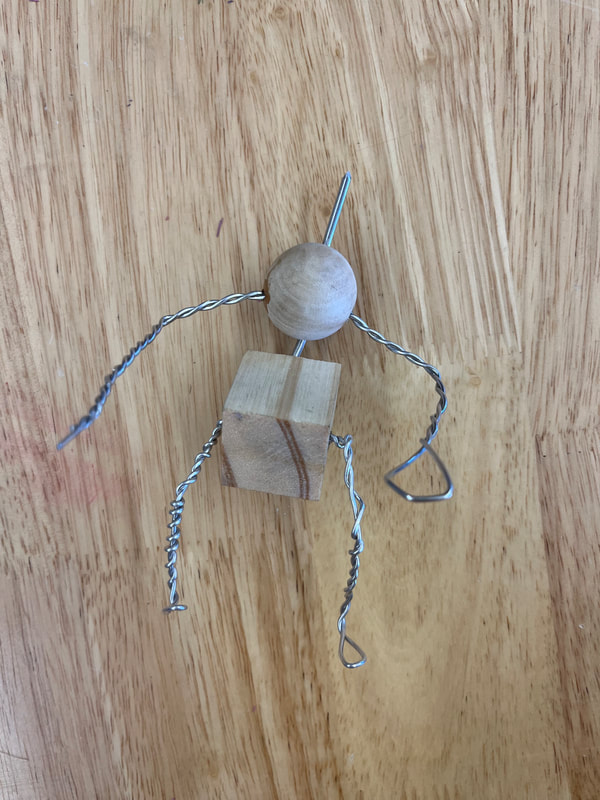
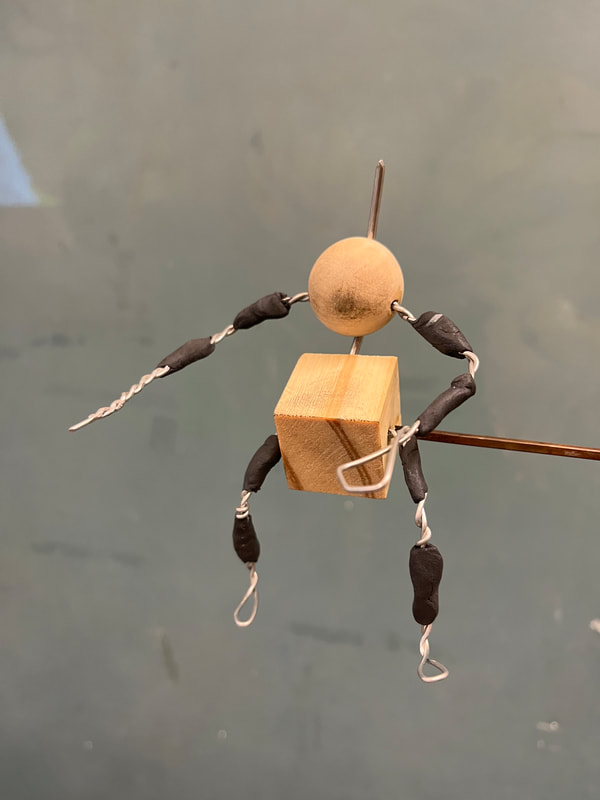
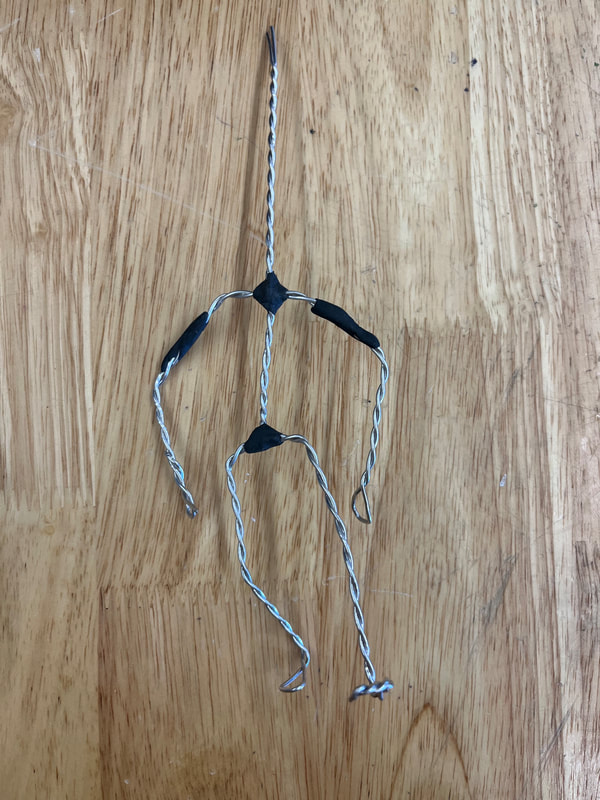
Wire & Wood Armature with replaceable arms and head and epoxy bones
|
|
Wood and wire armature with replaceable arms and felt finish
|
Ball and socket armature with moving eyeballs
|
|
|
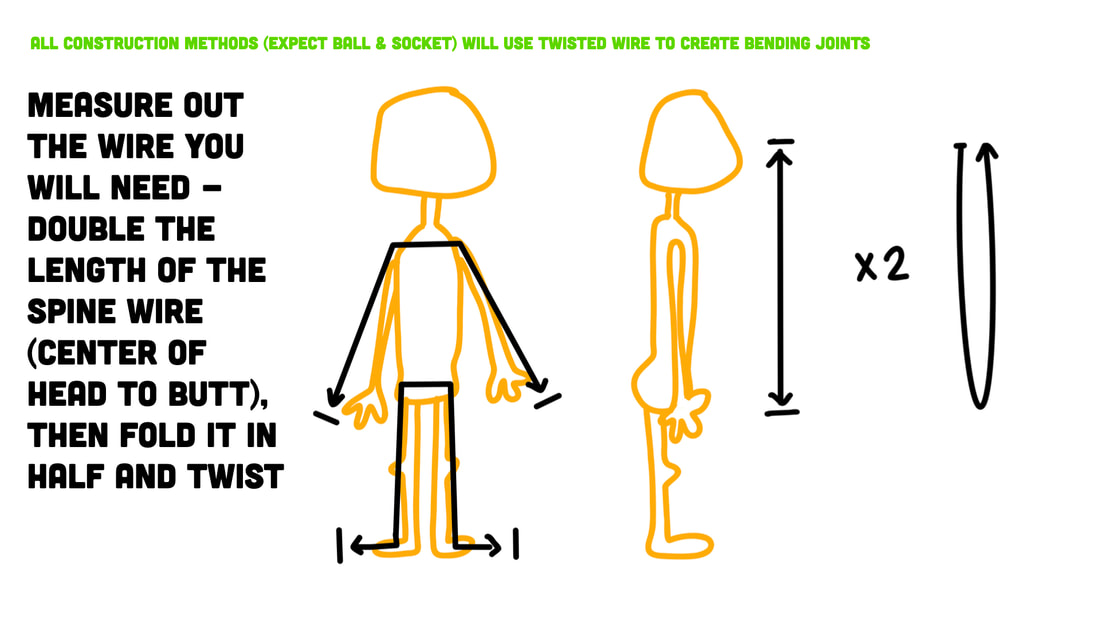
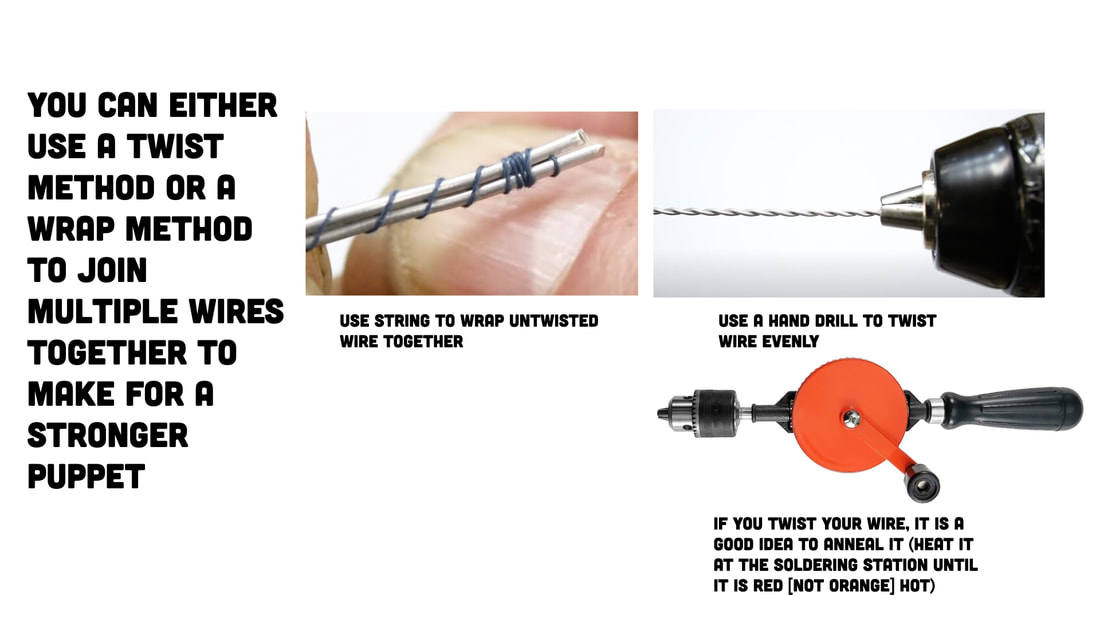
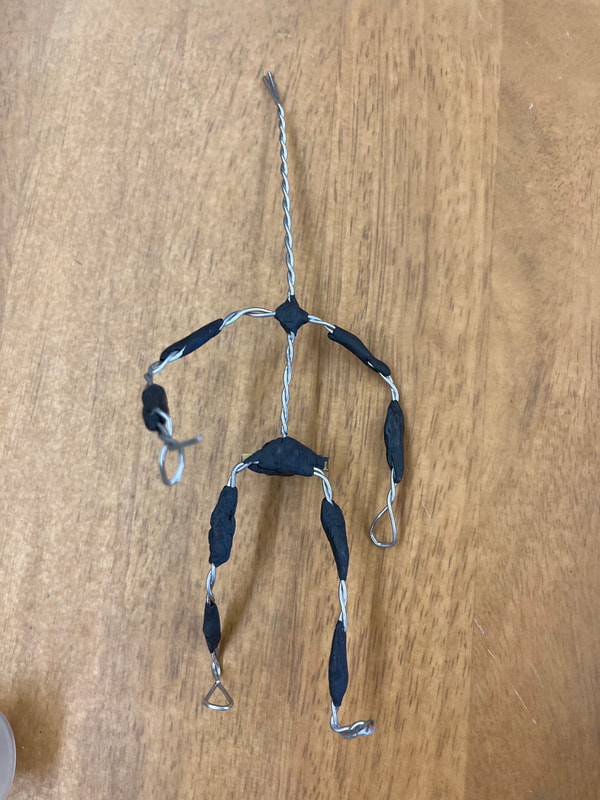
Preparing your Wire for an ArmatureWire armatures will break over time from the repeated stress of doing the same movements over and over with out annealing the metal.
In this video, Ed tests how twisted the wire should be to have it last the longest in your puppet. He says between 5 and 10 turns is the sweet spot if you are going to twist your wire. Wrapping it is also a good strategy, but twisting it too much damages the wire and makes it weaker. It would be interesting to test the wires after twisting and annealing to see if the tighter twist would last longer than the less twisted wire. |
Composition Concepts
|
|
Technical Skill VideosResource Book Page |
Order of WorkDetermine Your Design
|
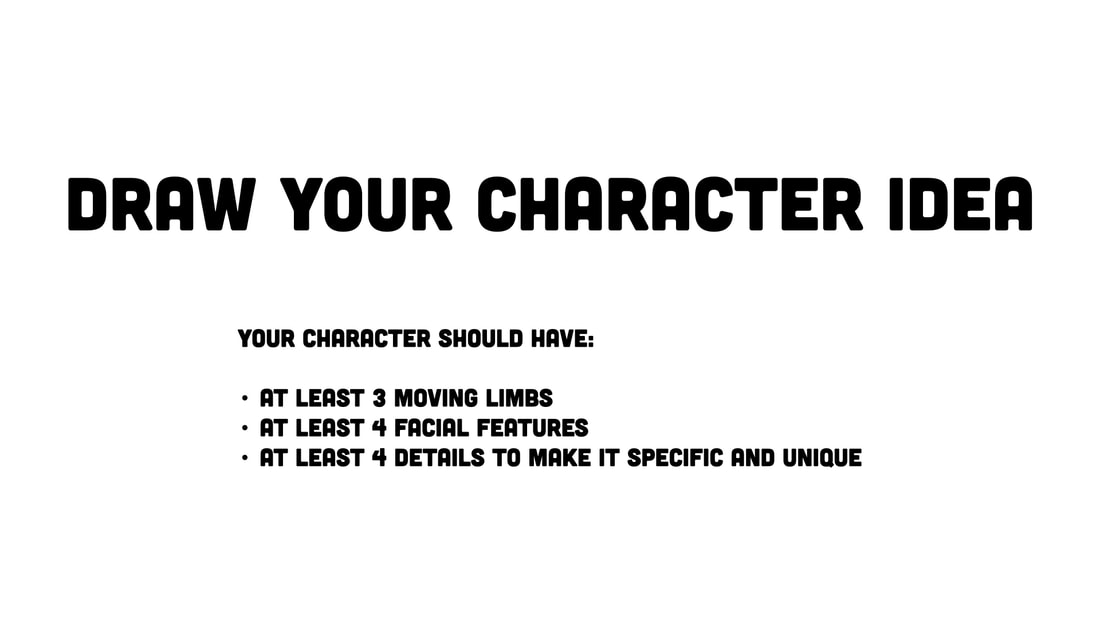
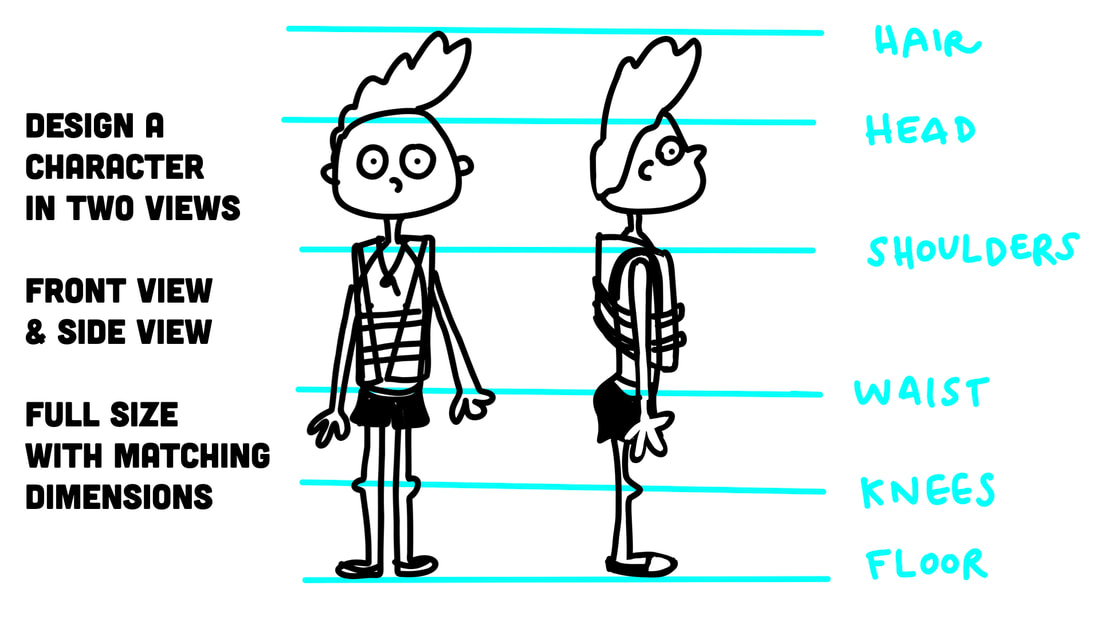
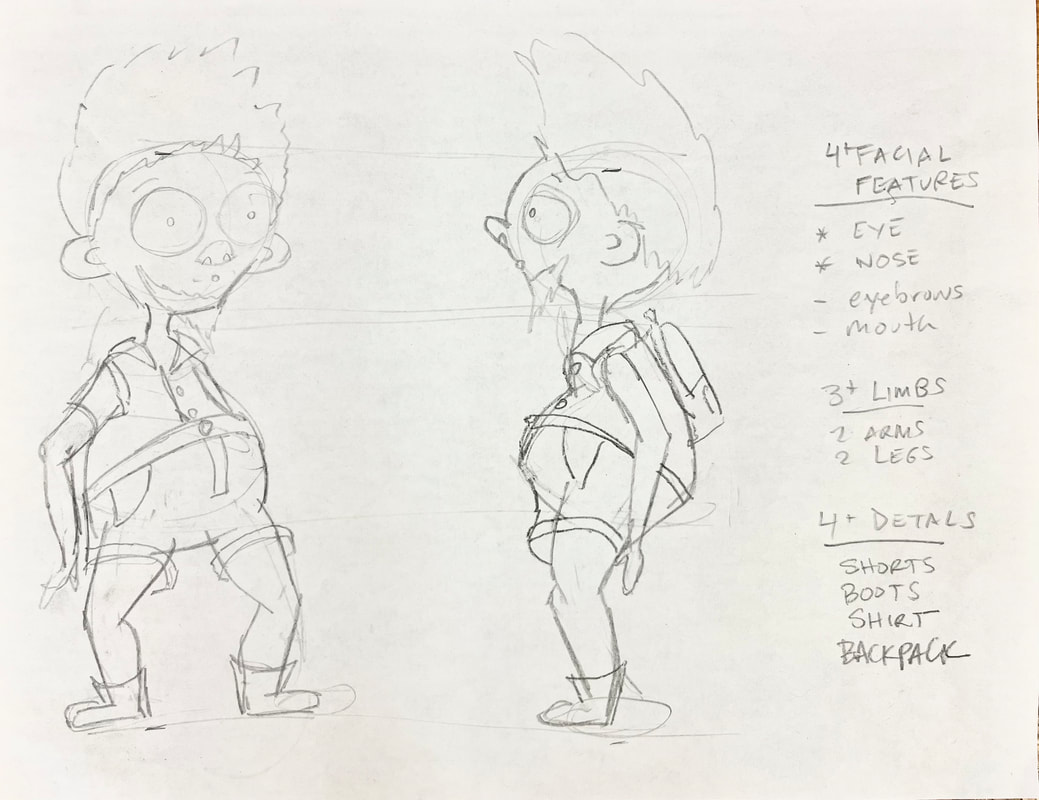
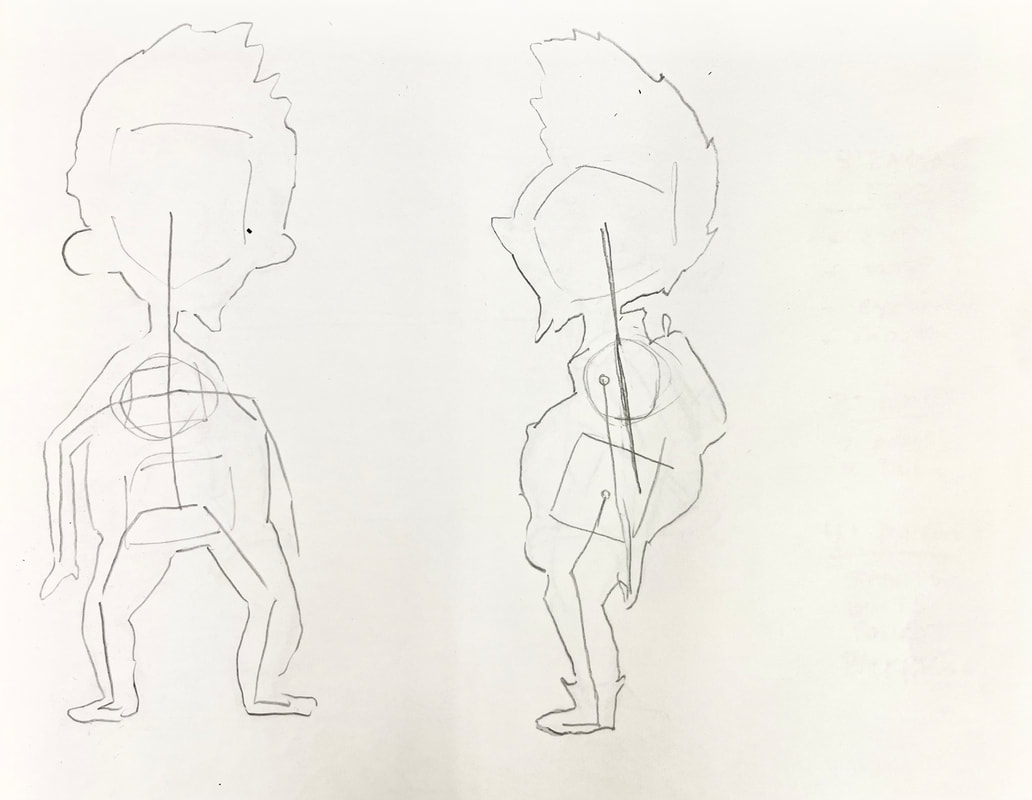
Design your Character
|
|
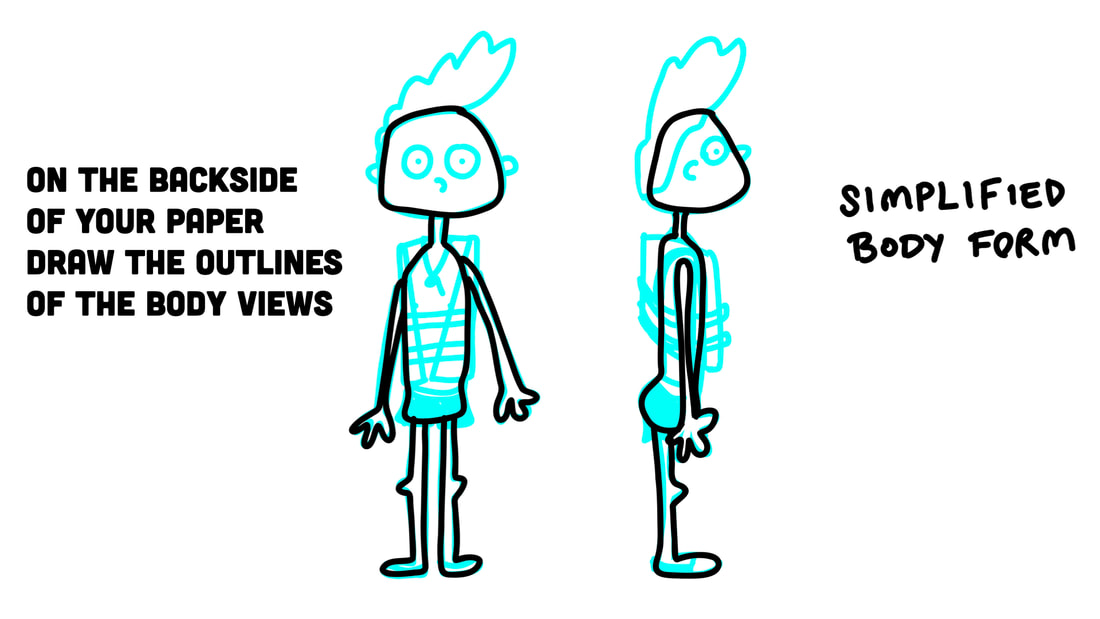
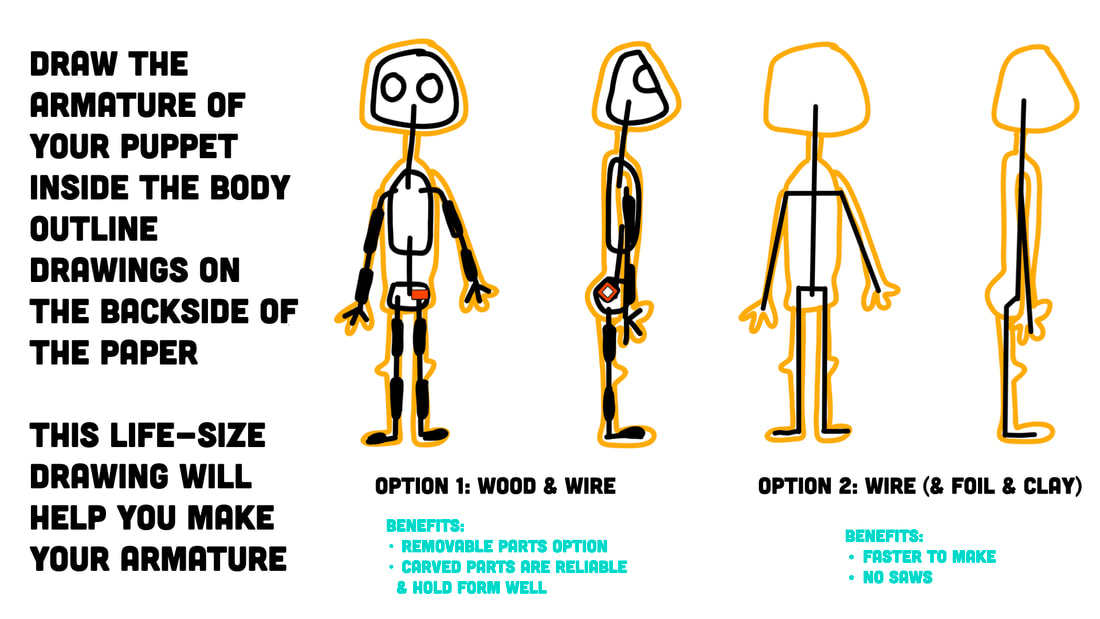
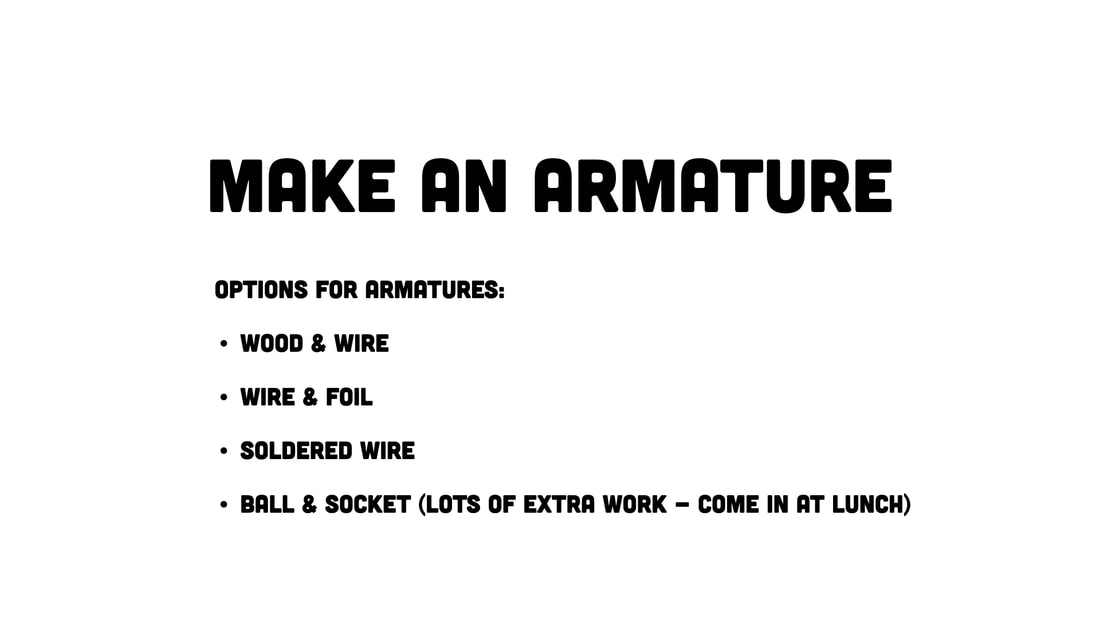
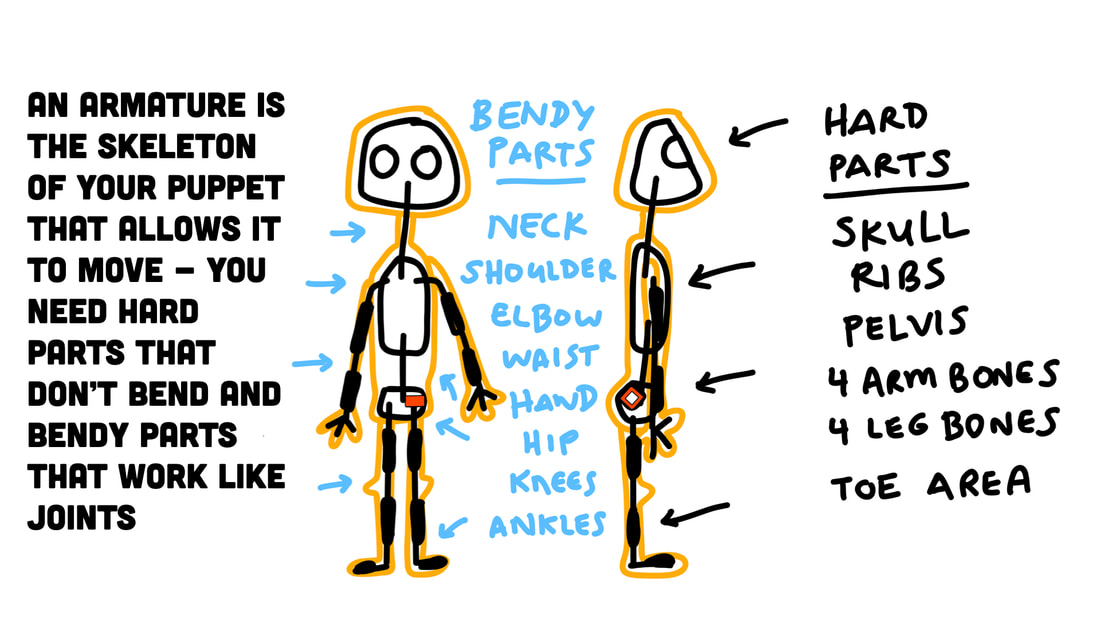
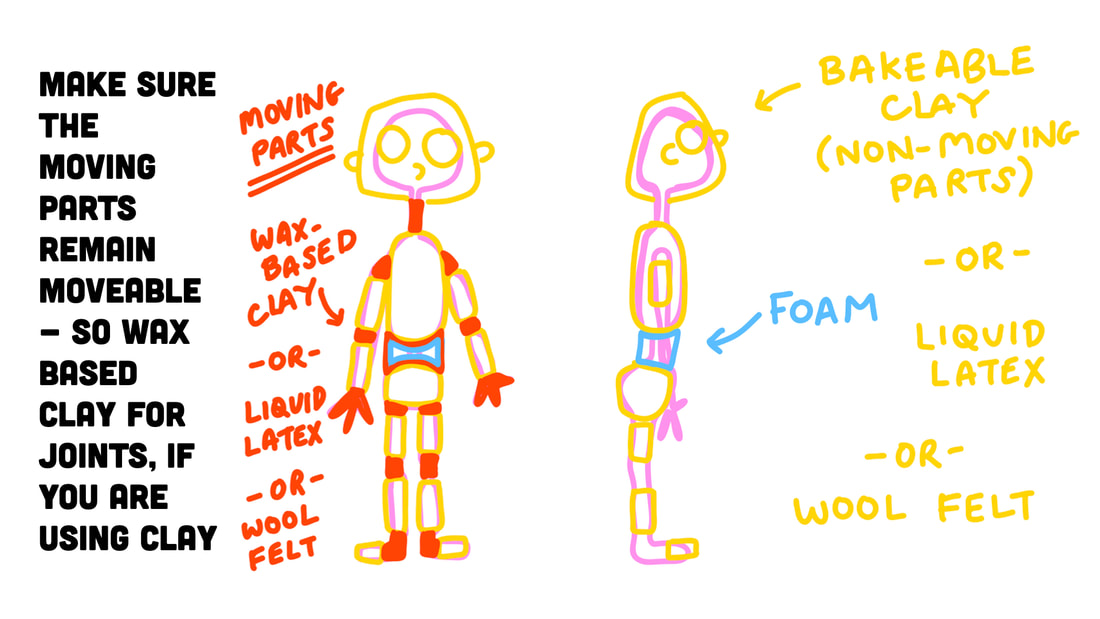
Armature

|
|
|
Body

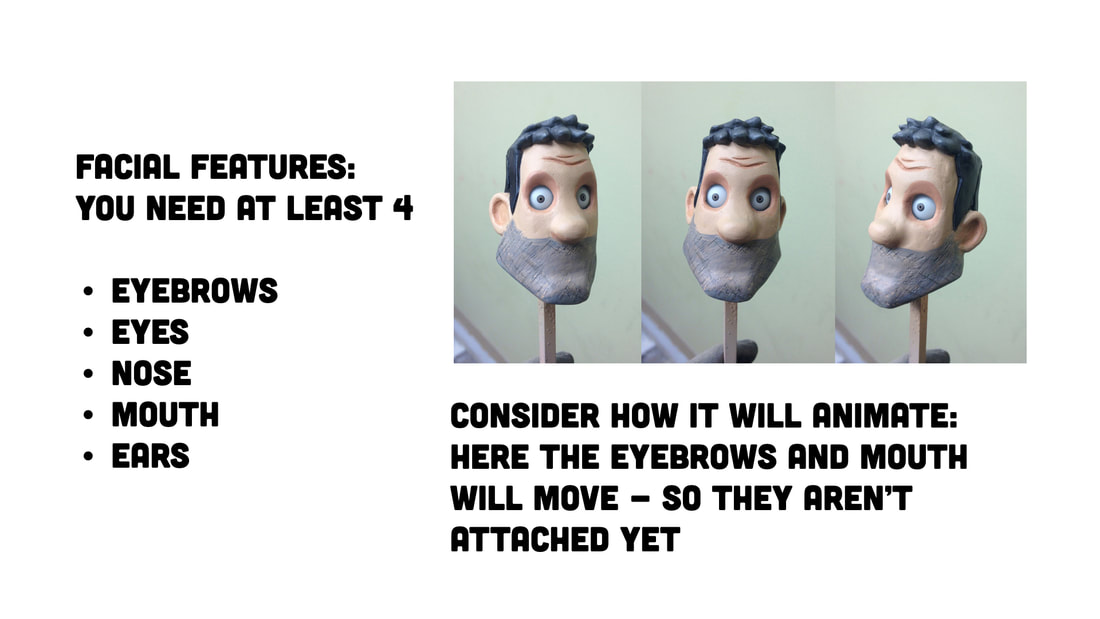
Facial Features
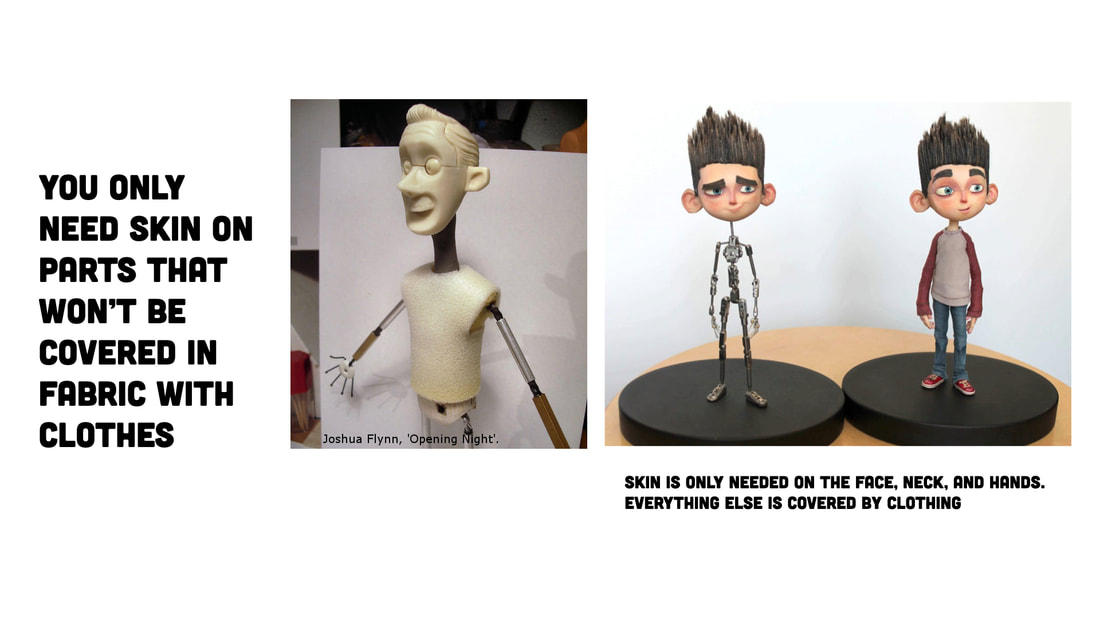
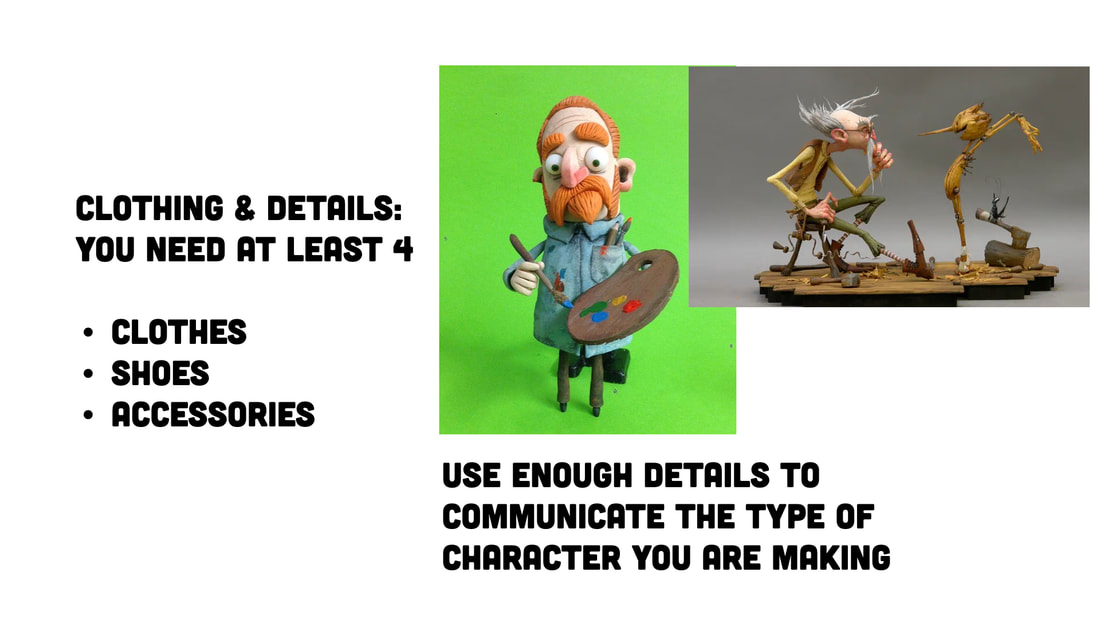
Clothing, Skin, & Details
4 Photos of your Puppet
Email an Image of Your Project
|
Grading Criteria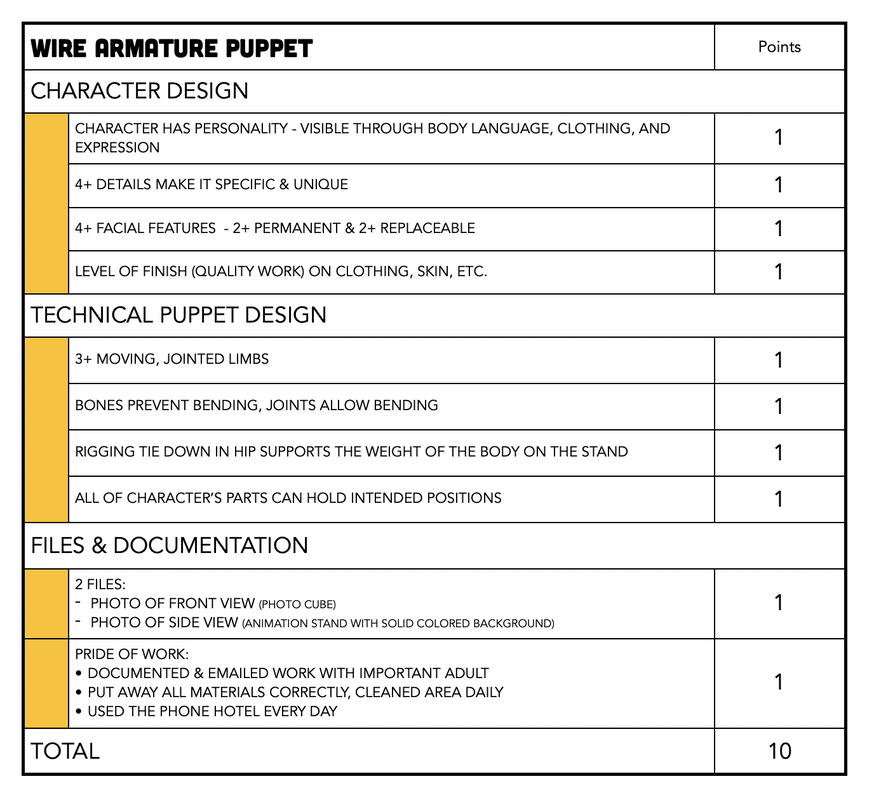
|
