
|
|
Paper Maché SkullsStudents will work in a group of up to four students to create a large paper maché skull sculpture.
This unit has five parts: research and design (designing a project, collaborating with teammates), prototype (individual life size paper skull sculpture), final design in paper maché, paint, and tissue paper, documentation of the finished work (photos, looping GIF, email, reflection, and critique), and display (Dia de los Muertos celebration). |
Overview Unit Goal
Composition Concepts
|
|
Technical Skill VideosResource Book Notes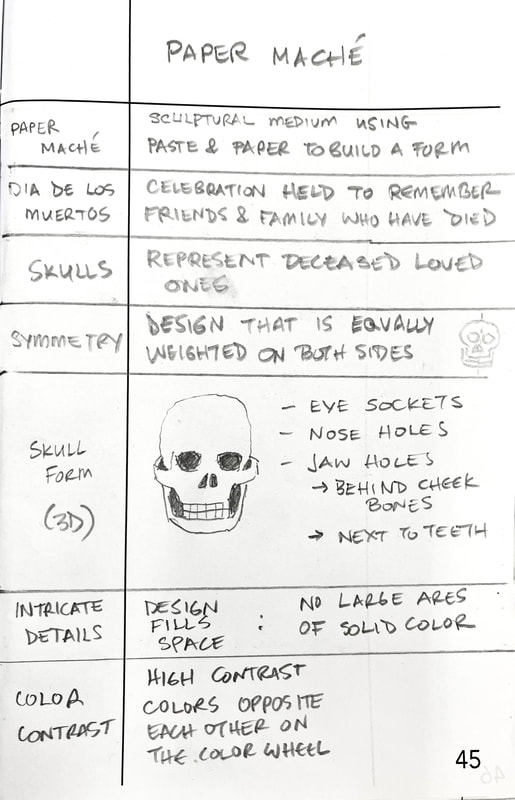
|
Order of WorkDetermine Your Design
|
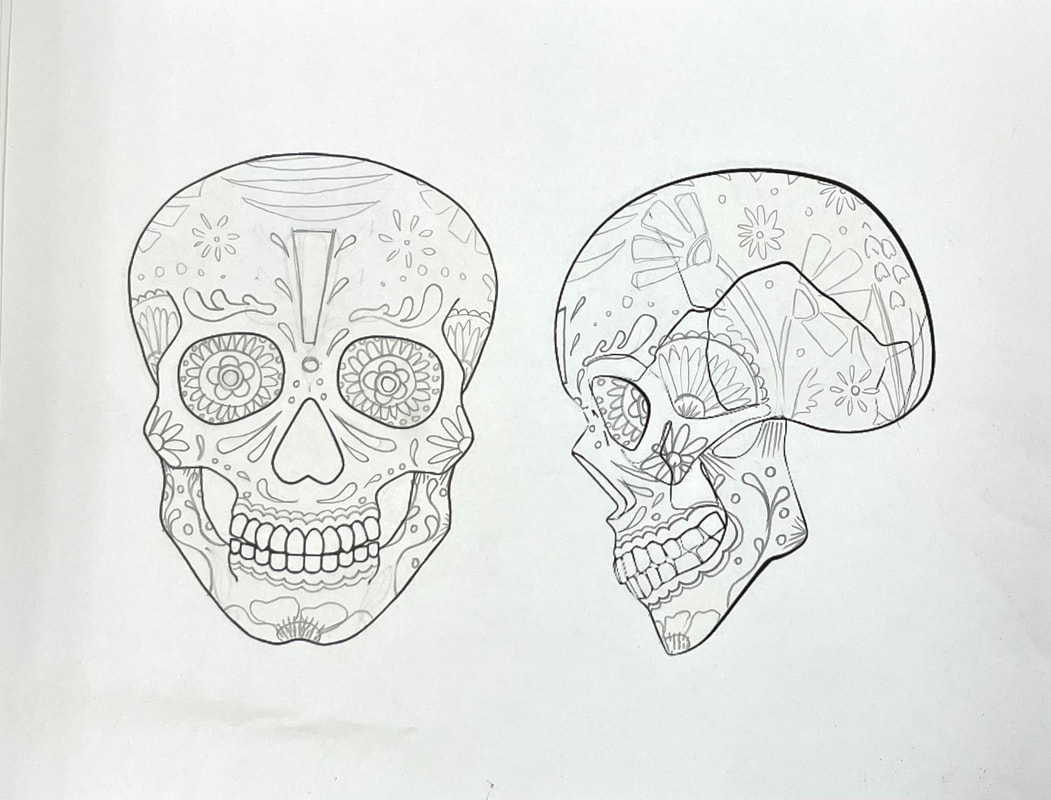
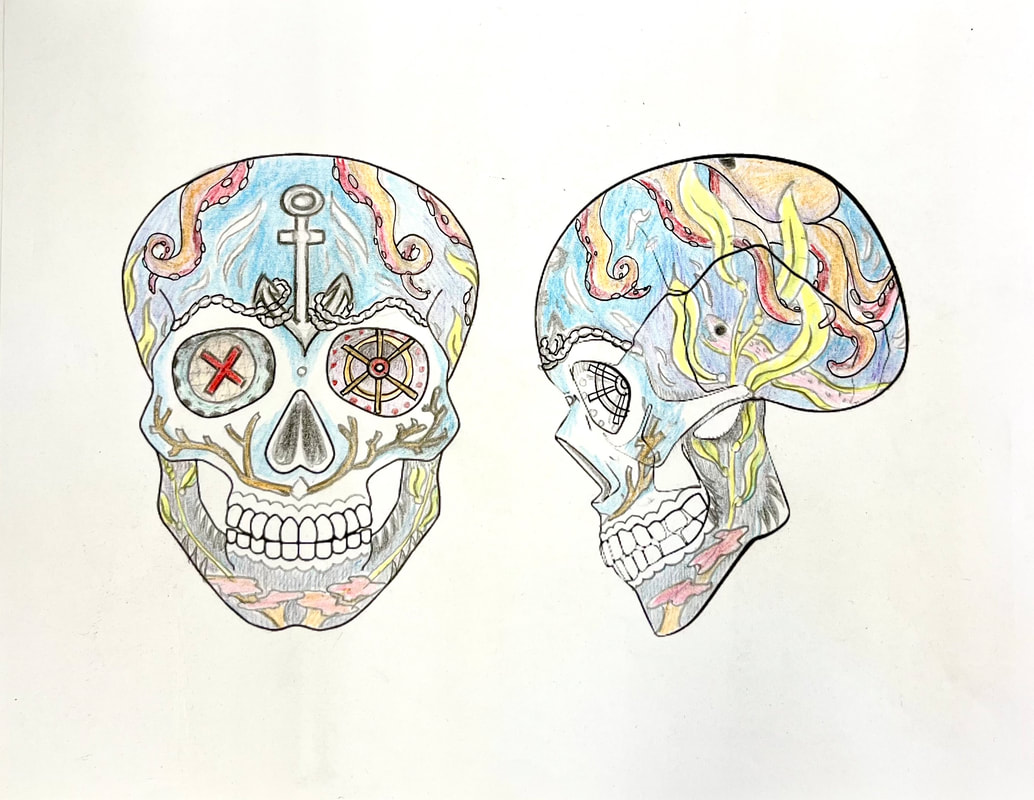
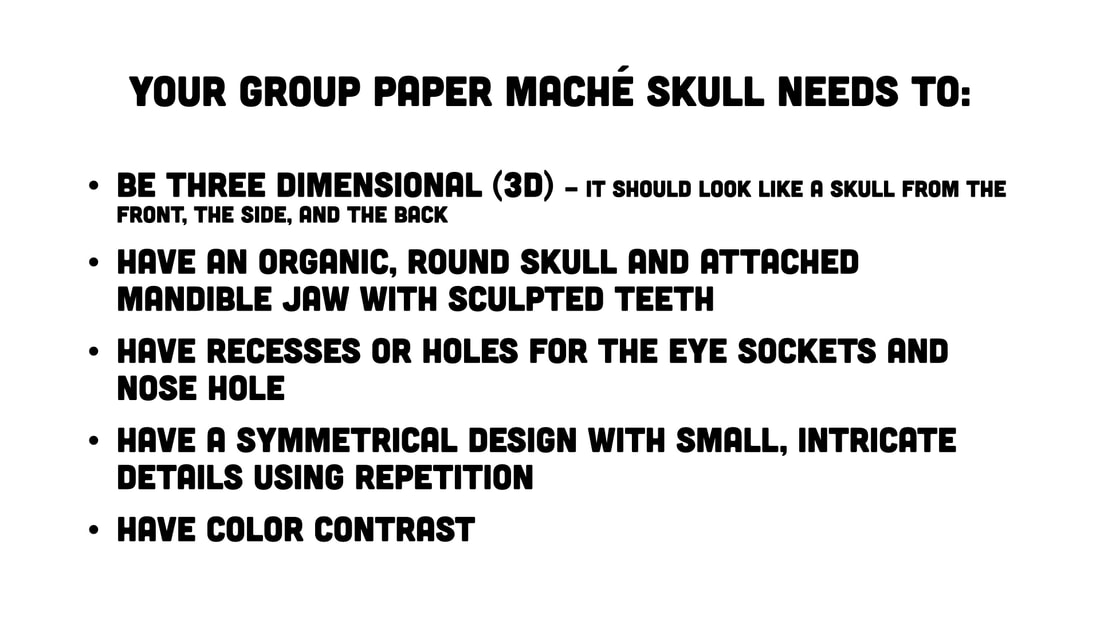
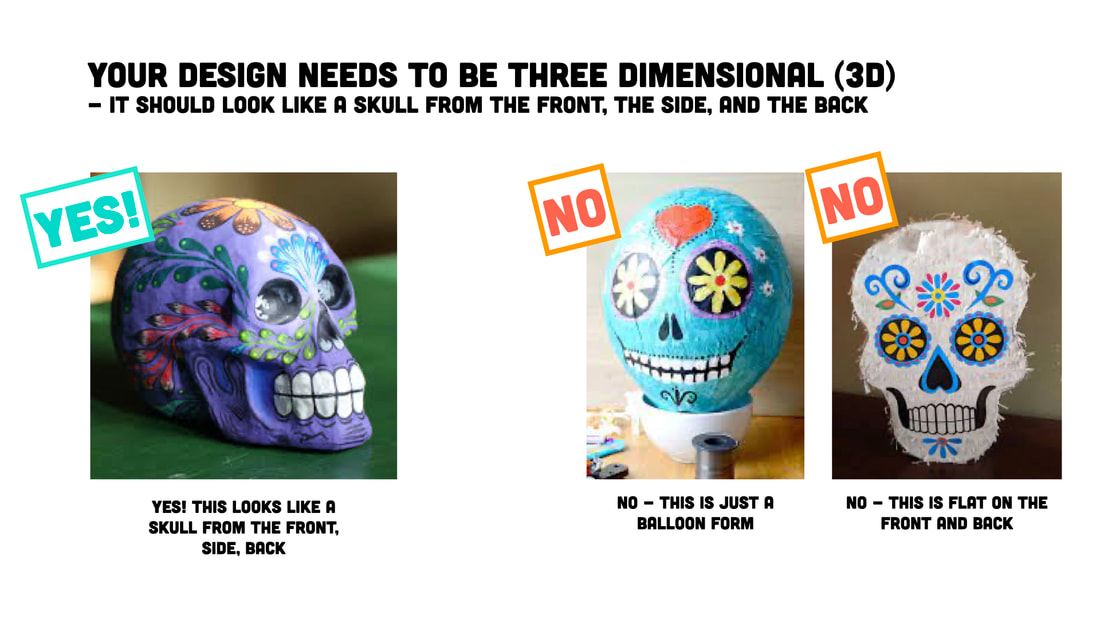
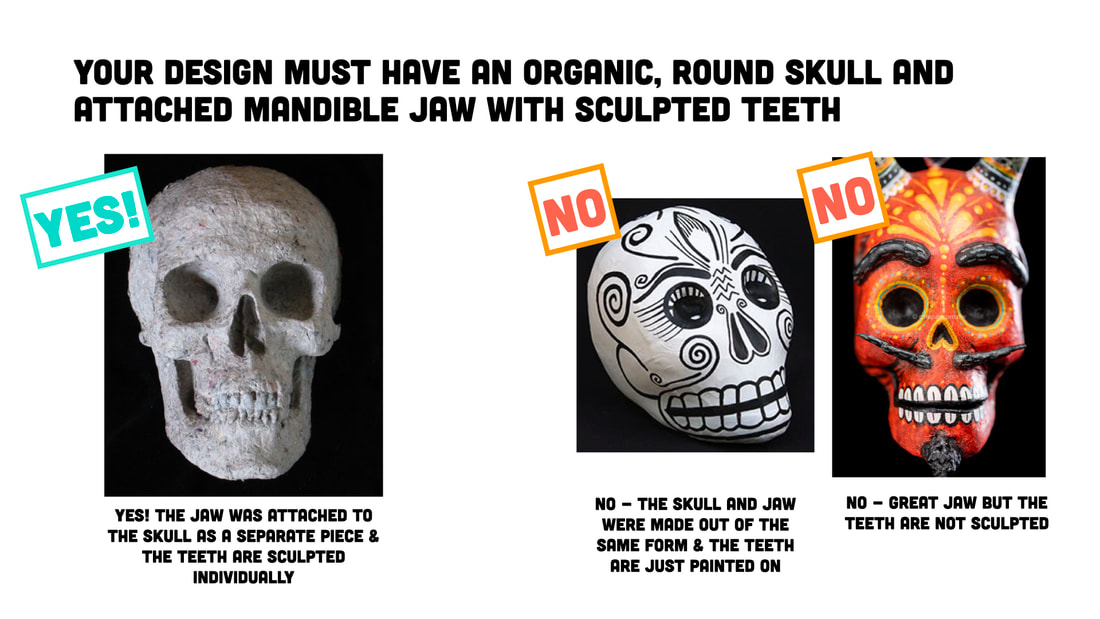
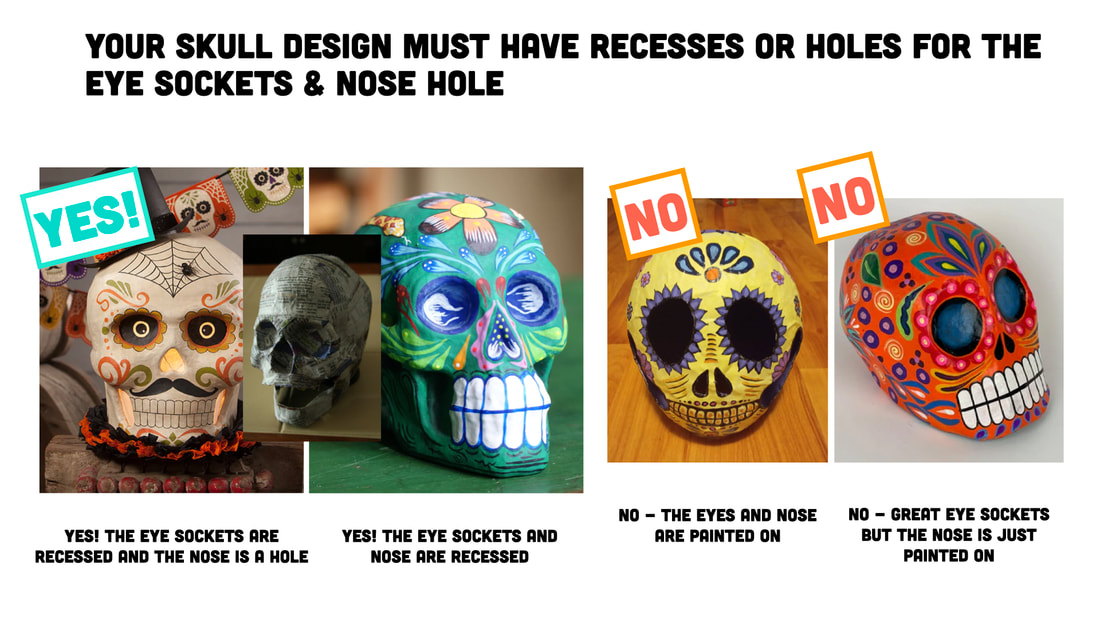
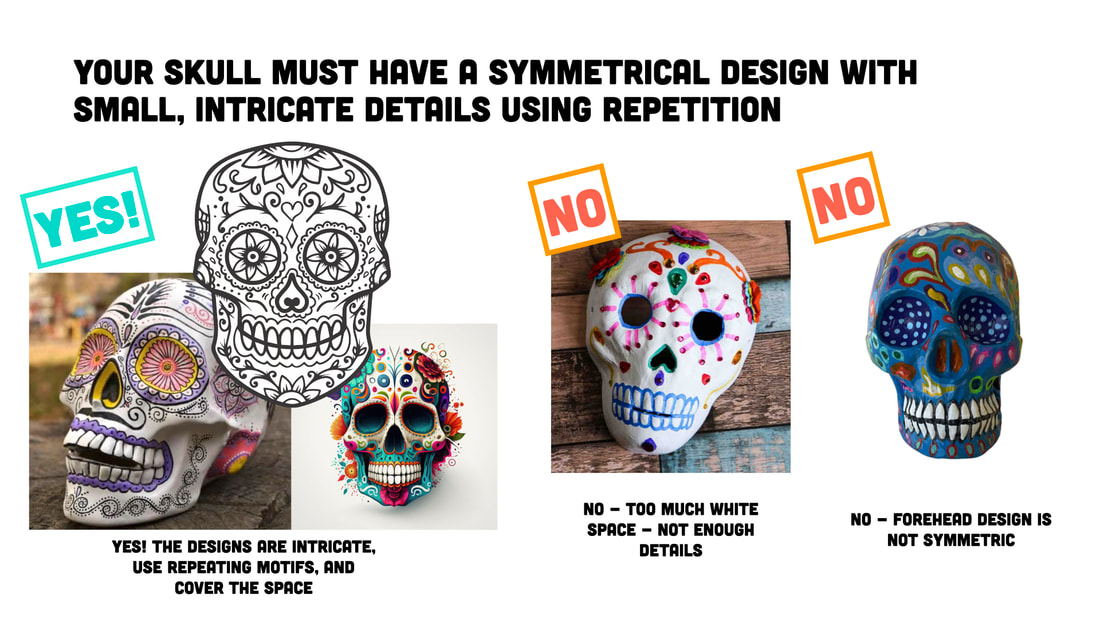
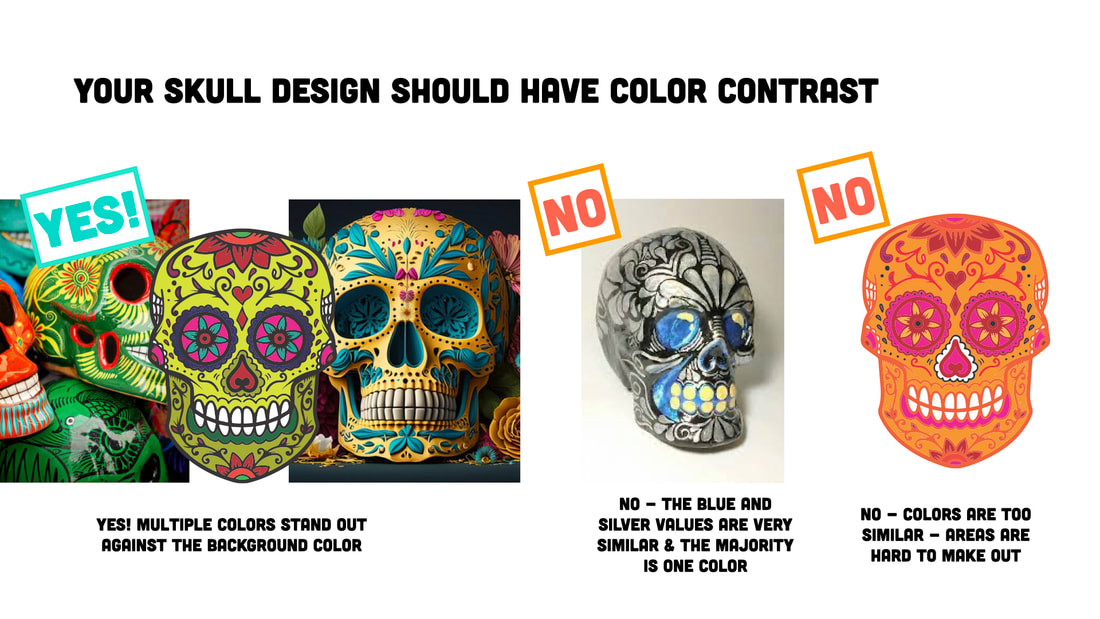
Skull Sculpture Criteria
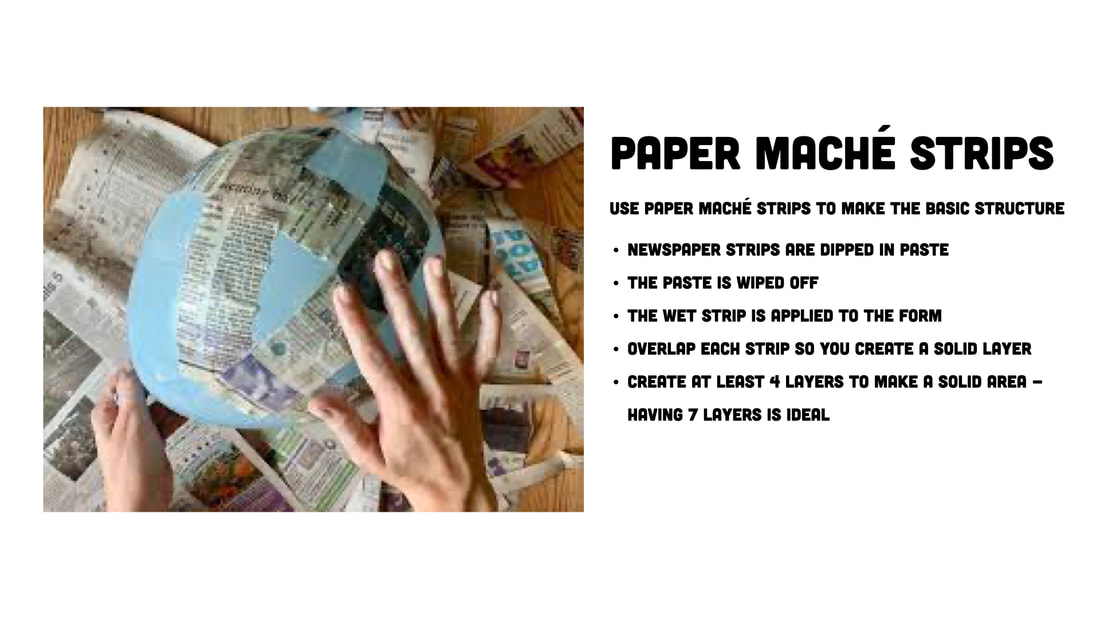
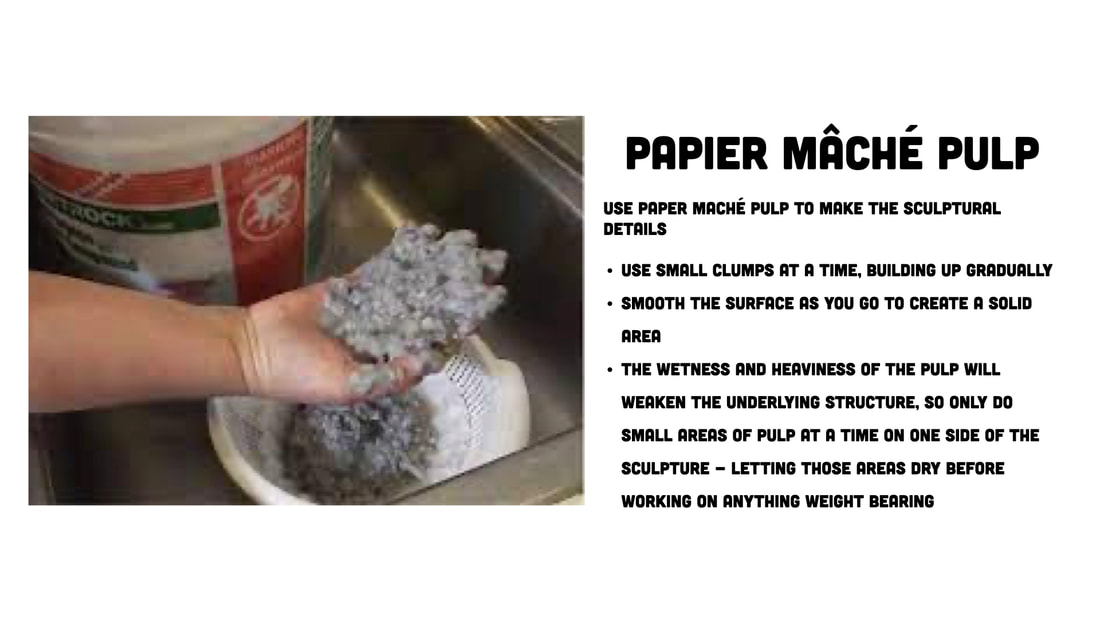
Paper Maché
|
|
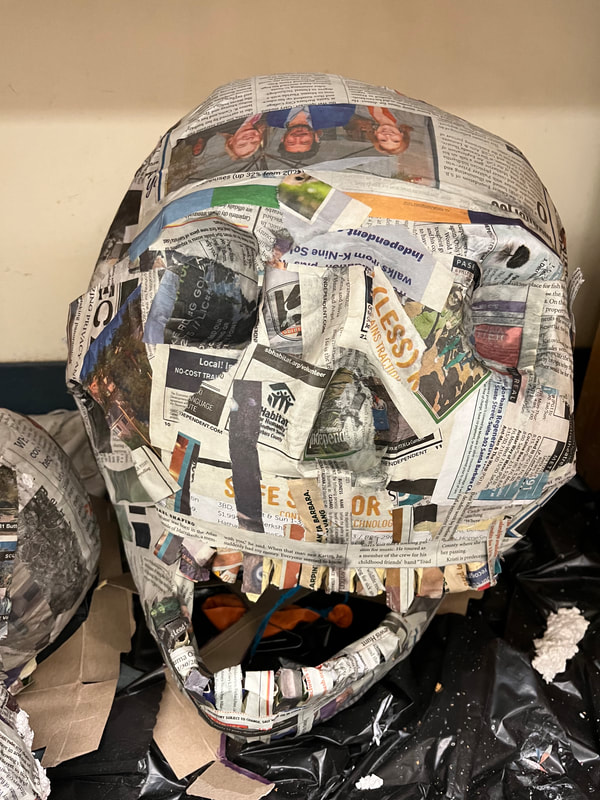
USE PAPER MACHE STRIPS TO MAKE THE BASE SCULPTURE
USE PAPER MACHE PULP TO ADD SCULPTURAL DETAILS DO NOT USE PULP TO MAKE AN ENTIRE JAW |
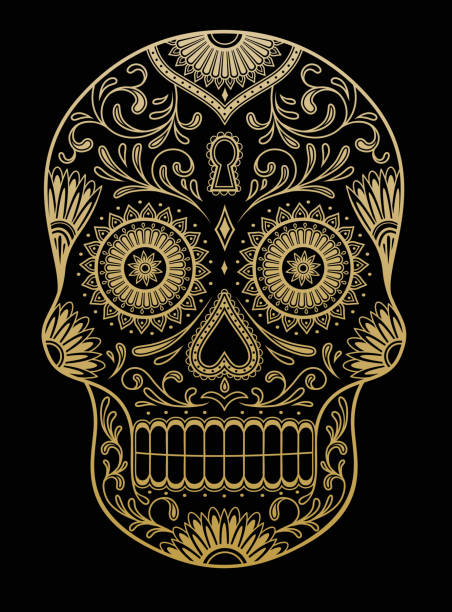
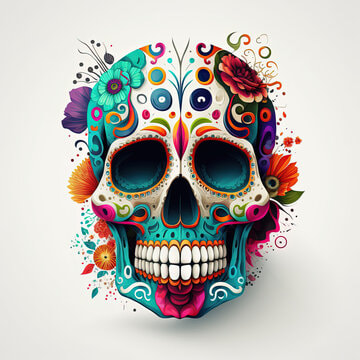
Skull Detail Ideas

Steps
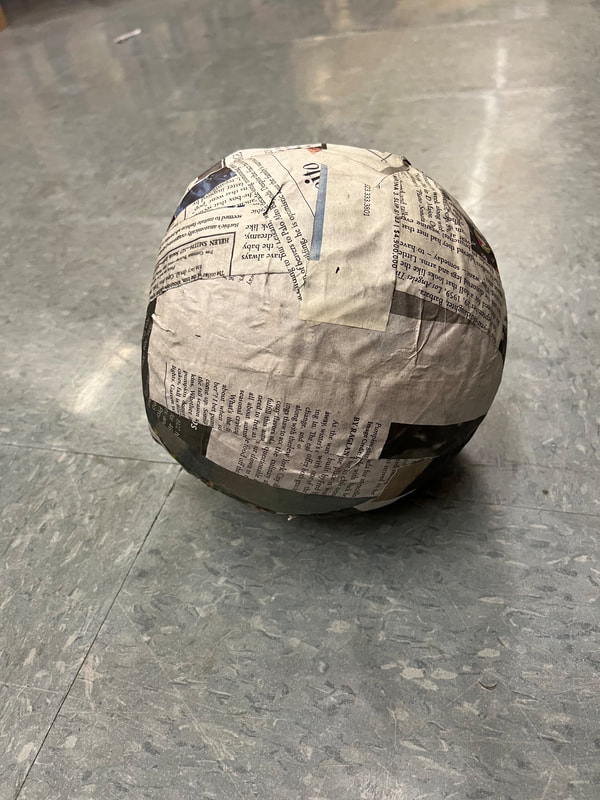
PAPER MACHE A BALLOON
|
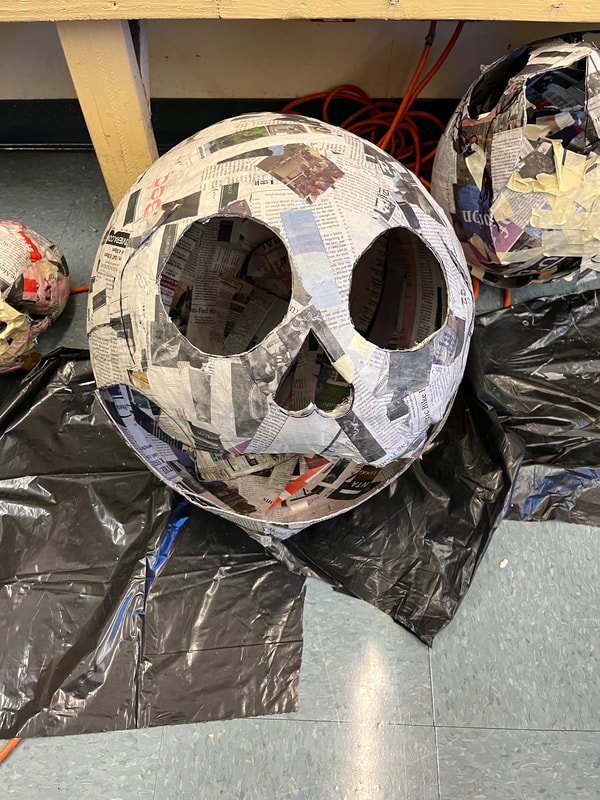
CUT OUT THE EYES & NOSE - MAKE CHEEK BONE SLITS & CUT UPPER JAW
|
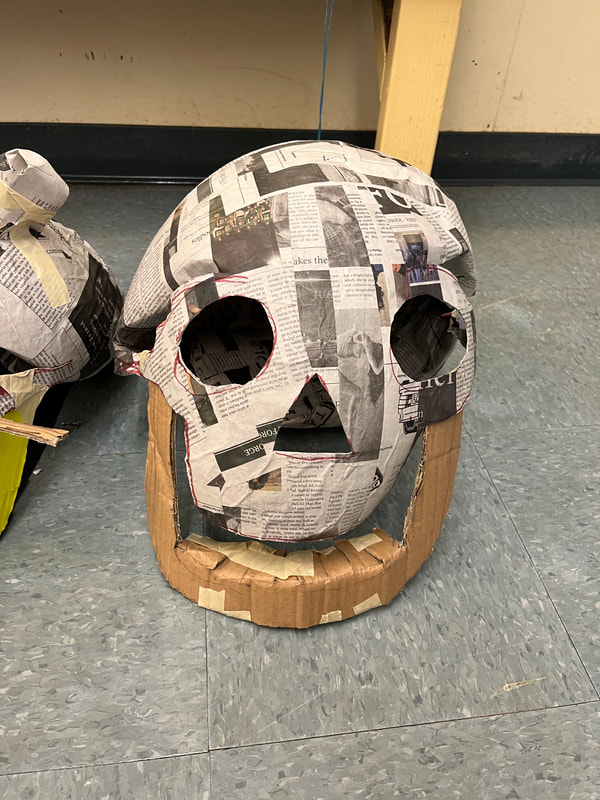
CREATE & ATTACH LOWER JAW
|
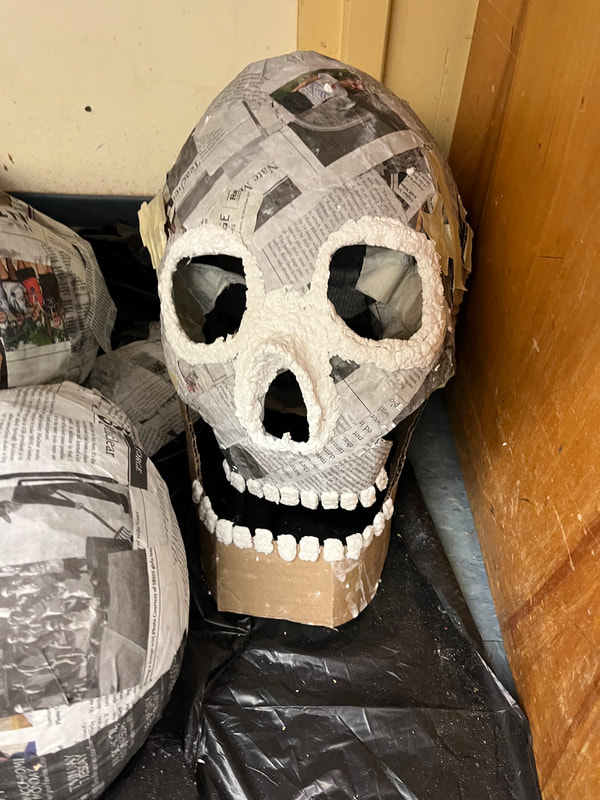
ADD PROTRUDING PARTS (EYEBROW RIDGE, NOSE RIDGE, TEETH) - CAN BE CEREAL BOX OR PULP
|
CREATE EYE SOCKETS & RECOVER WITH PAPER MACHE
|
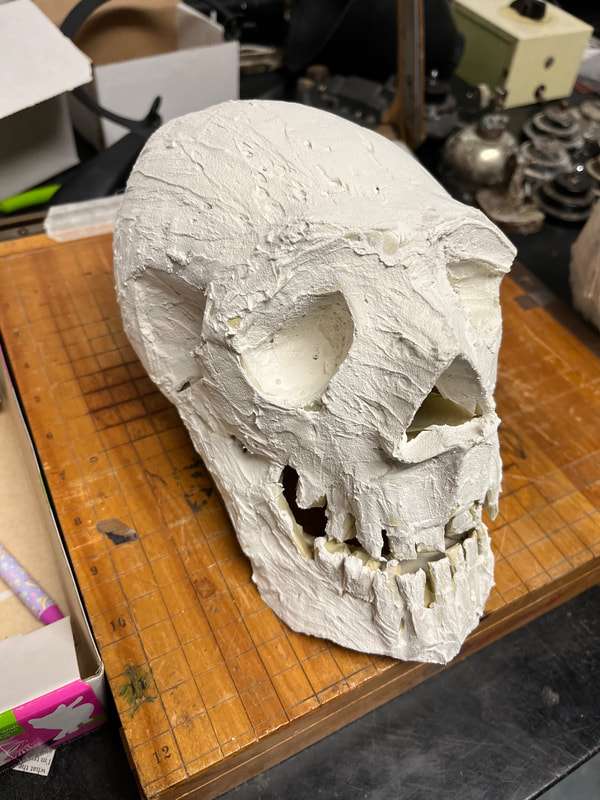
ADD A THIN LAYER OF JOINT COMPOUND
|
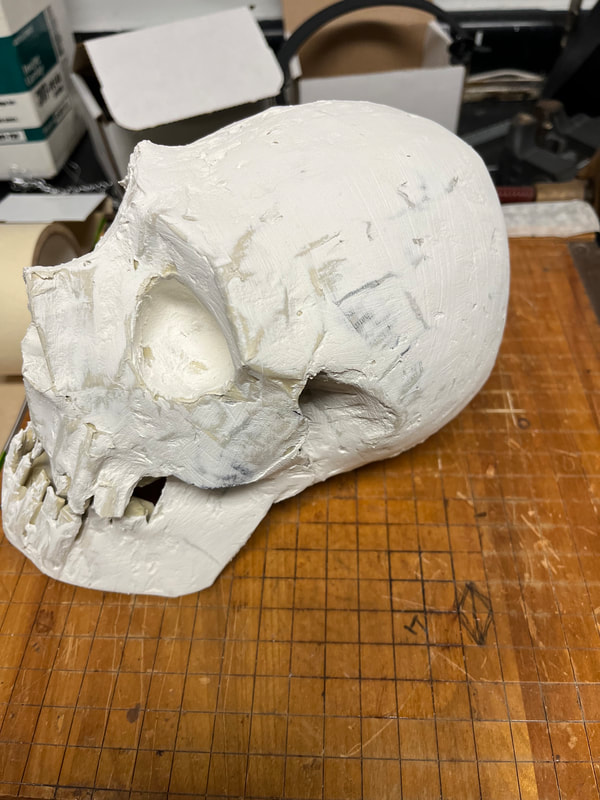
SAND DOWN THE TEXTURE FROM THE JOINT COMPOUND
|
Documenting your Skull Sculpture
Email an Image of Your Project
|
Grading Criteria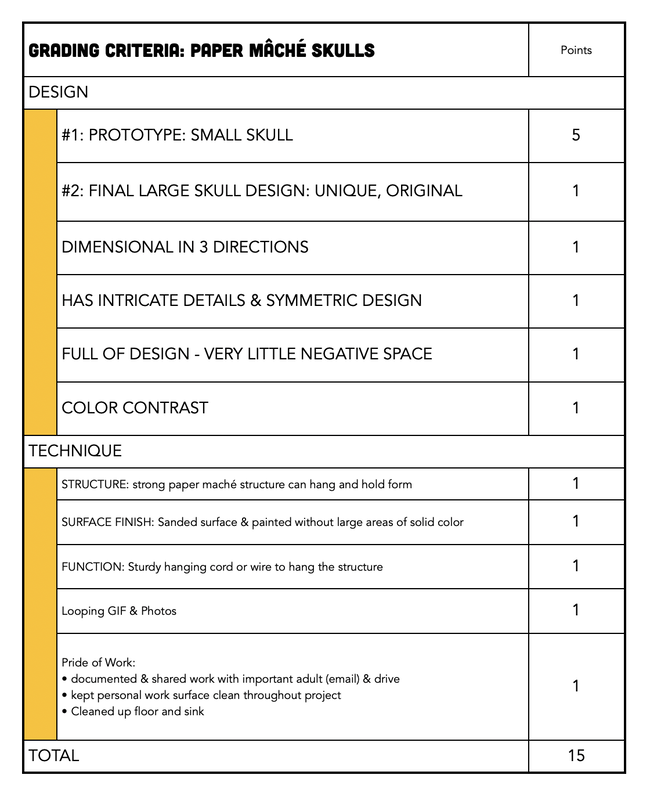
|
