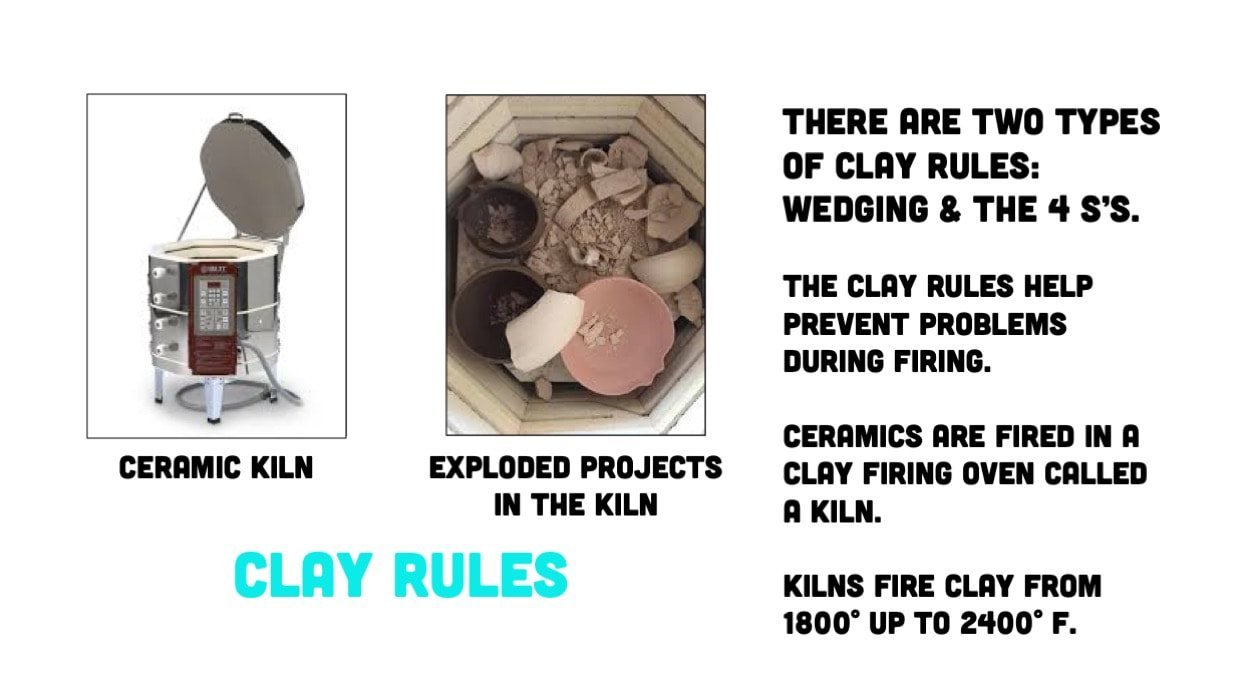
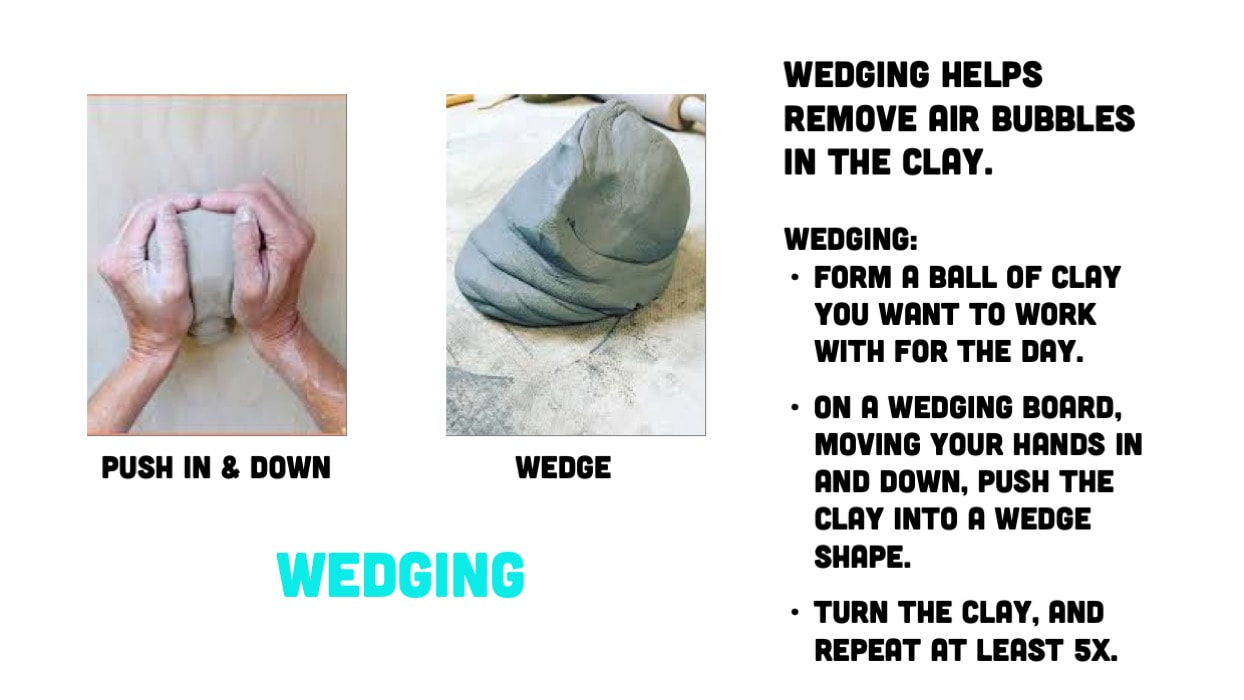
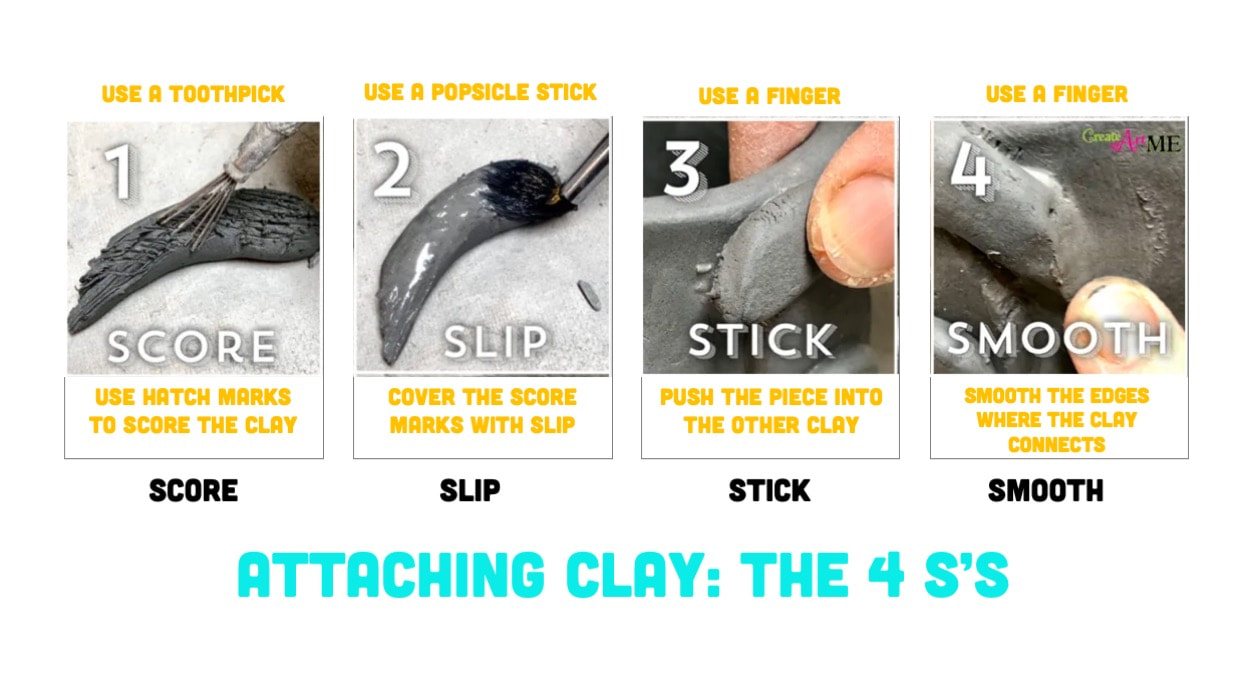
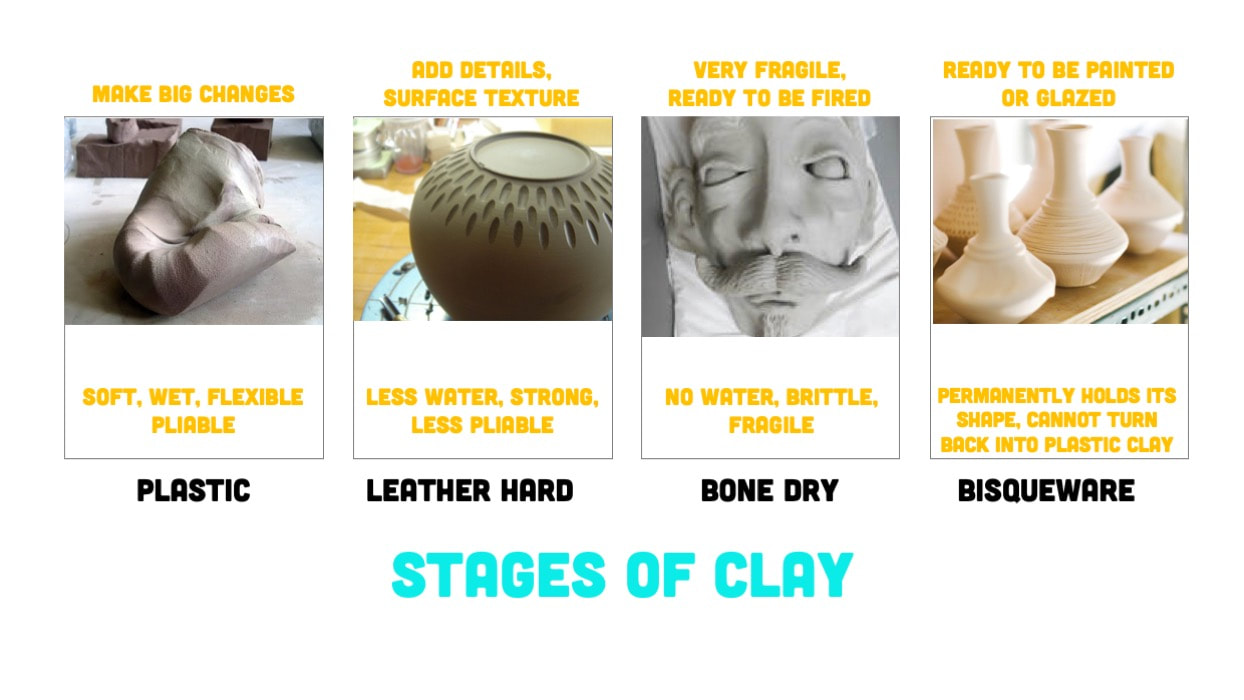
art with ross
  • Home
  • Sculpture
  • Advanced Sculpture
  • Sculpture for Animation
  • Art Terminology
    • Art Term - Line
    • Art Term - Shape
    • Art Term - Form
    • Art Term - Color
    • Art Term - Value
    • Art Term - Texture
    • Art Term - Space
    • Art Term - Balance
    • Art Term - Contrast
    • Art Term - Dominance
    • Art Term - Pattern
    • Art Term - Movement
    • Art Term - Rhythm
    • Art Term - Variety
    • Art Term - Unity
    • Art Term - Style
    • Art Term - Perspective
    • Art Term - Vantage Point
    • Art Term - Graphic Design
    • Art Term - Hand Lettering
    • Art Term - Drawing Styles
    • Art Term - Shading
    • Art Term - Ceramics
    • Art Term - Painting
  • GHS
    • Field Trips
    • Intro
    • Motion
    • Printmaking
    • AP
    • Gallery
    • Other Art Classes
    • Distance Learning
    • AP 2019
    • Enrichment

CERAMICS

Picture
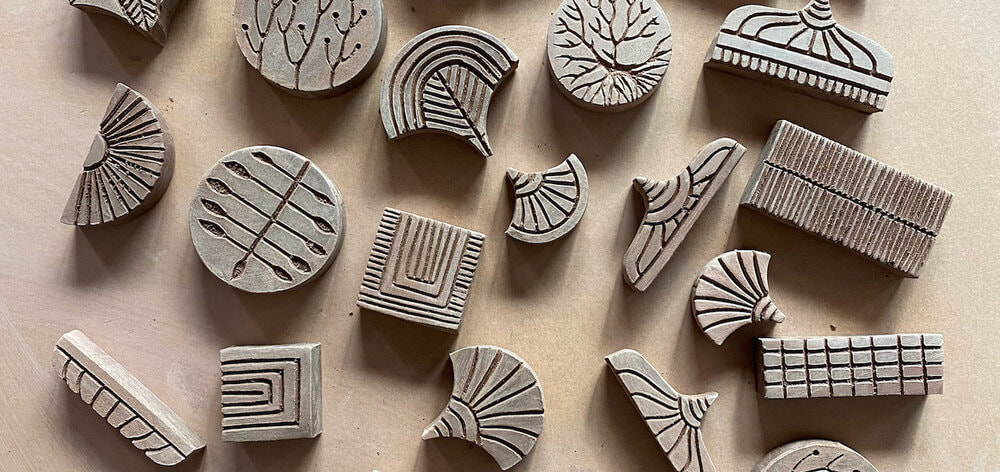
CARVE YOUR WOODEN STAMP
Picture
ROLL OUT A SLAB
Picture
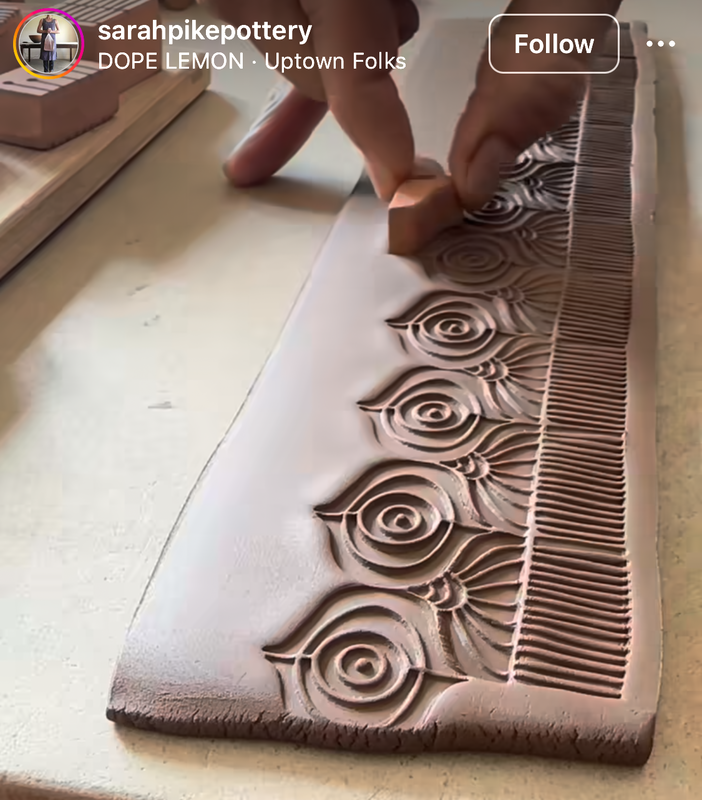
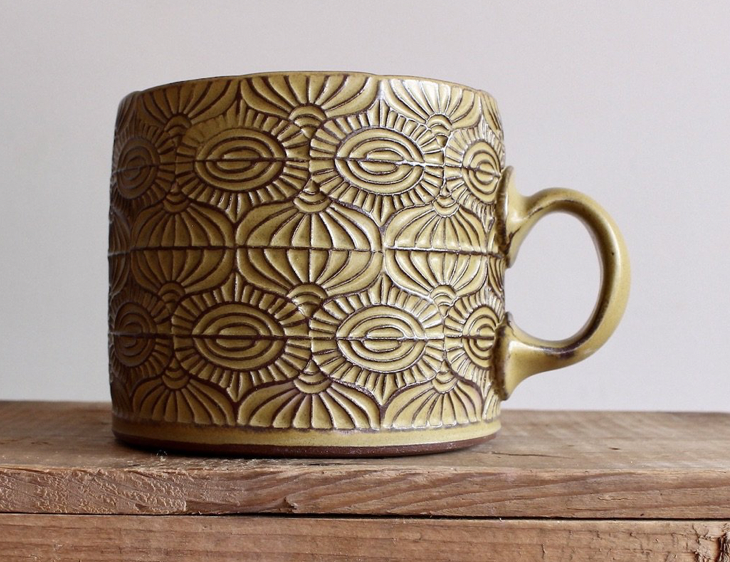
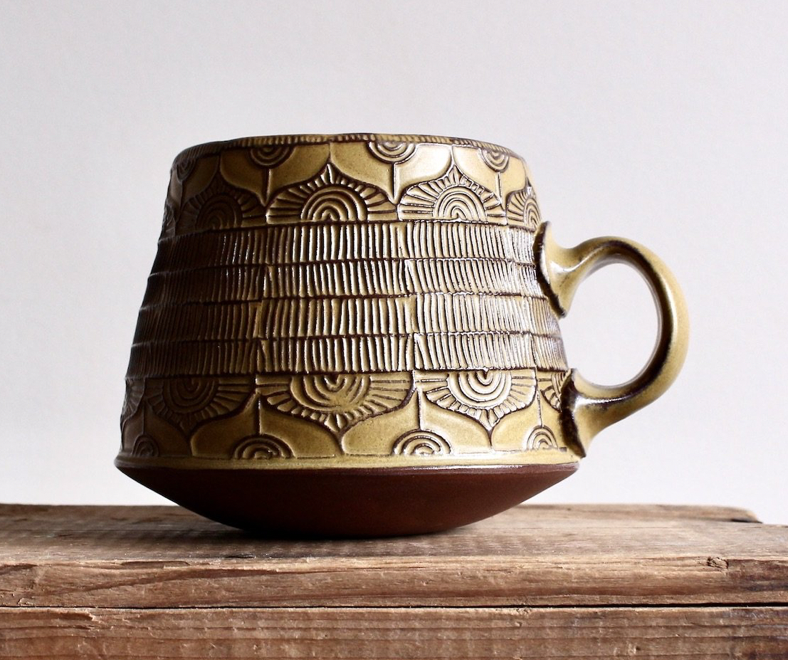
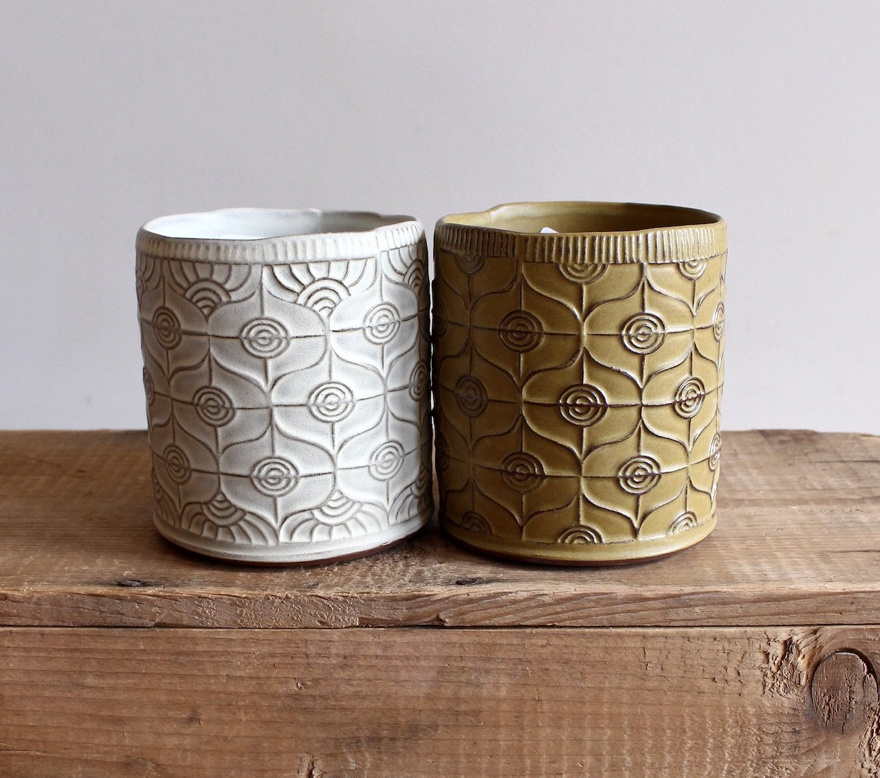
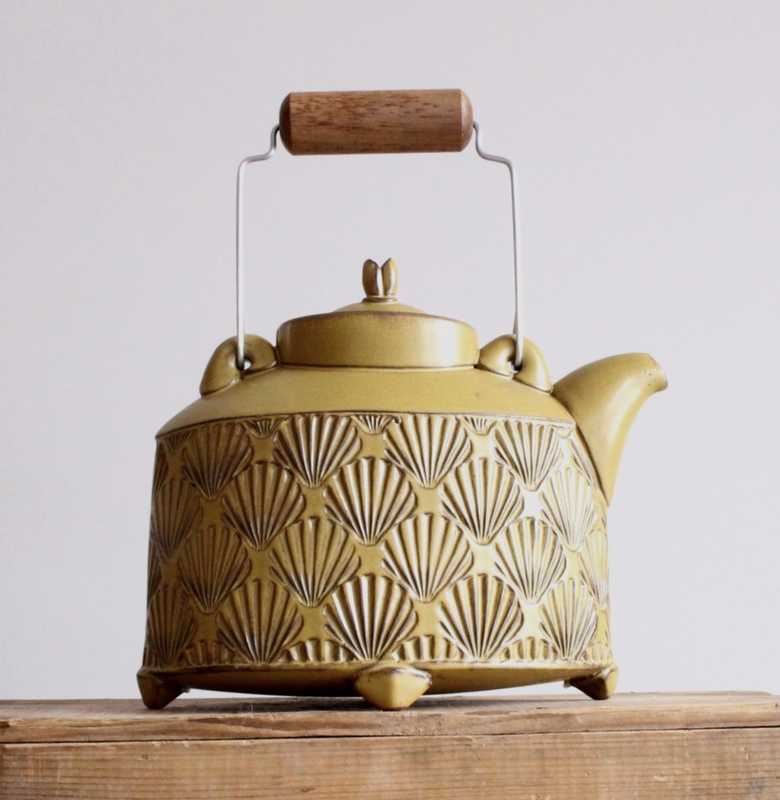
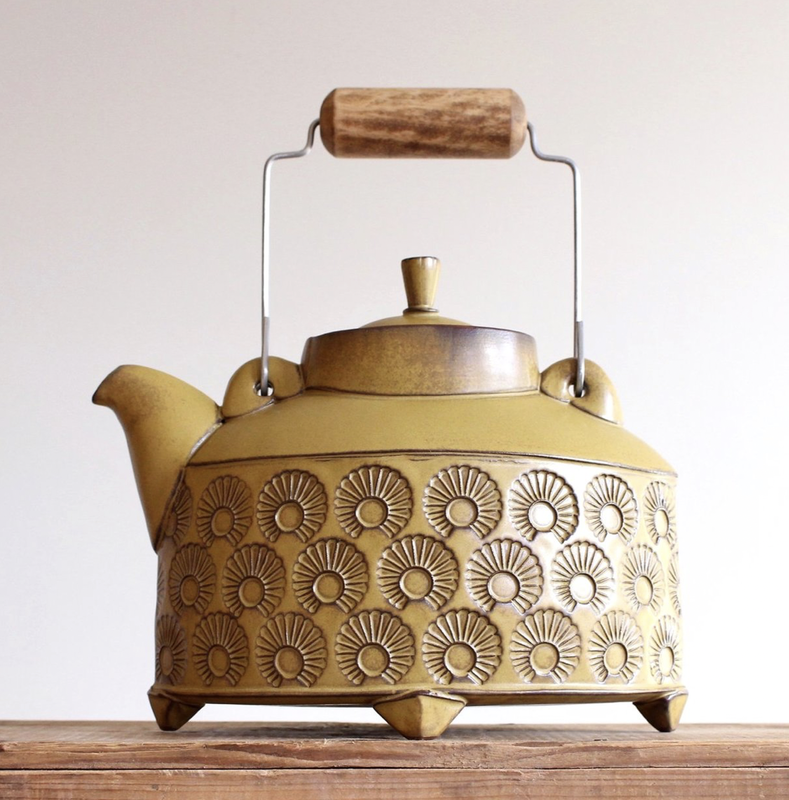
MAKE A DESIGN IN THE SLAB WITH THE STAMPS
Picture
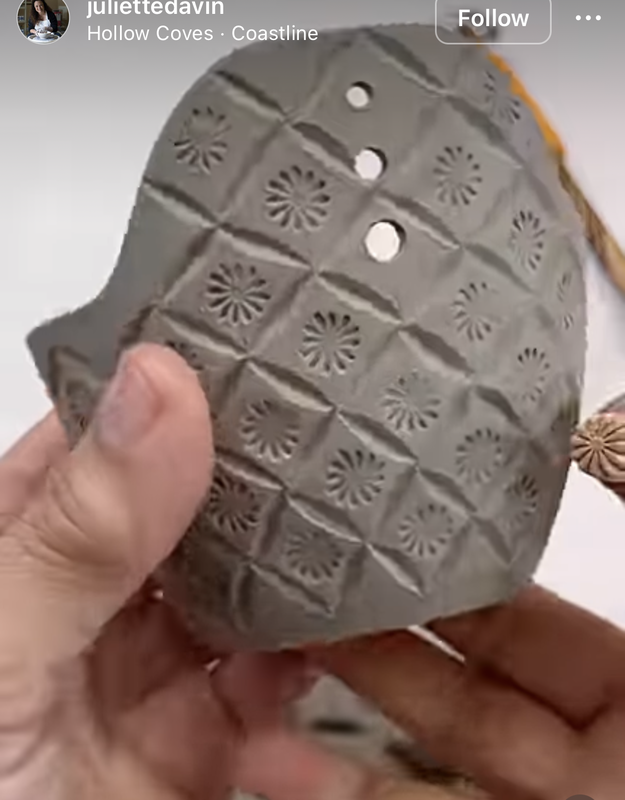
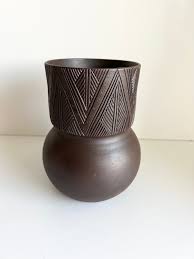
YOU CAN ALSO MAKE YOUR FORM FIRST AND THEN STAMP
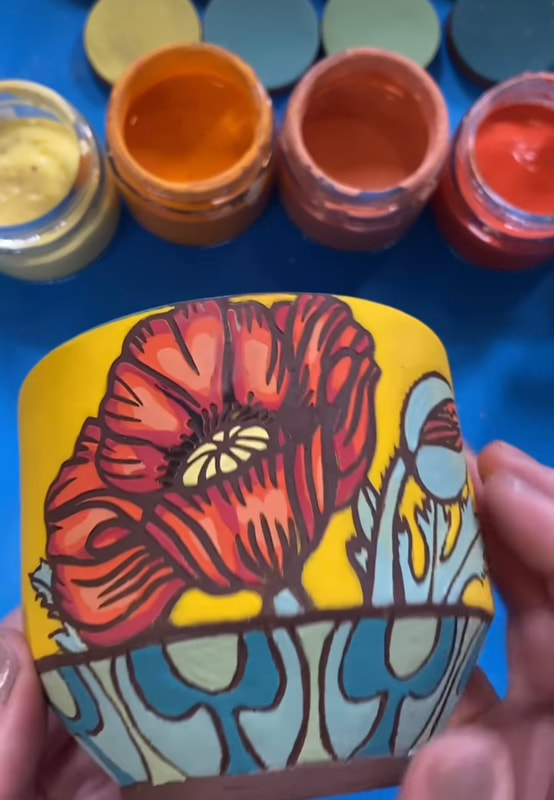
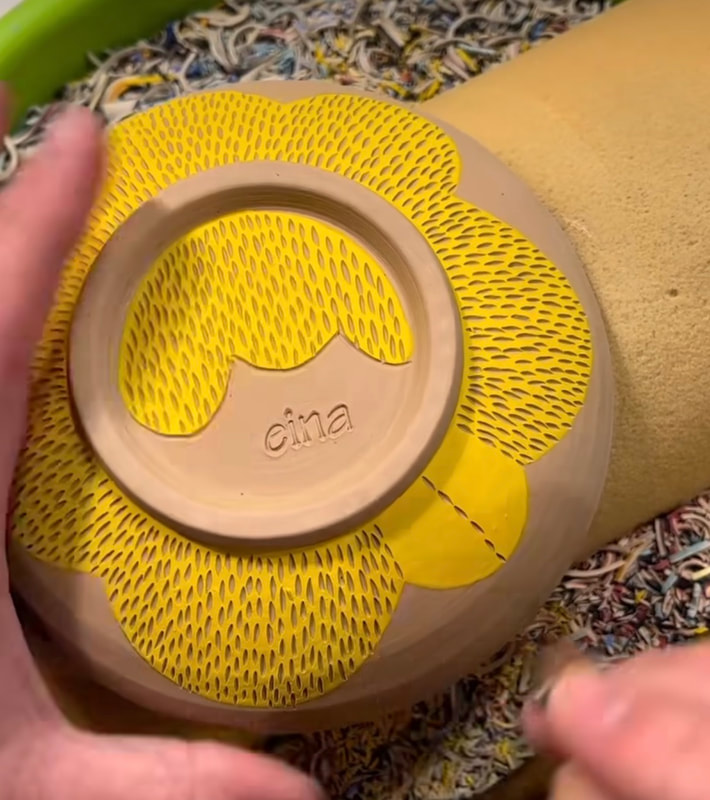
Picture
APPLY UNDERGLAZE
Picture
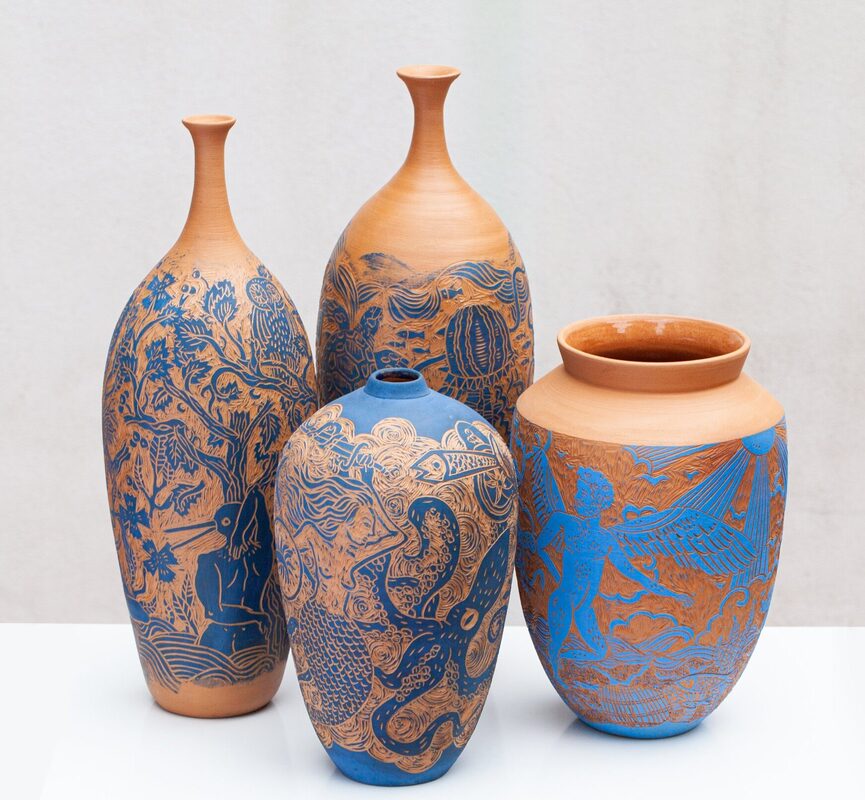
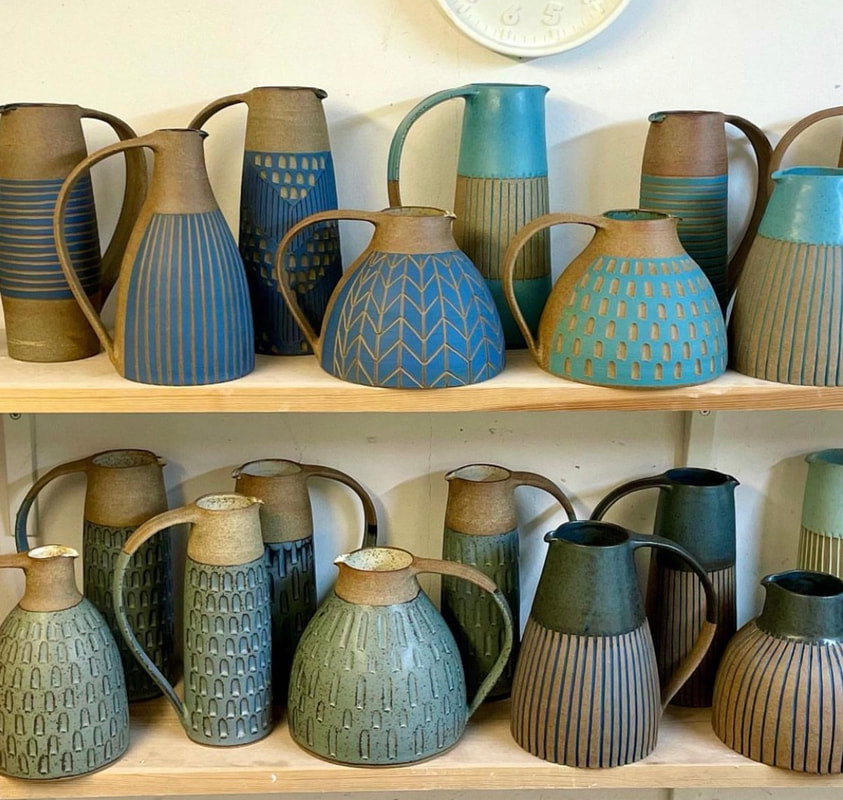
YOU CAN ALSO UNDERGLAZE AND THEN REMOVE CLAY TO CREATE A DESIGN
Picture
YOU CAN CARVE TEXTURES INTO THE GLAZE TO CREATE CONTRAST


TECHNICAL SKILLS VIDEOS

SARAH PIKE TEXTURED SLAB POTTERY
FLARED CUP FROM SLAB
MAKING STAMPS OUT OF CLAY
MAKING WOODEN STAMPS
ELLEN C DUVALL - UNDERGLAZE COLORS
MICHAEL WEISENER - PATTERN
MONOPRINTING GLAZE
TABLE LUMINARY CARVING
GLAZE STENCILS
UNDERGLAZE & SLIP TRAILING

INSTRUCTION

  • PLAN OUT YOUR PROJECT DESIGN (mug, cup, bowl, pitcher, bird feeder, spoon rest, etc.)
  • CARVE A WOODEN STAMP (use a speedball Lino cutter, be cognizant of your fingers, carve away from yourself and your other hand, use a vise as needed)
  • ROLL OUT A SLAB (use a slab mat and rolling pin to roll out your clay - 1/8 to 1/4 inch thickness)
  • STAMP DESIGN (using your wooden stamp, and possibly other students' stamps, make a pattern on your clay slab)
  • FORM BASIC FORMS (form your basic structure - use the 4 S's to attach clay - Score, Slip, Stick, and Smooth; touch up the pattern on joints after the joints are well attached and smooth)
  • CLEANING UP SURFACE (spend some time make sure the surface is exactly how you want it - consider running a damp sponge over areas that need to be smoothed)
  • BETWEEN LEATHERHARD AND BONEDRY (dry out your project some, but not all the way - it should be firm but not yet fragile)
  • UNDERGLAZE (paint or flow underglaze in recessed areas - you can run a sponge over the raised areas to remove any glaze that got away from you)

ADVANCED IDEAS

  • CARVING INTO AREAS THAT ARE ALREADY GLAZED
  • PROJECTS WITH MORE COMPLICATED SHAPES
  • INTEGRATING METAL AND/OR WOOD INTO YOUR FINISHED CERAMICS PROJECT
  • STENCILS TO APPLY DIFFERENT AREAS OF GLAZE
  • CONTRASTING COLORED SLIP
Picture
Powered by Create your own unique website with customizable templates.