
|
Ceramic Phone Holder with an Additional FunctionThis project involves students creating hand-built ceramic phone holder with an additional function.
Students will learn ceramic building techniques: wedging, attaching clay with the four s's, slab, coil, pinch, as well as, focusing on surface quality. |
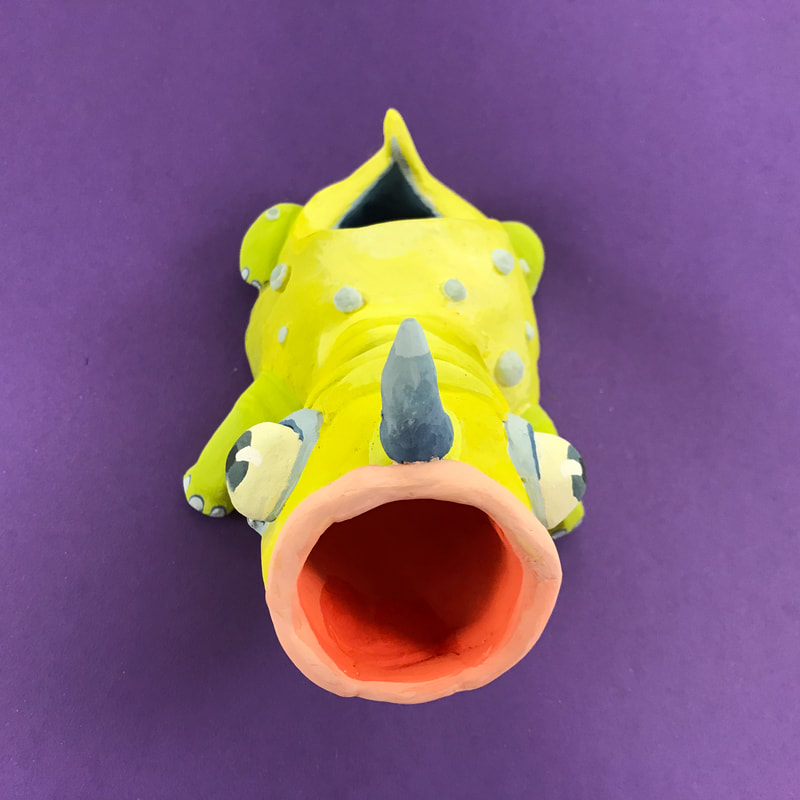
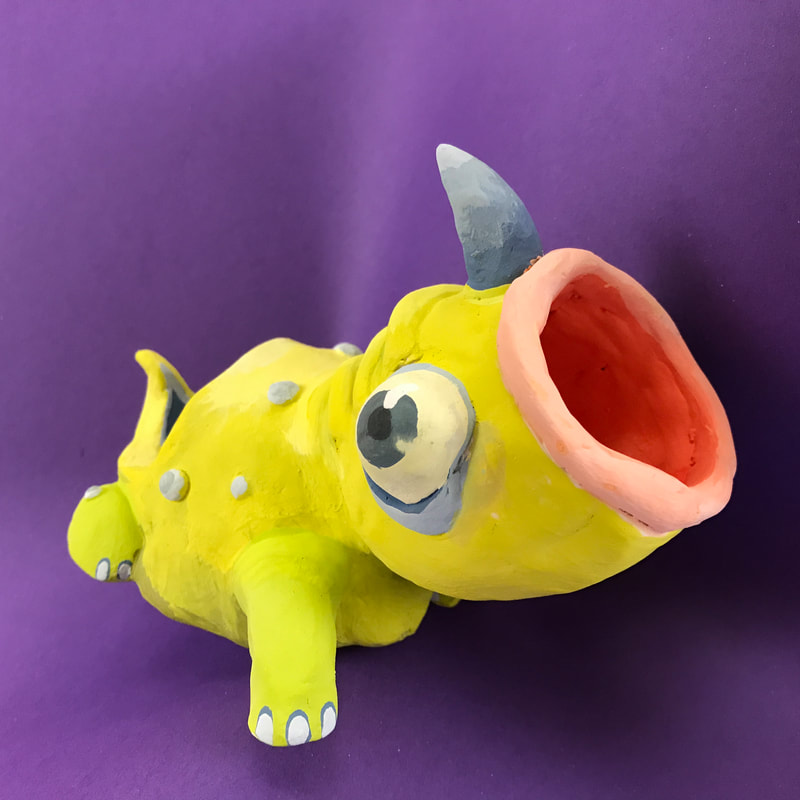
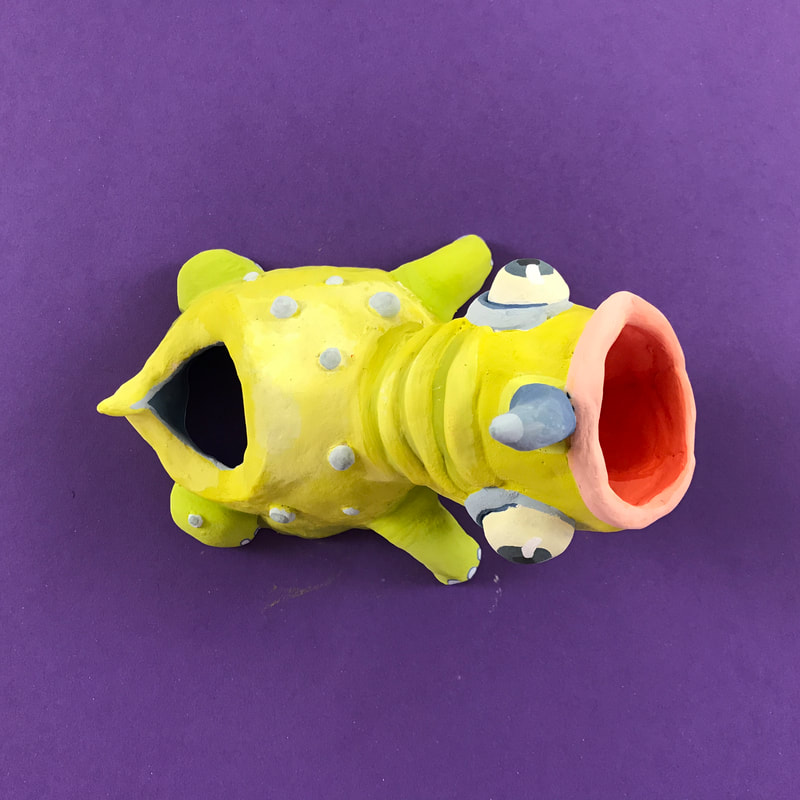
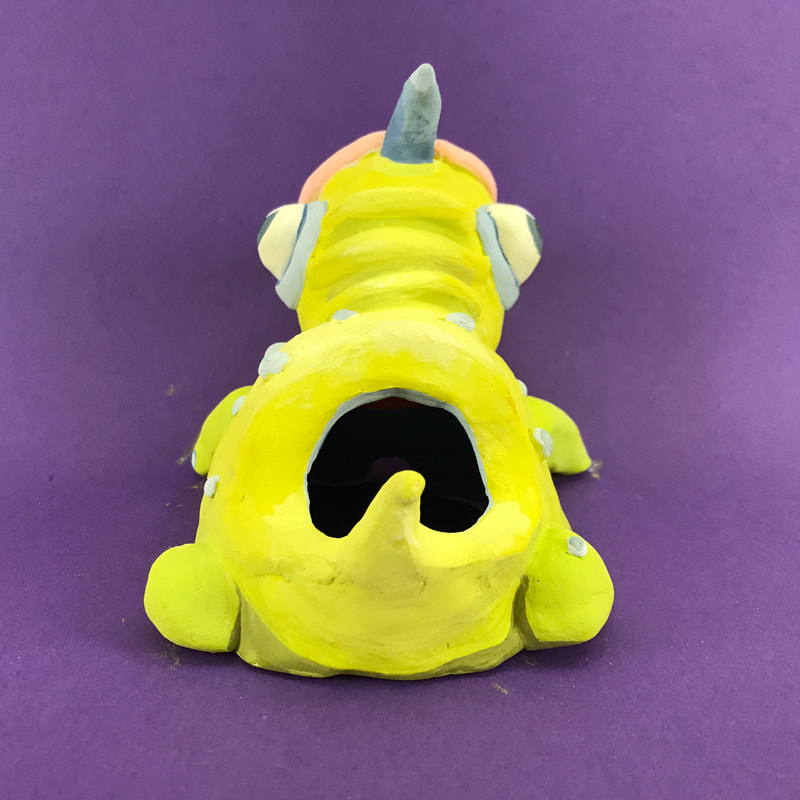
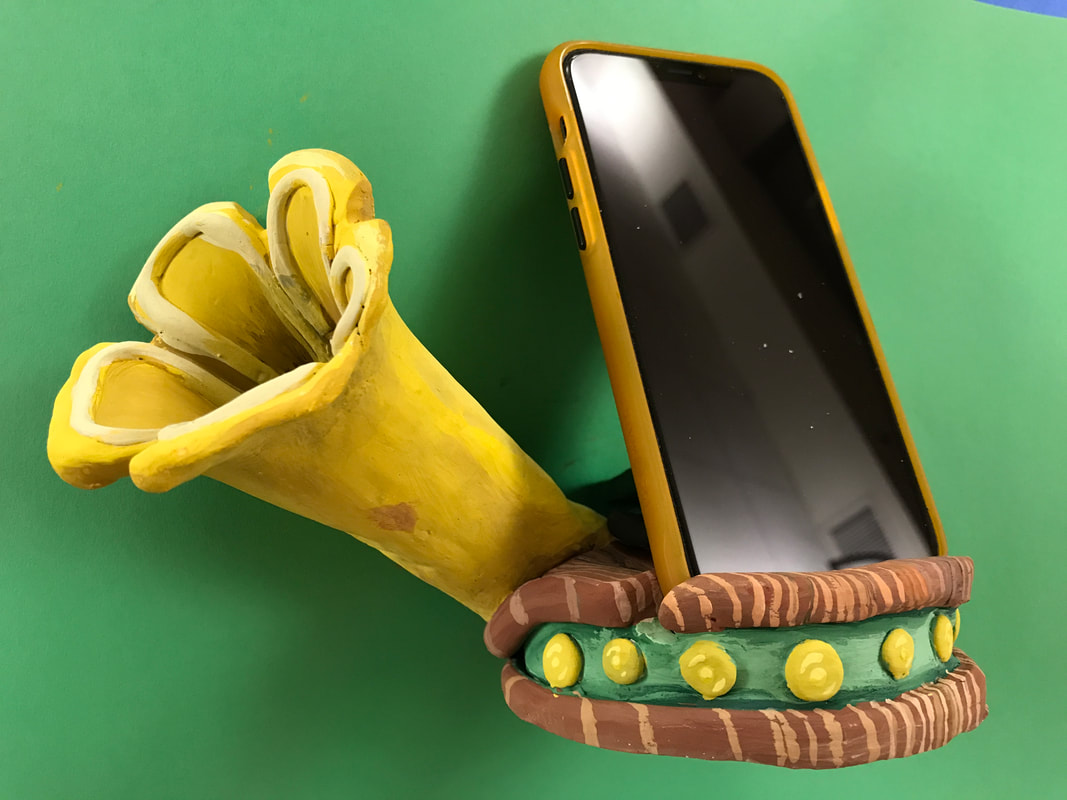
Ceramic Phone Holder has an Additional Function
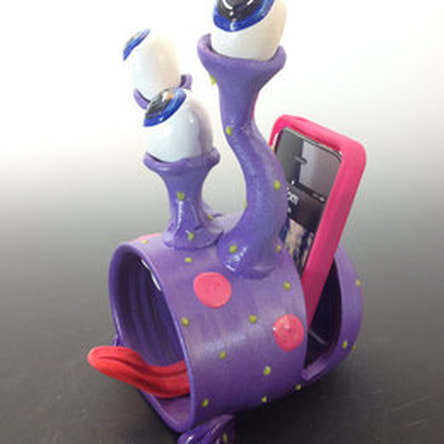
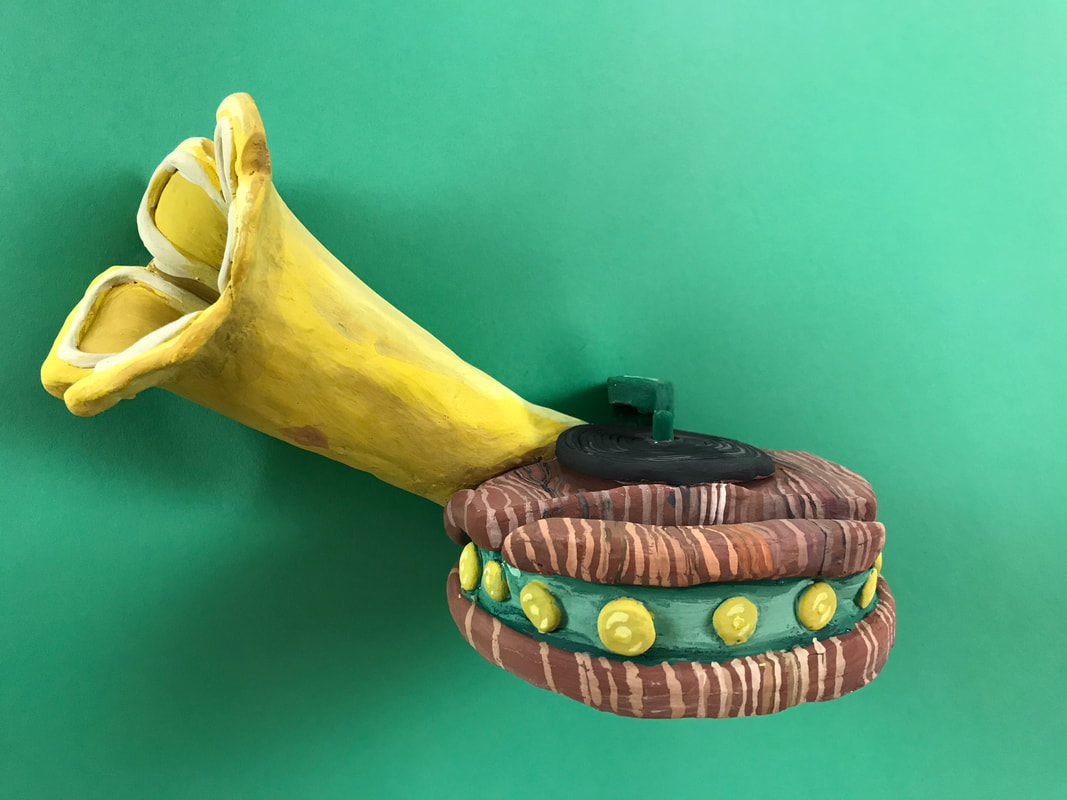
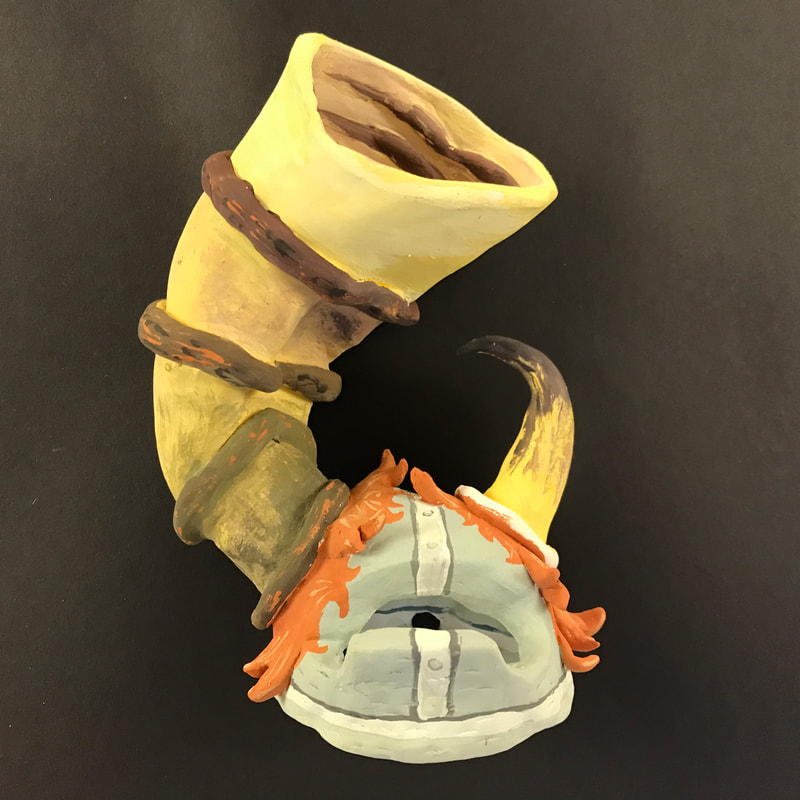
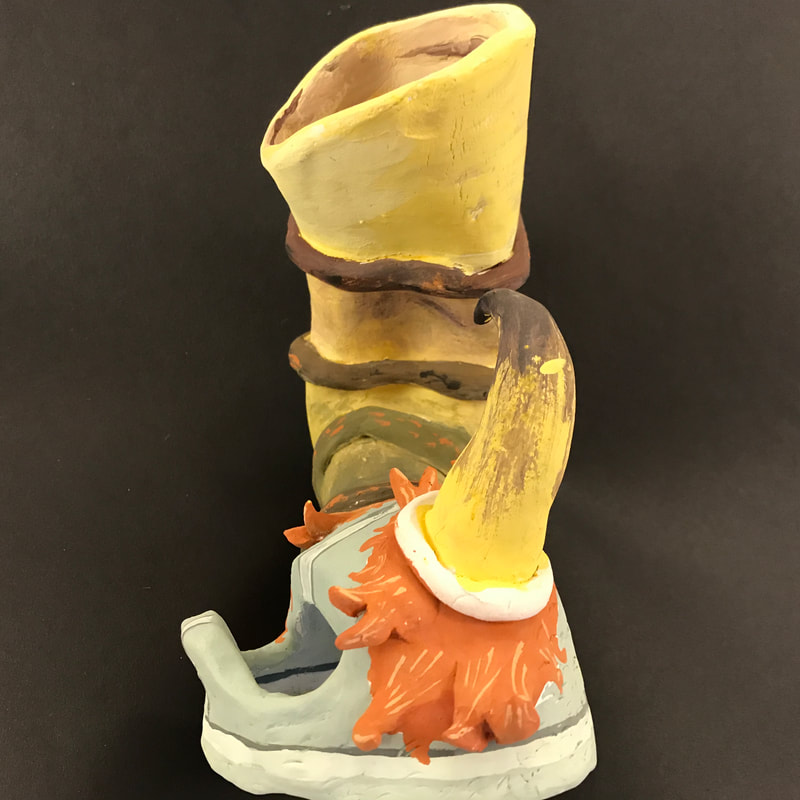
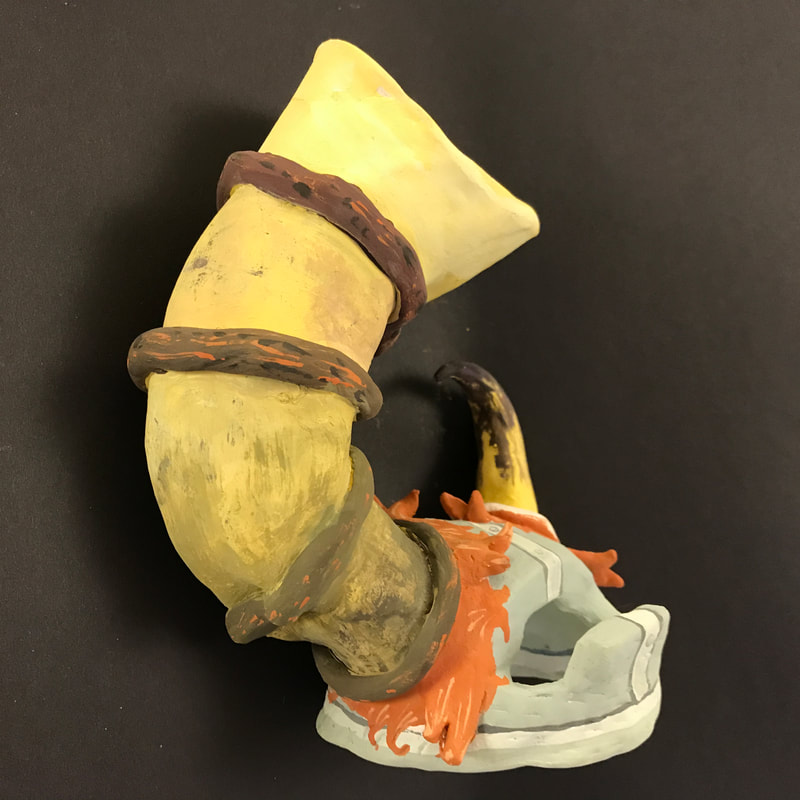
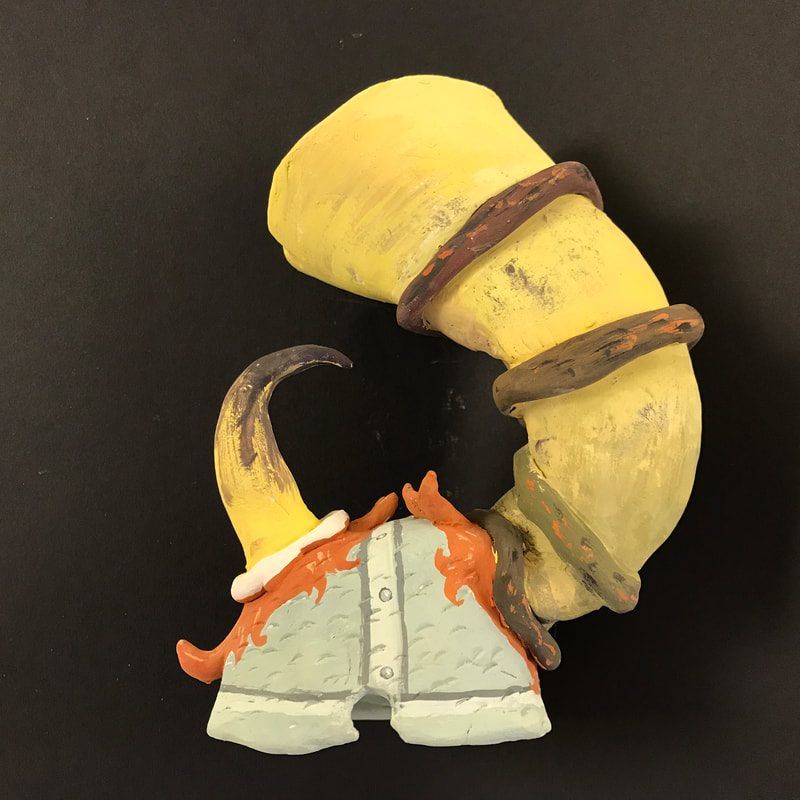
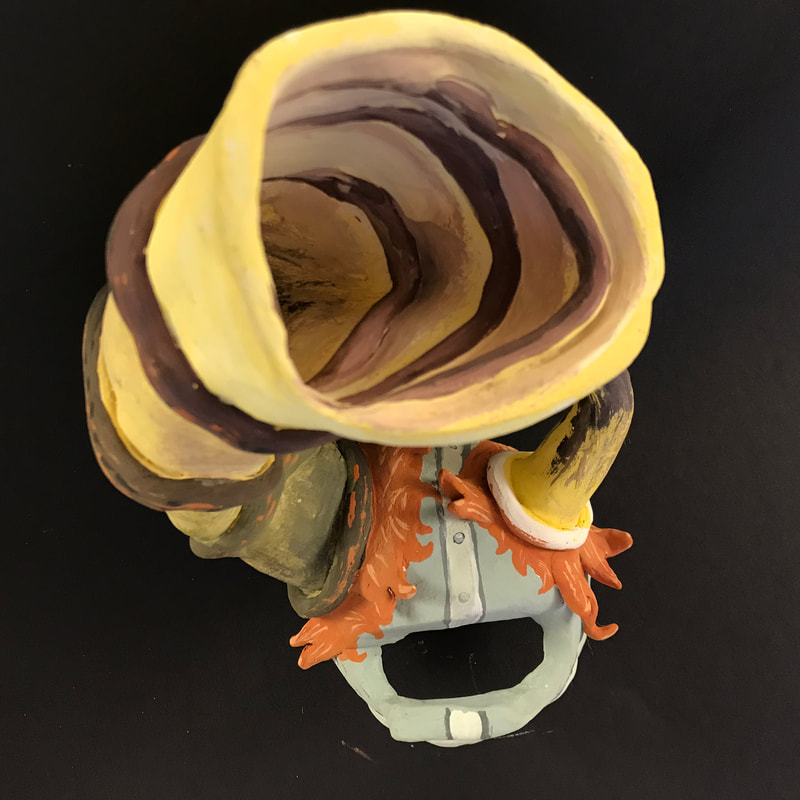
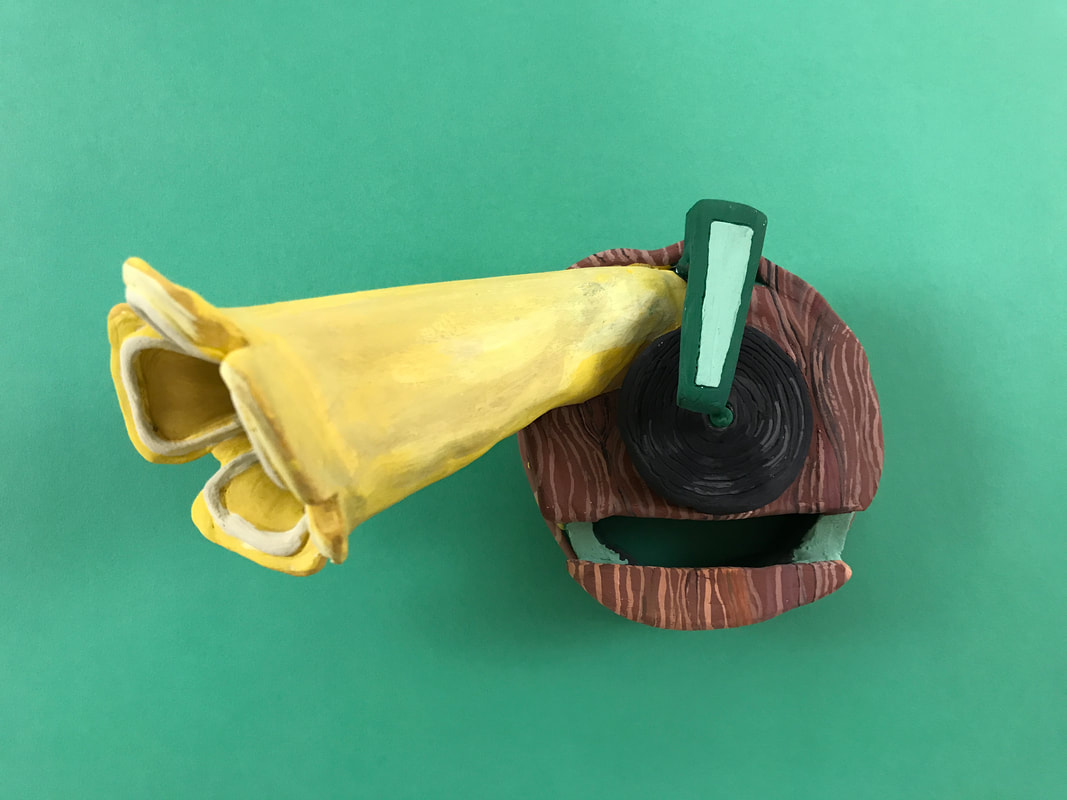
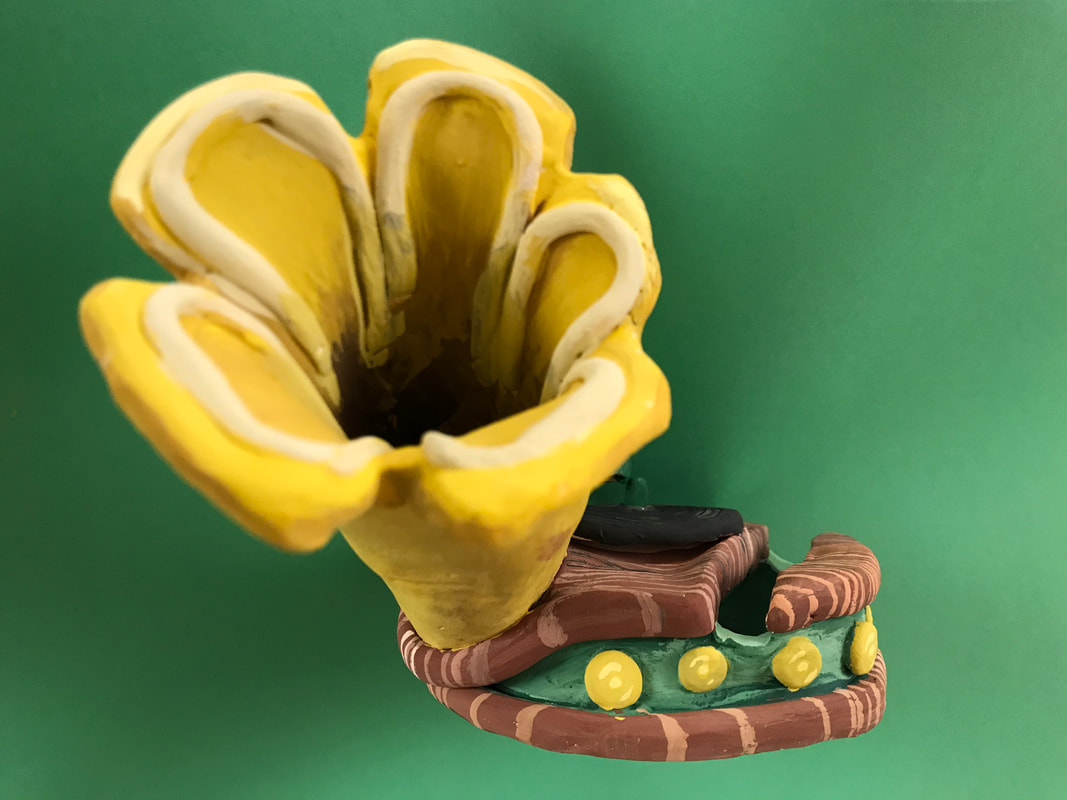
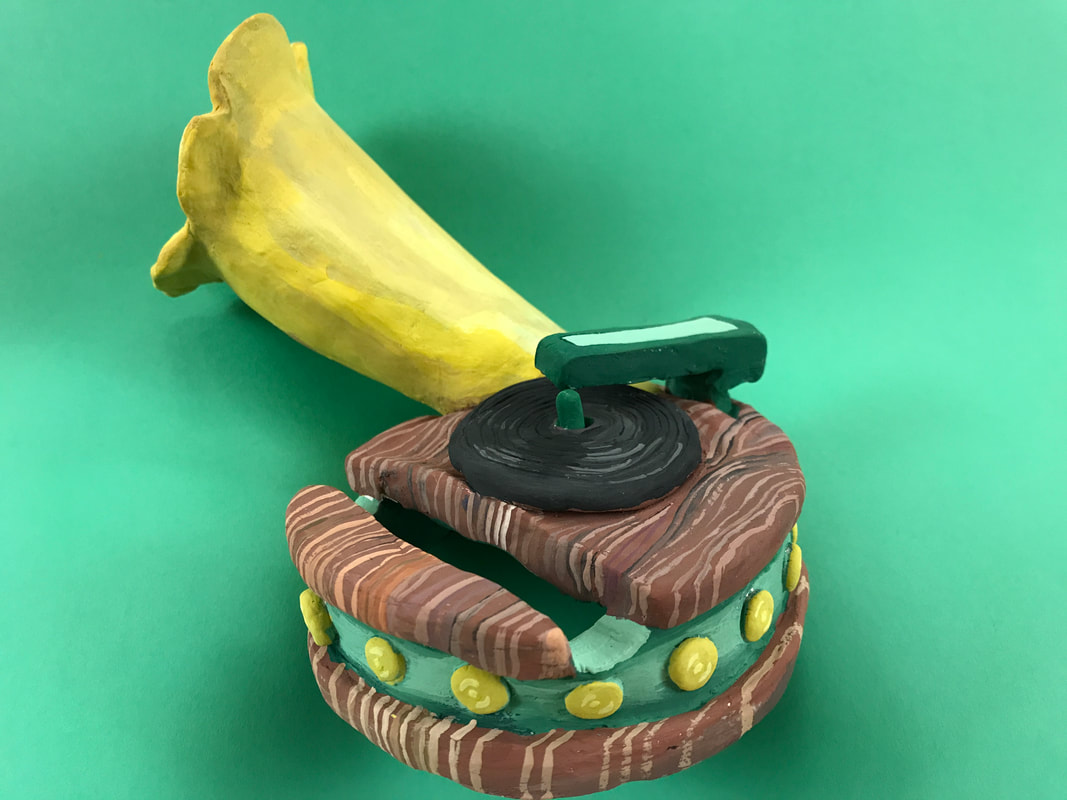
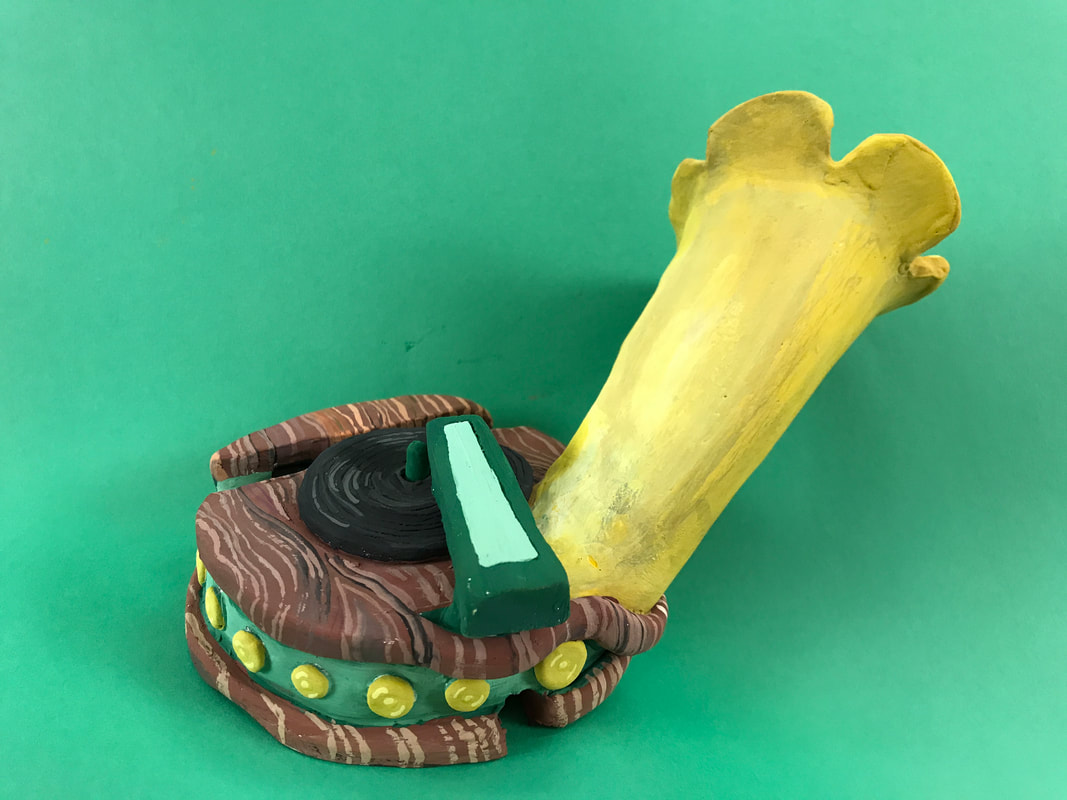
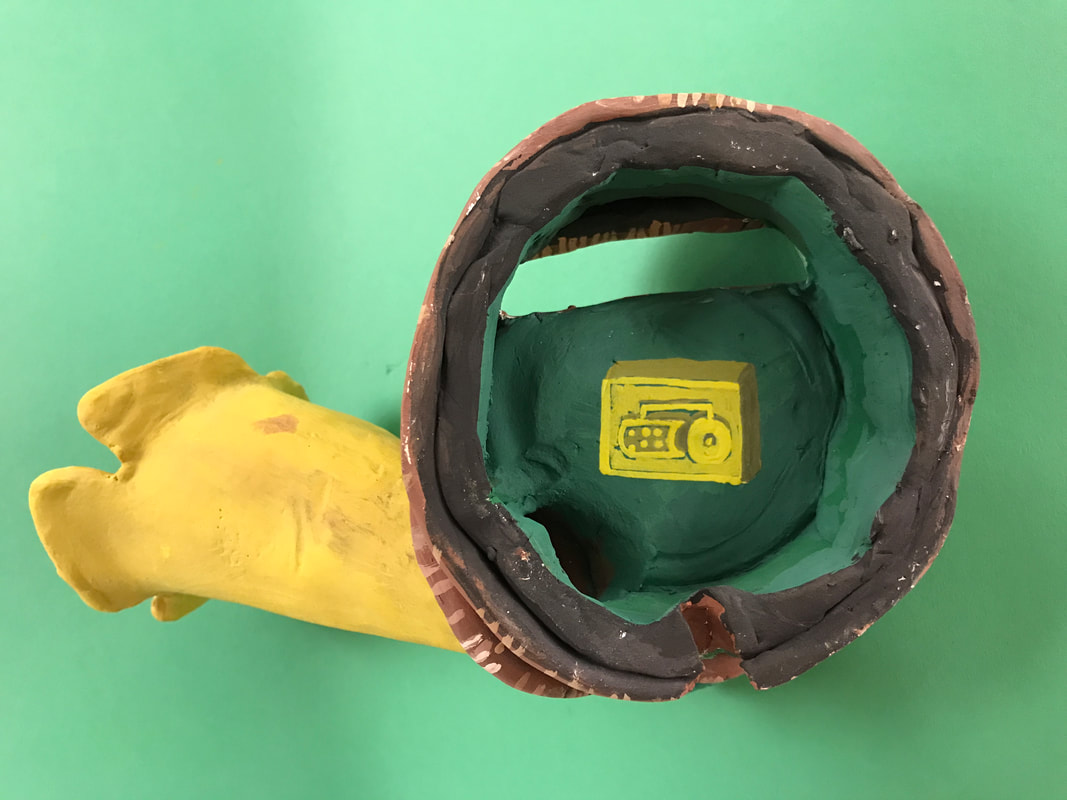
Amplifier plus Phone Holder
|
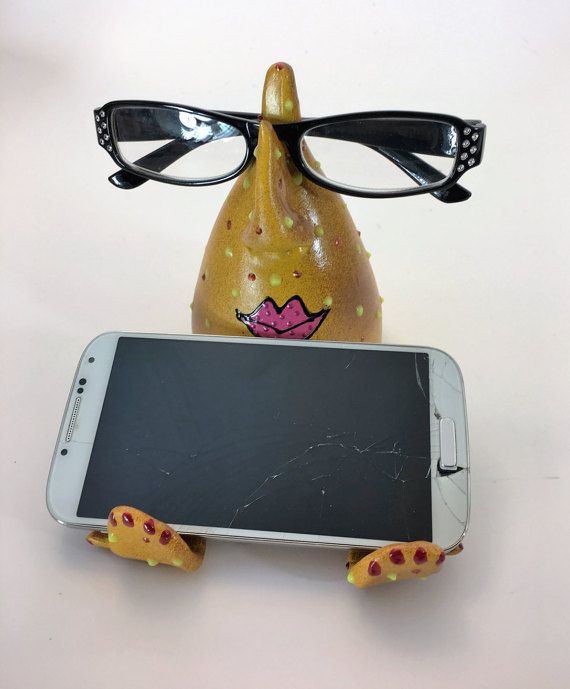
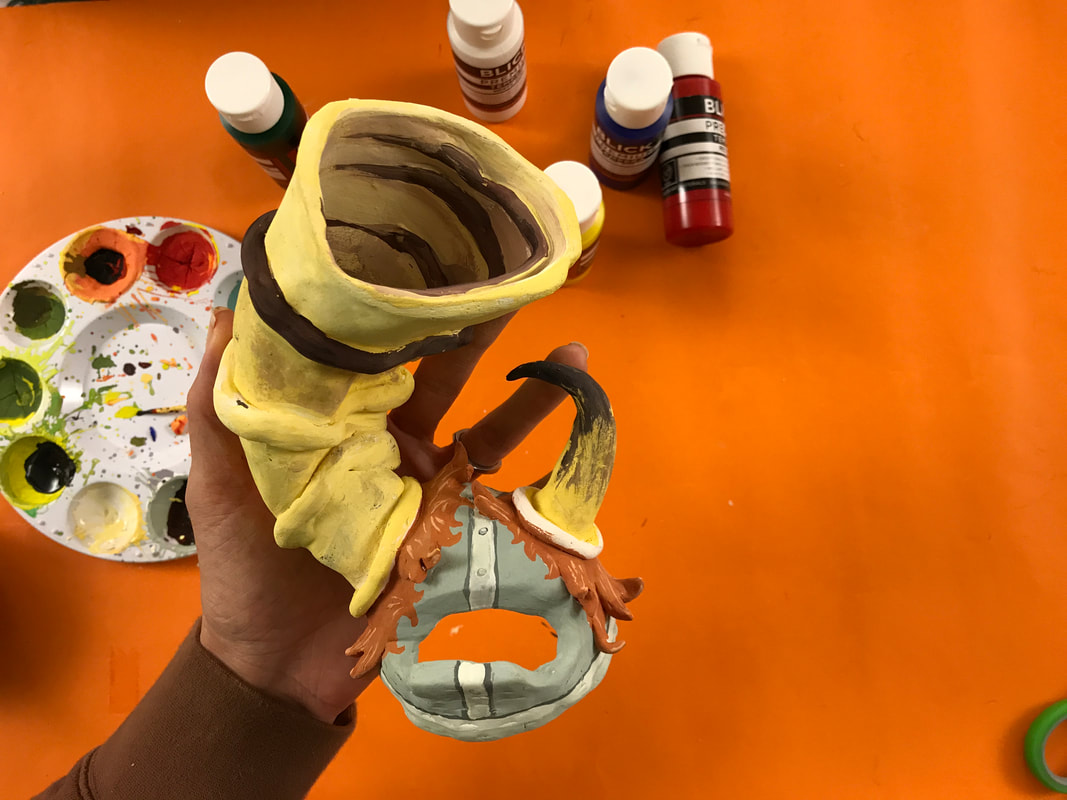
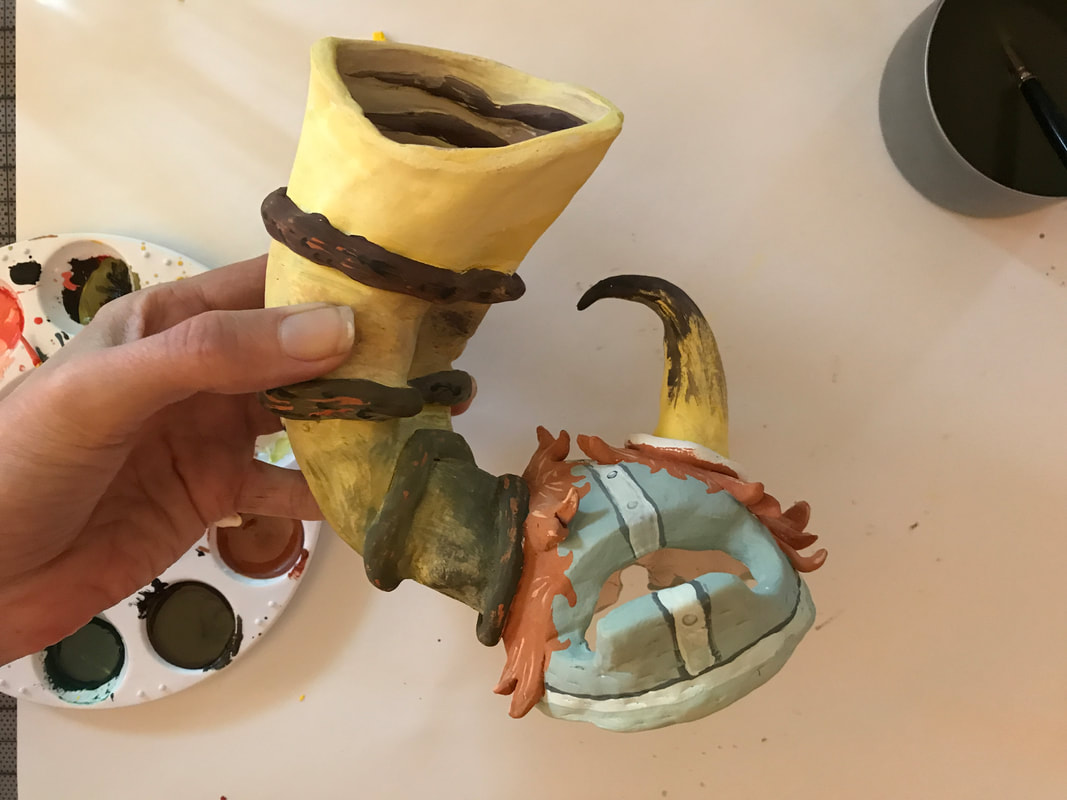
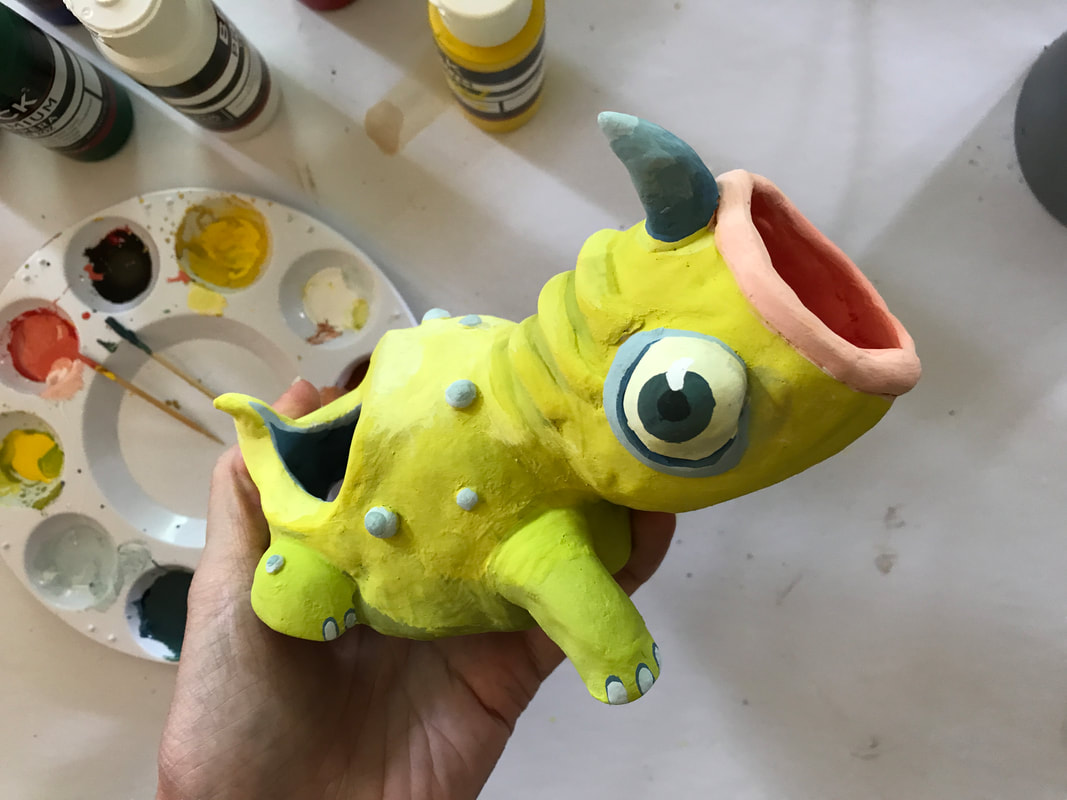
Glasses Holder plus Phone Holder
|
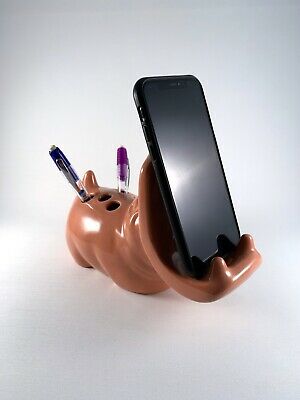
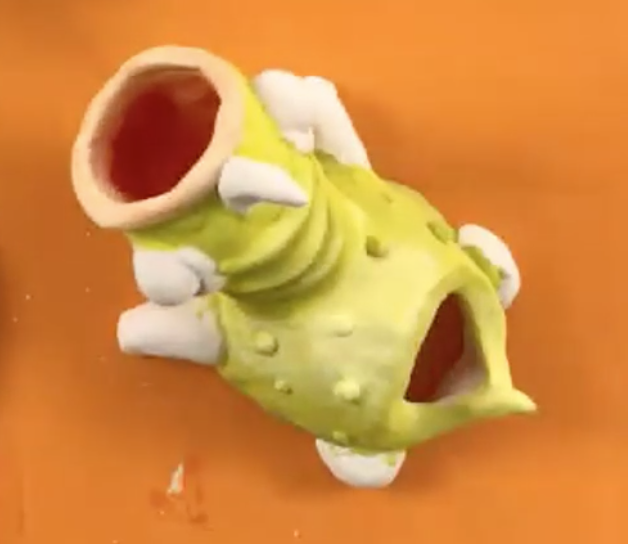
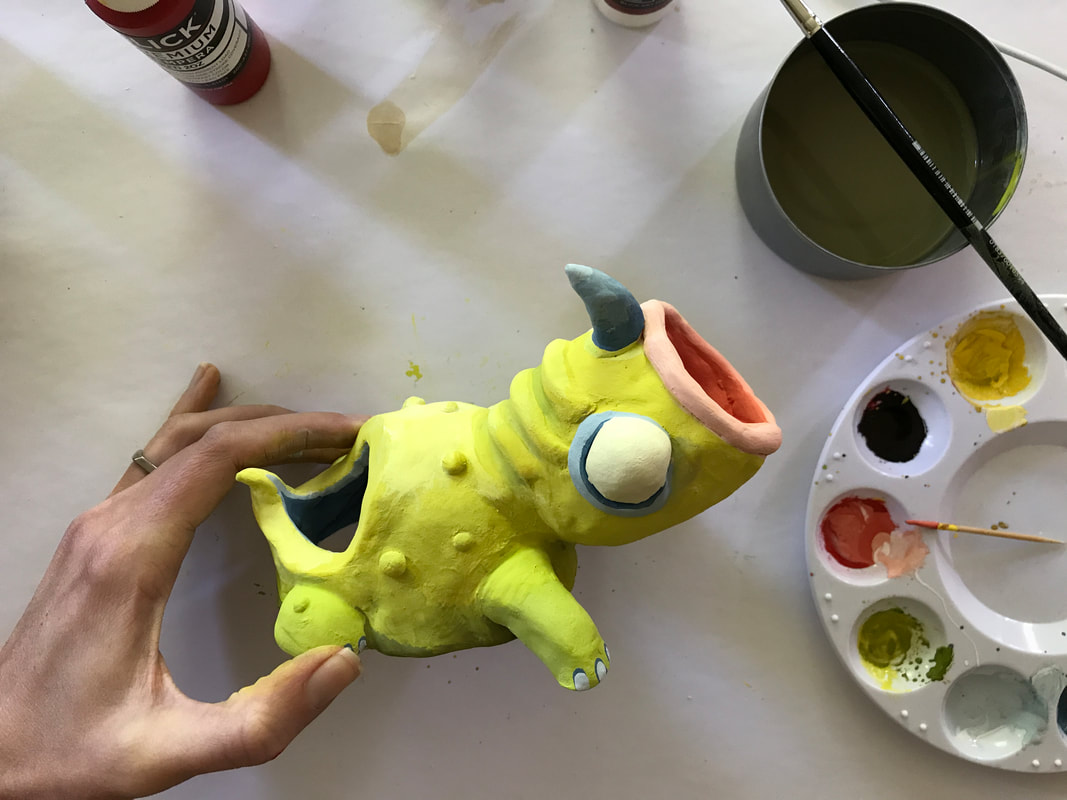
Pencil Holder plus Phone Holder
|
Ceramics is an Art Medium
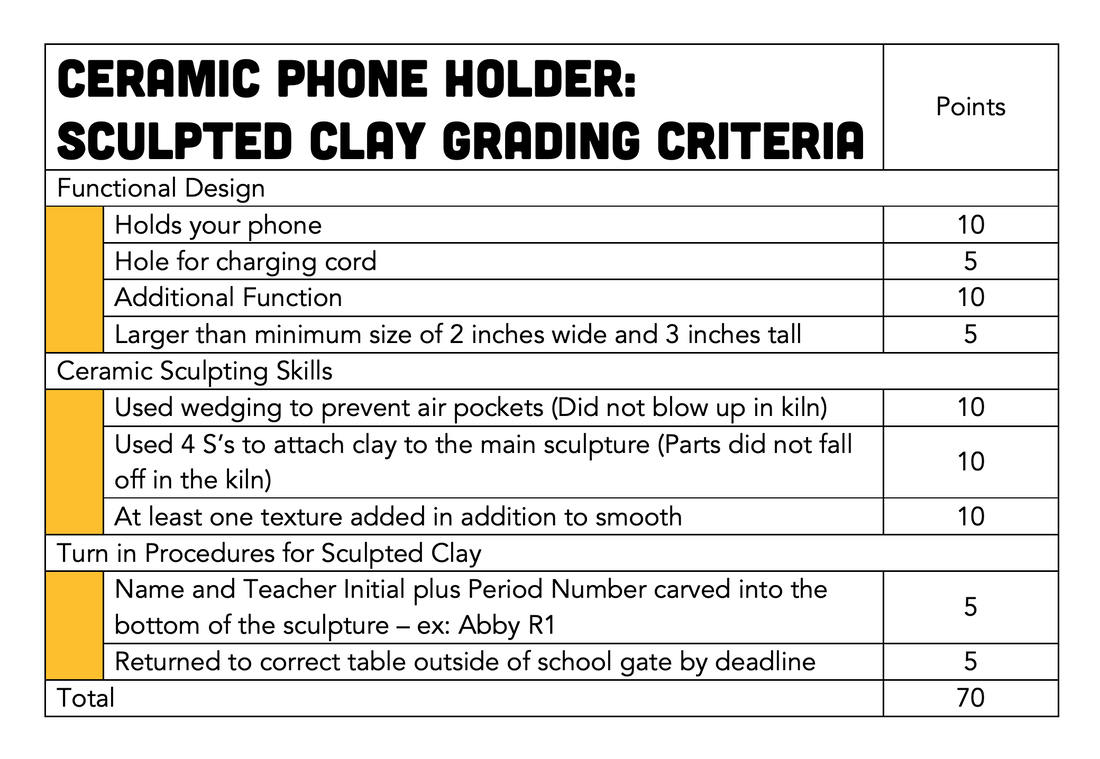
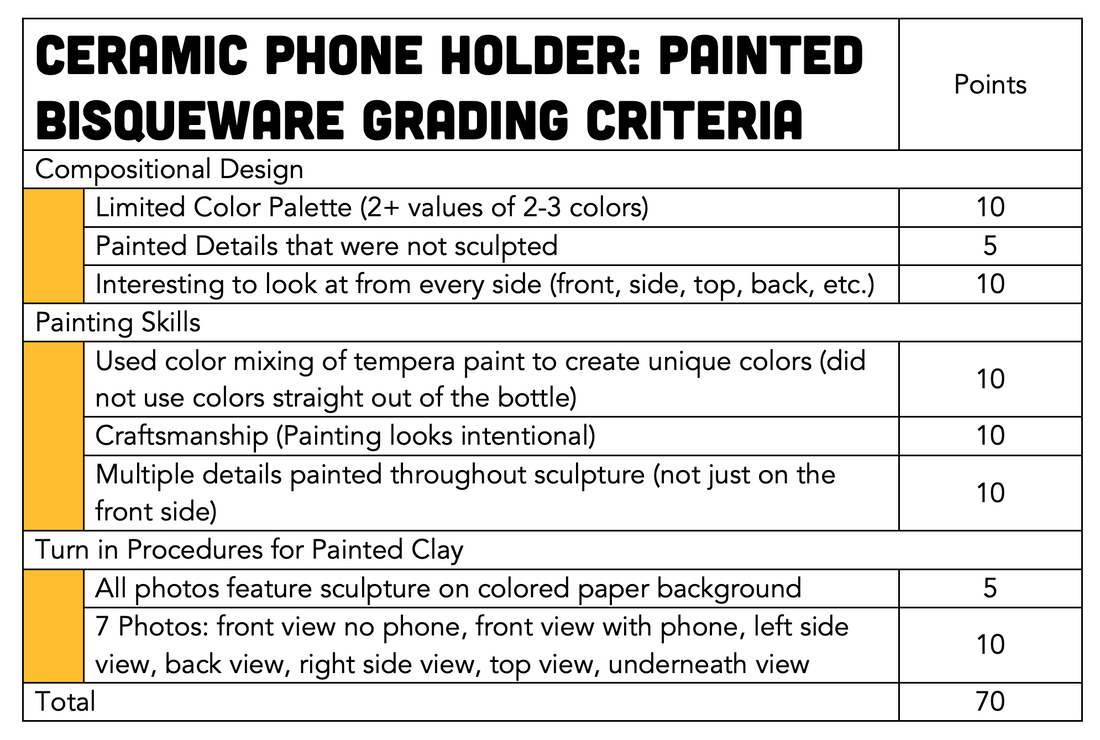
Project Requirements
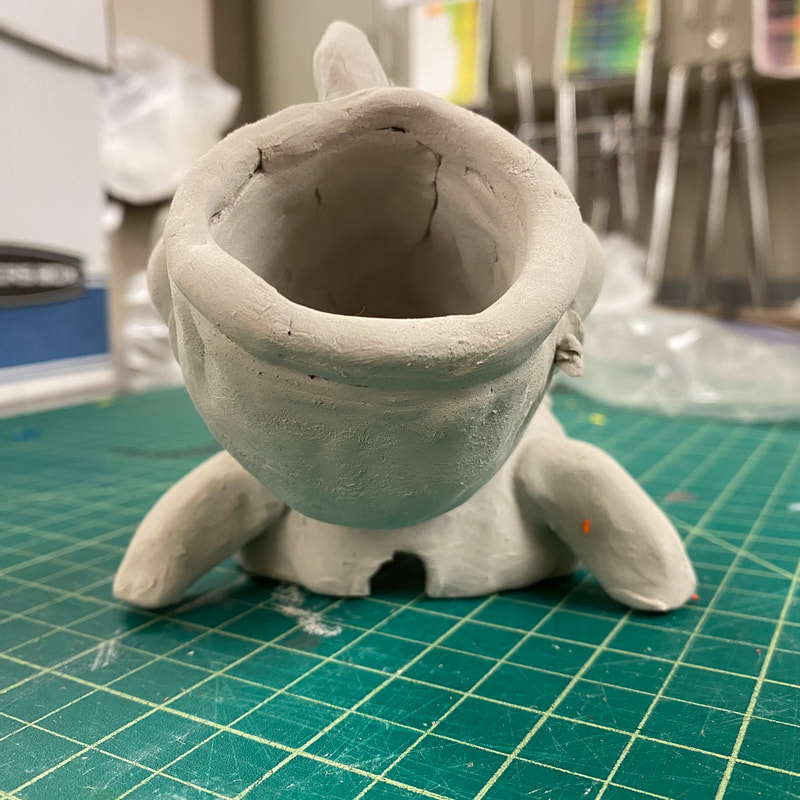
Holds Your Phone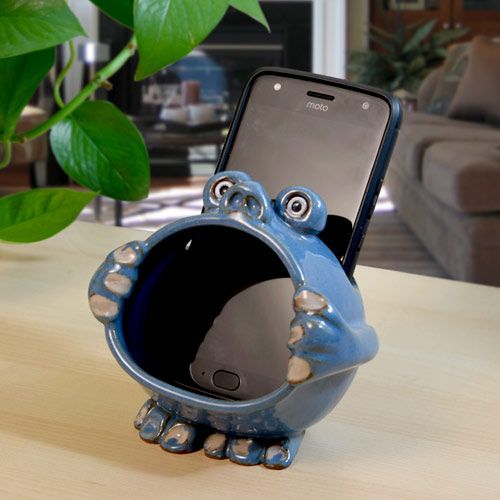
Phone fits and sculpture doesn't fall over when holding phone
|
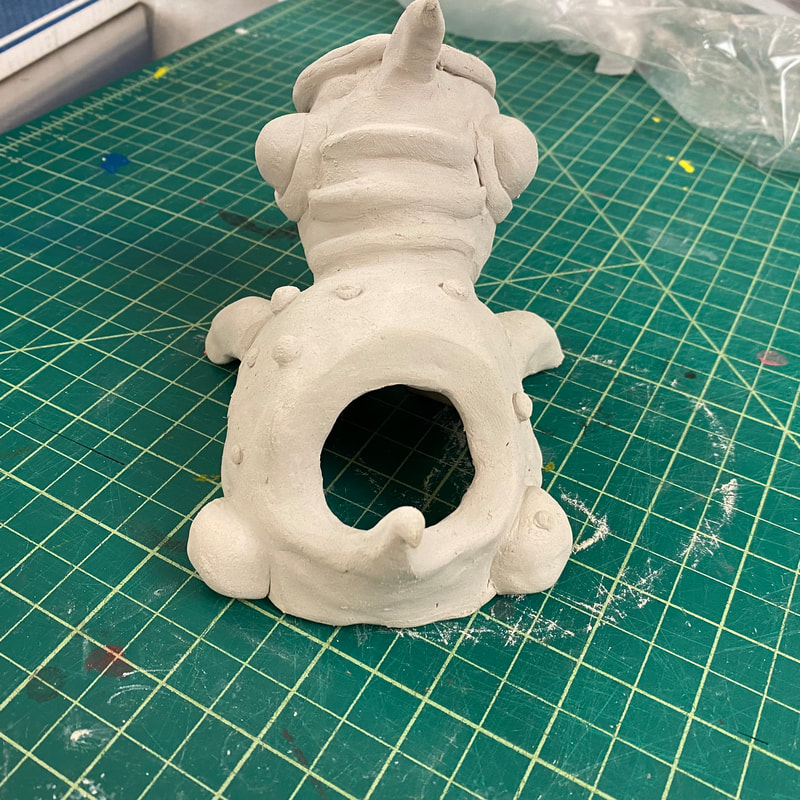
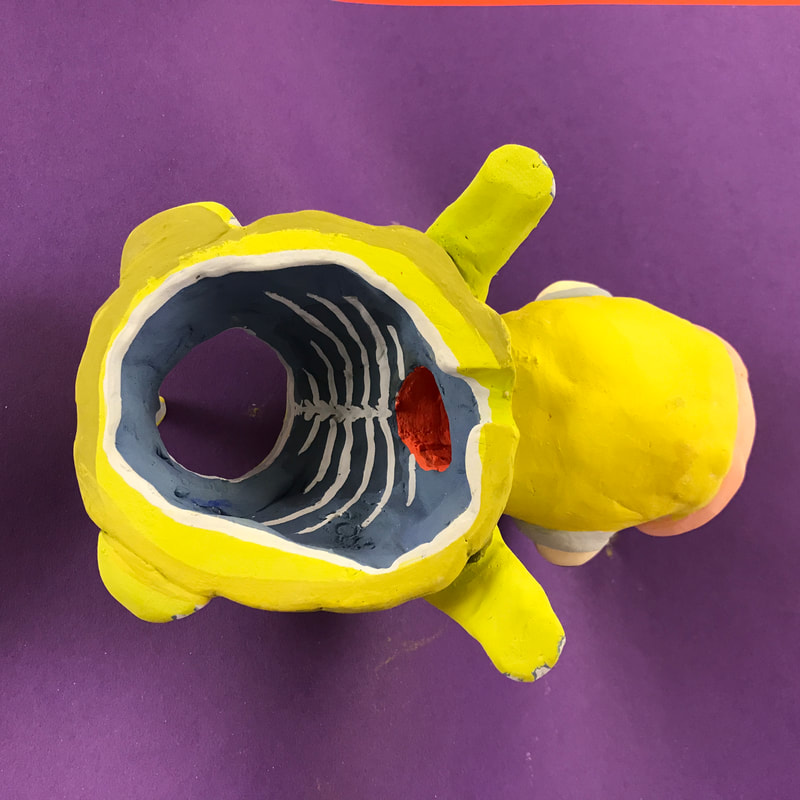
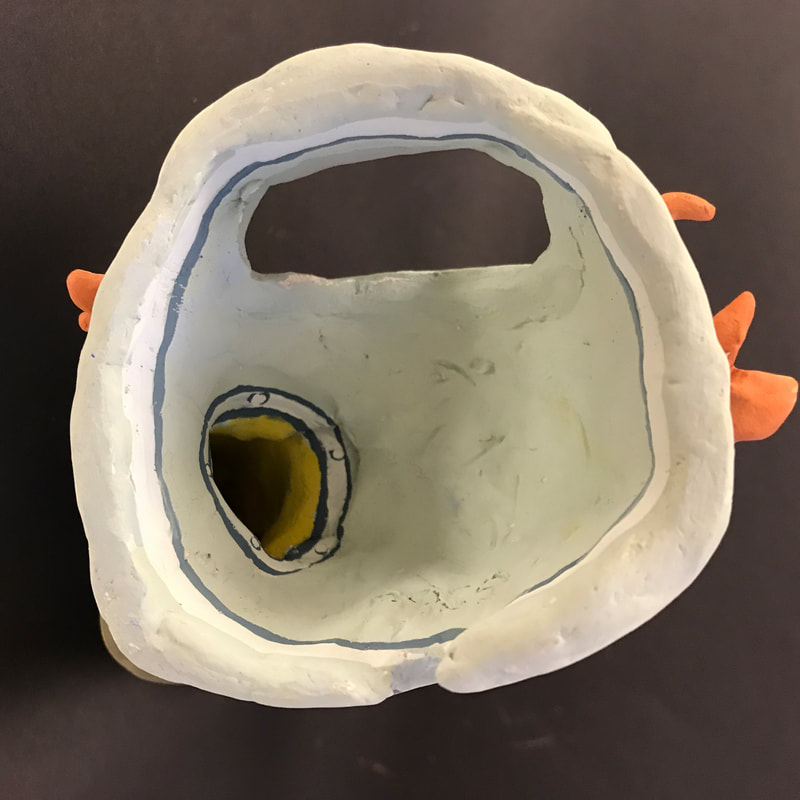
Charging Cord Hole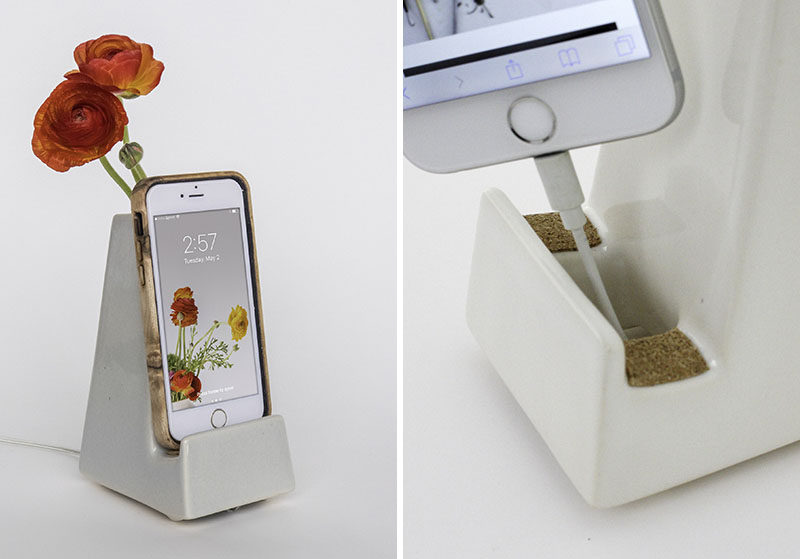
Make a hole in the bottom and the back for the charging cord. There should be space for the phone to be charging while in the sculpture. Don't make it too hard to plug in the phone.
|
Additional Function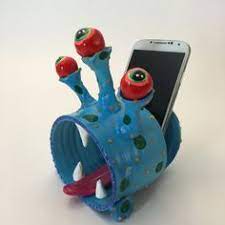
In addition to being a phone holder, the sculpture also does something else, like a pencil holder or sound amplifier.
|
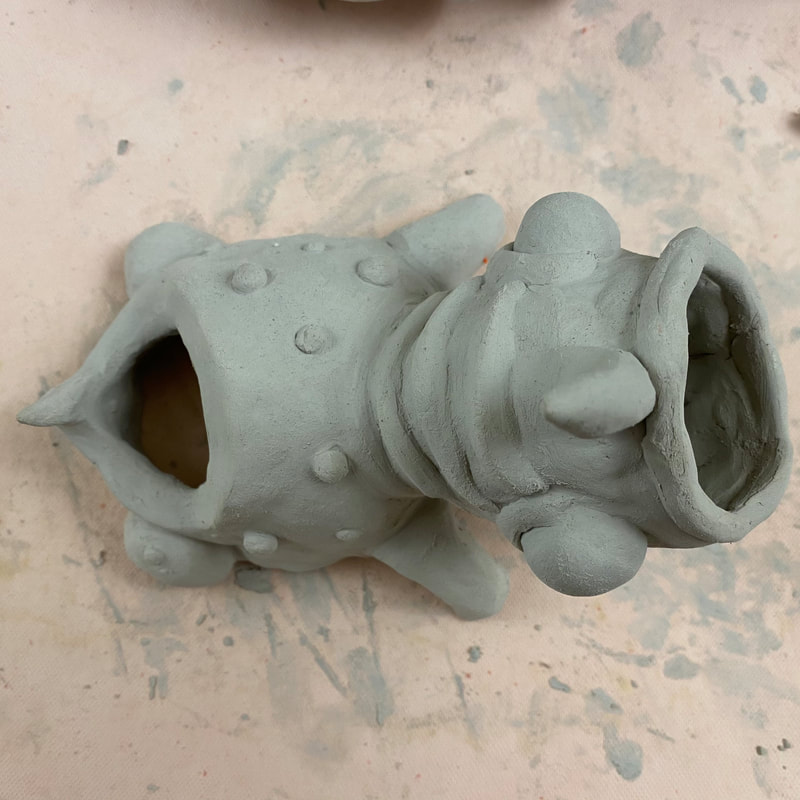
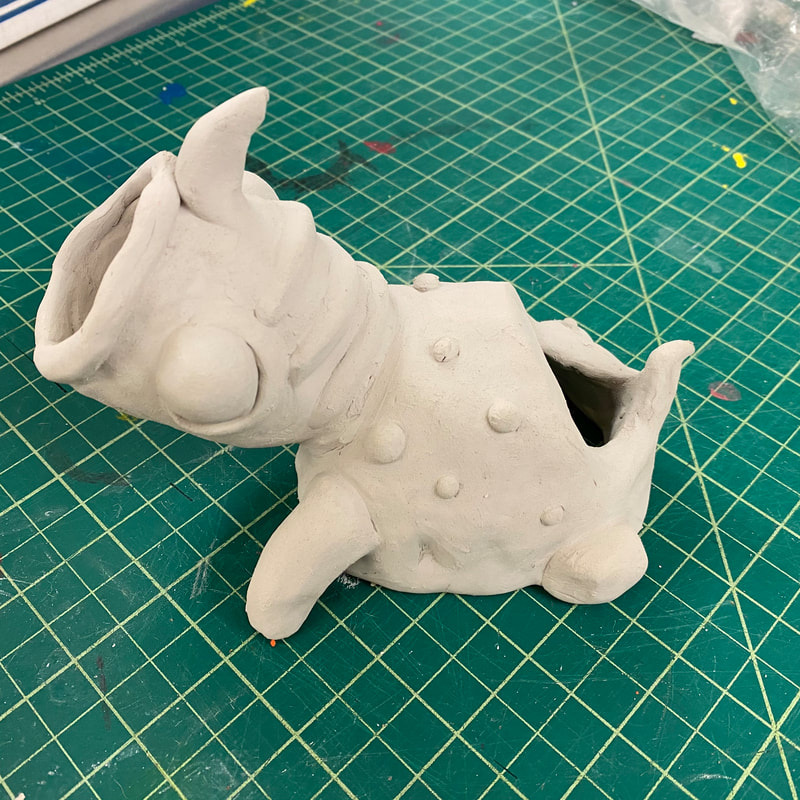
Texture Added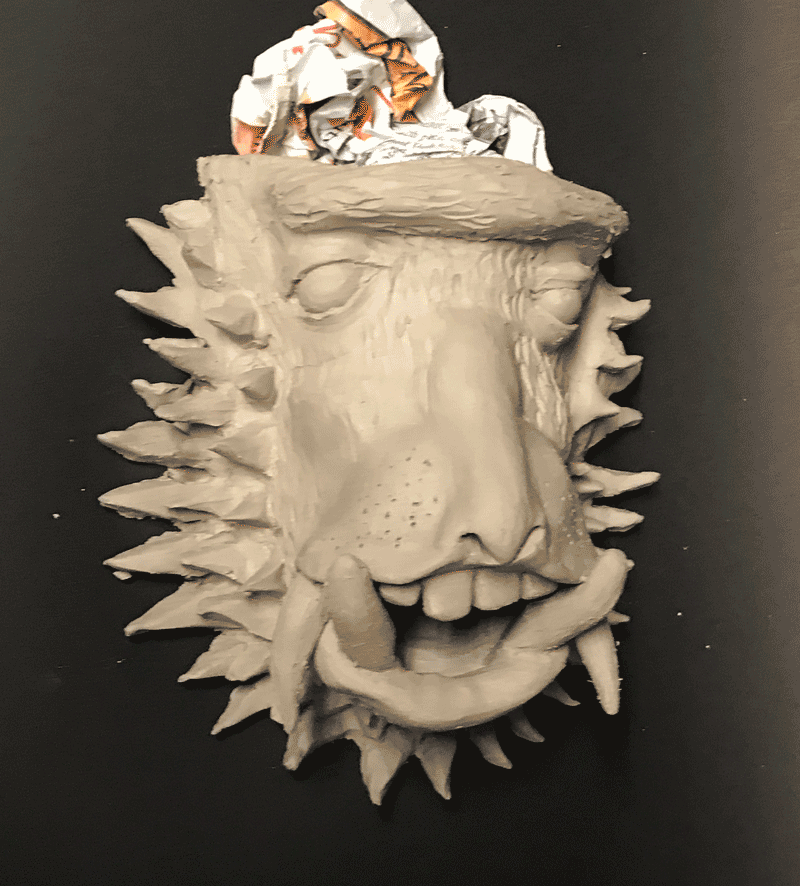
Carved textures or attached clay textures make the surface more interesting. Smooth is the default. Textures are added on smooth clay
|
Wedged Clay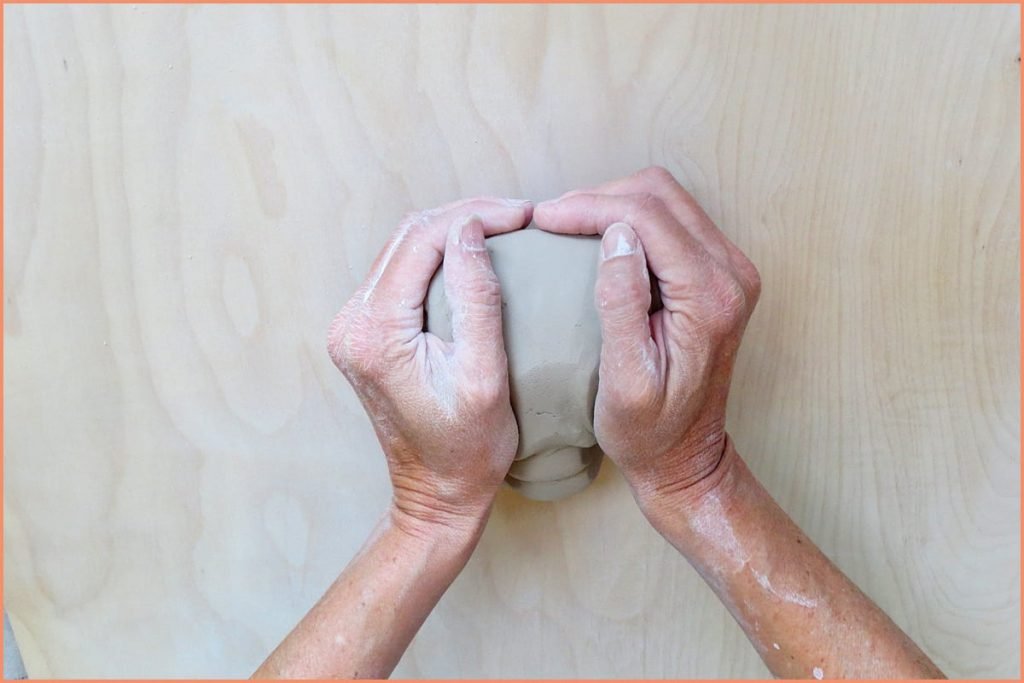
Wedging removes air bubbles from the clay to prevent the clay from blowing up in the kiln.
|
Scored & Slipped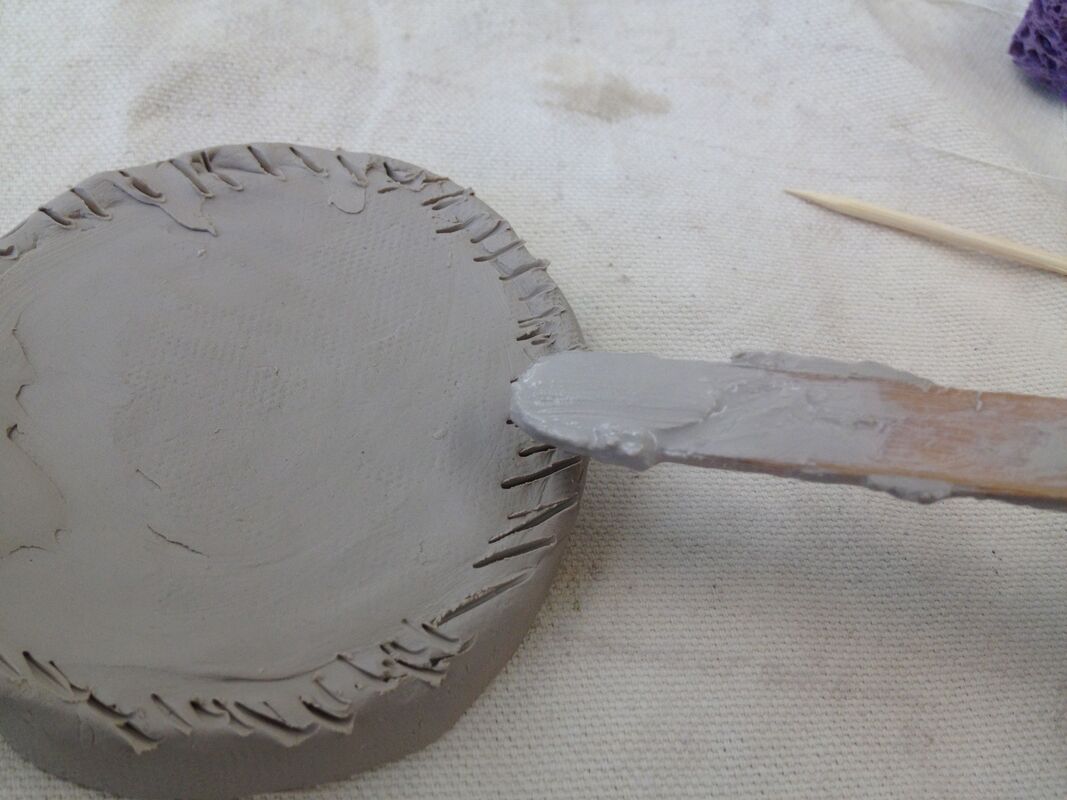
Scoring helps create more surface area between the two parts being connected. Slip helps join the two pieces like glue.
|
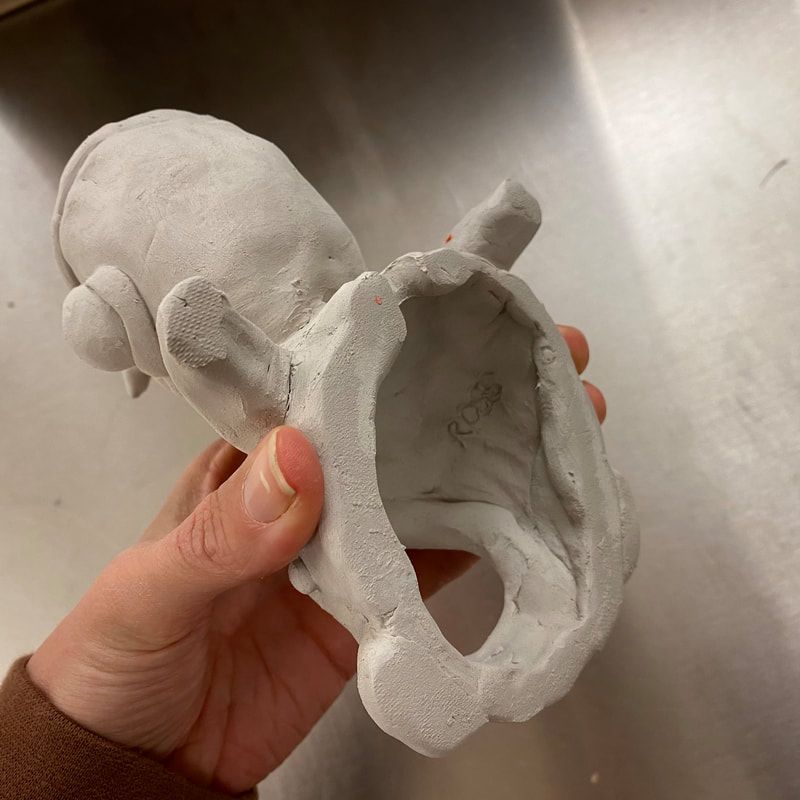
Right SizeYour sculpture should be BIGGER than the minimum sizes of 2" wide, 3" tall and 3" deep.
|
Name CarvedYou should carve your name, your teacher's initial, and period number inside or on the bottom of your sculpture. No name on there? You might not get a grade for your work!
|
Rough Sketch
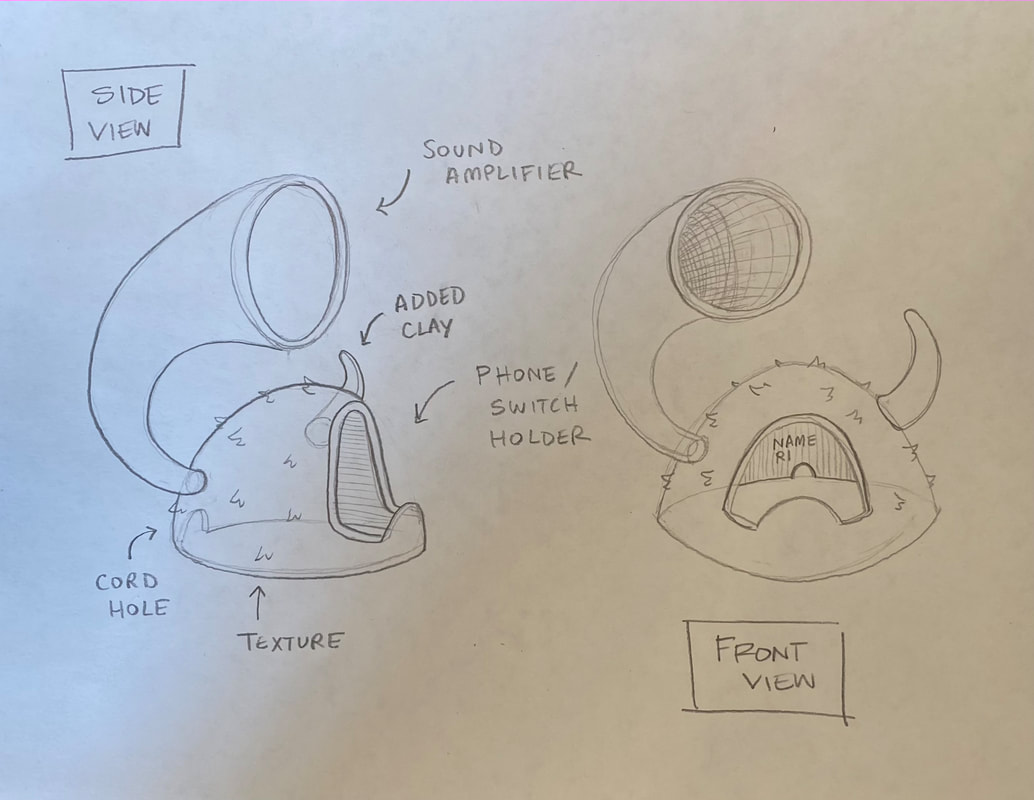
Idea #1
|
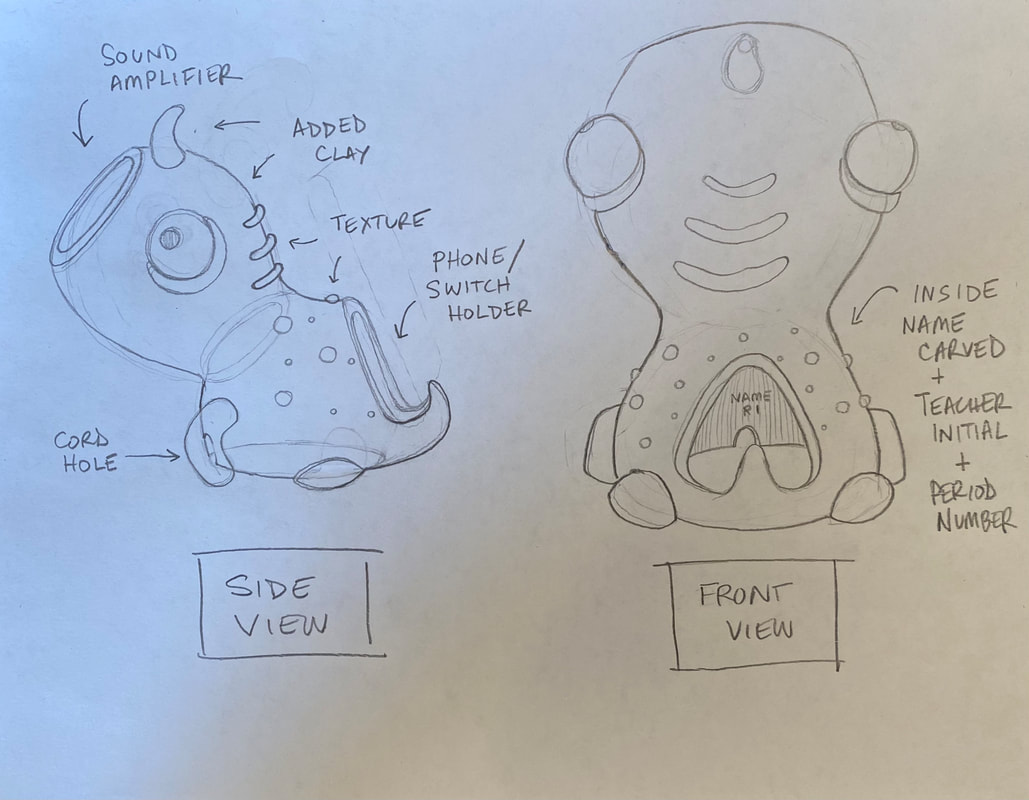
Idea #2
|
|
Sculpting Instructions
Step One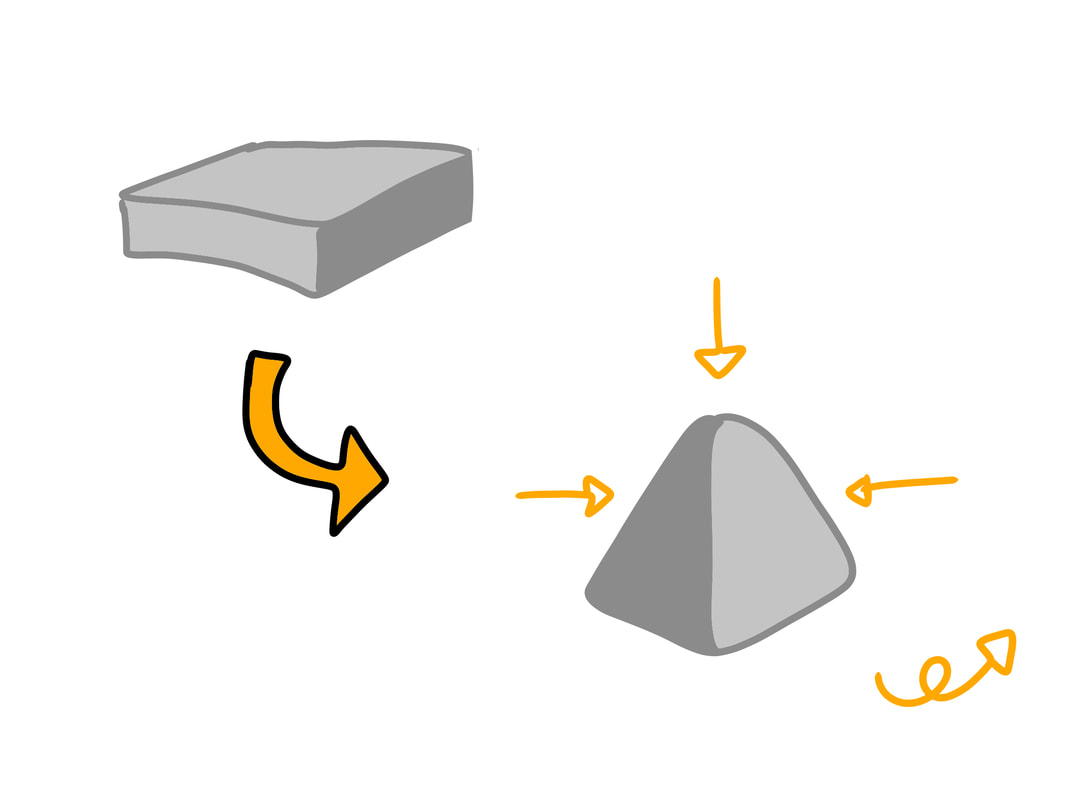
WEDGING : Take 2 minutes to wedge your clay. Start by forming your clay into a ball. Then, with both hands on either side, push the clay in and down towards the wedging mat at the same time. Then, flip the clay and do it again. You should end up with a little pyramid.
|
Step Two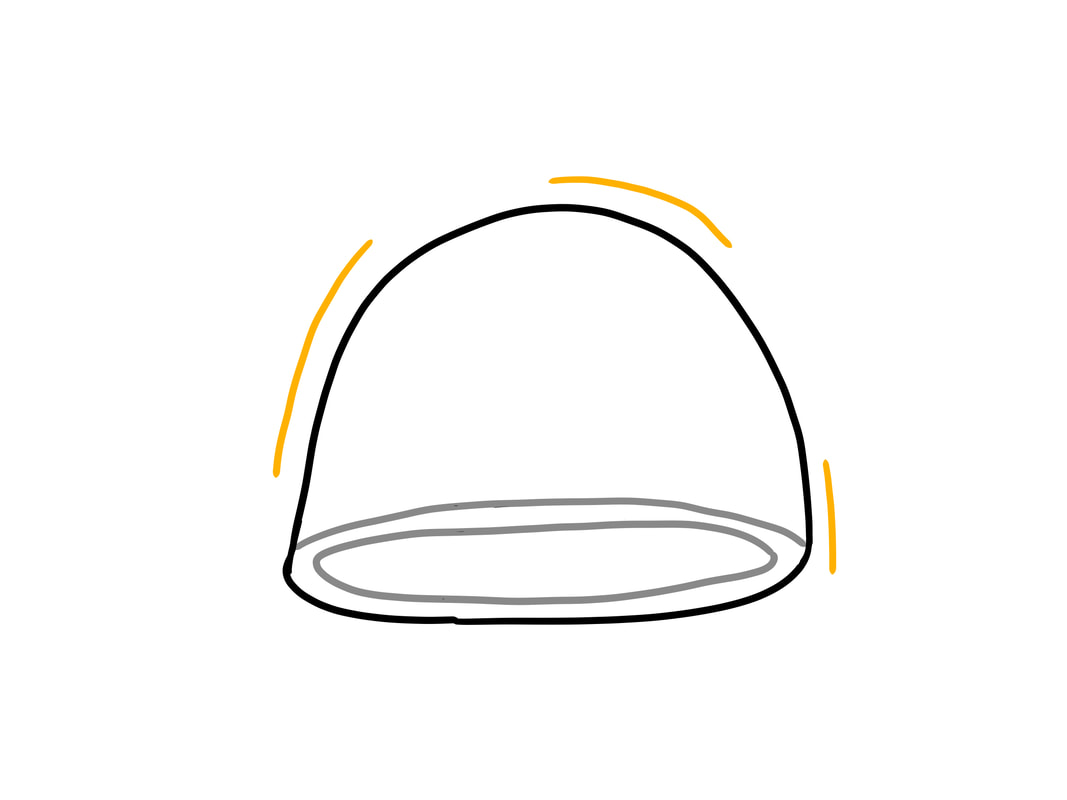
MAKE A PINCH POT : Cut your wedge in half. Put half under a wet towel. Use the other half to make a pinch pot. The walls of the pinch pot should be no thinner than a 1/4" thick, but no fatter than 1/2" thick.
|
Step Three
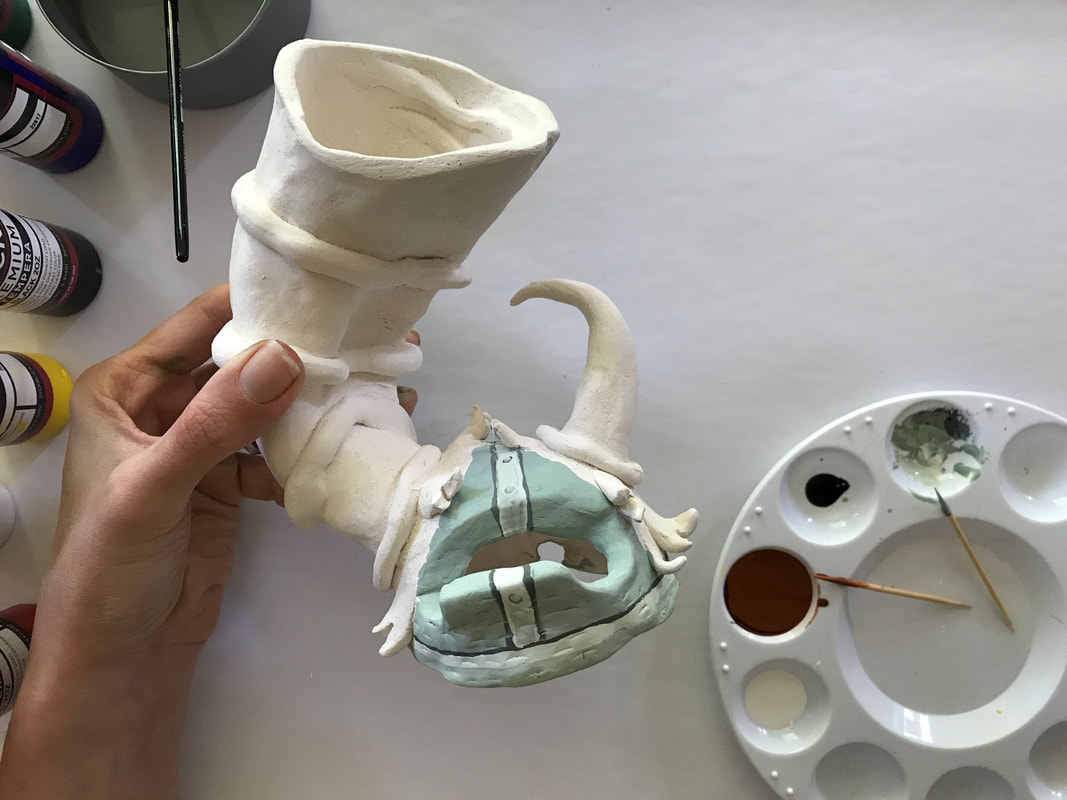
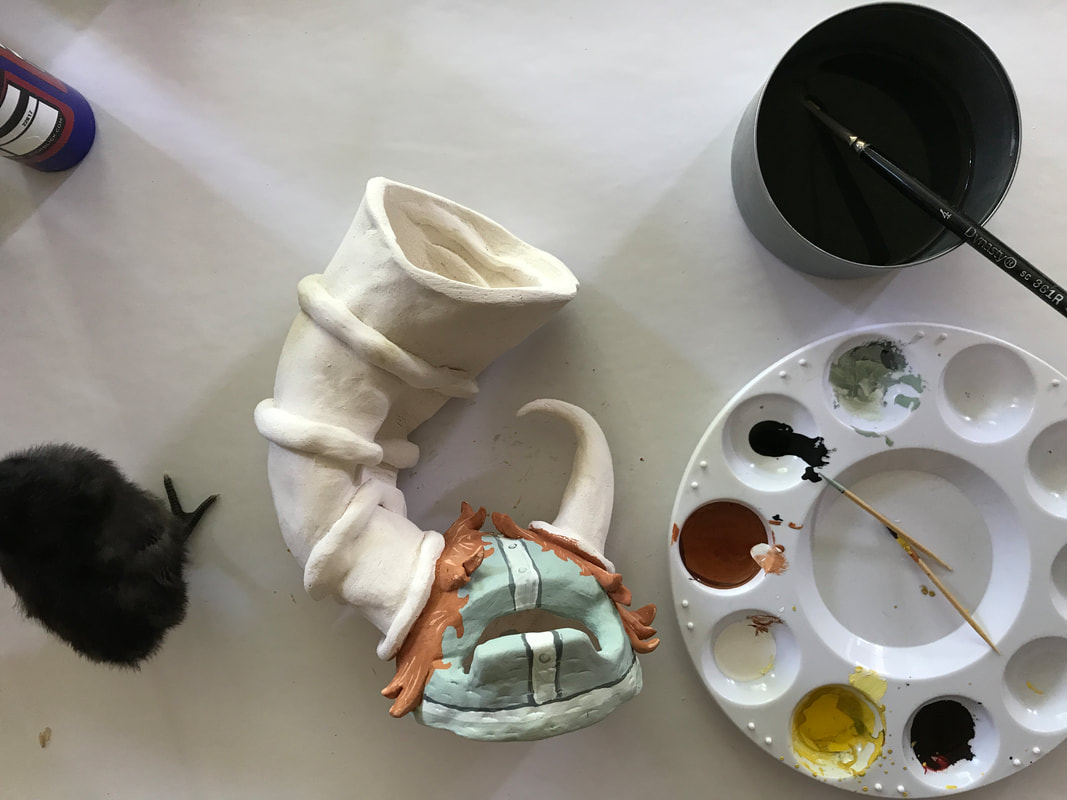
ADD BIG STUFF : Add Function Parts (Amplifier pictured). Remember to SCORE the parts you want to attach, add SLIP to the scoring, STICK them together, and SMOOTH out the attached parts.
|
Step Four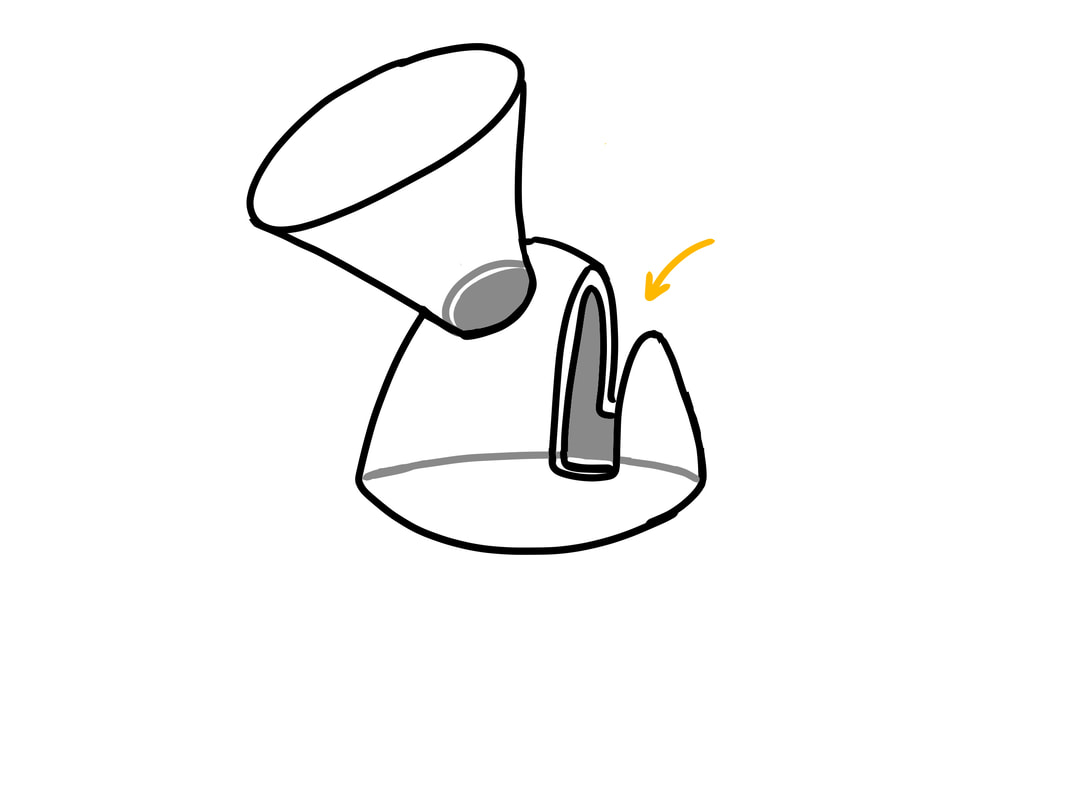
CUT PHONE HOLDER SLOT : Cut Phone Holder Slot. Remember that clay shrinks a bit as it dries, so make the space for your phone a bit larger than your phone.
|
Step Five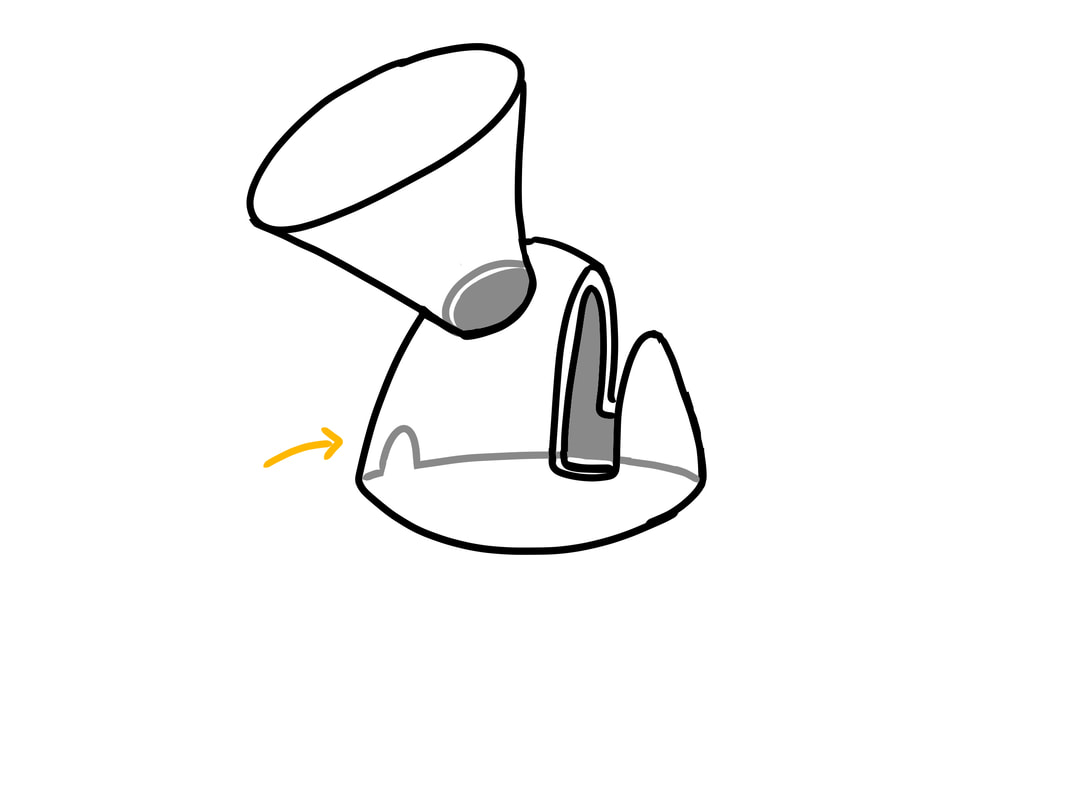
CORD HOLE : Cut a hole for the charging cord to exit out the back.
|
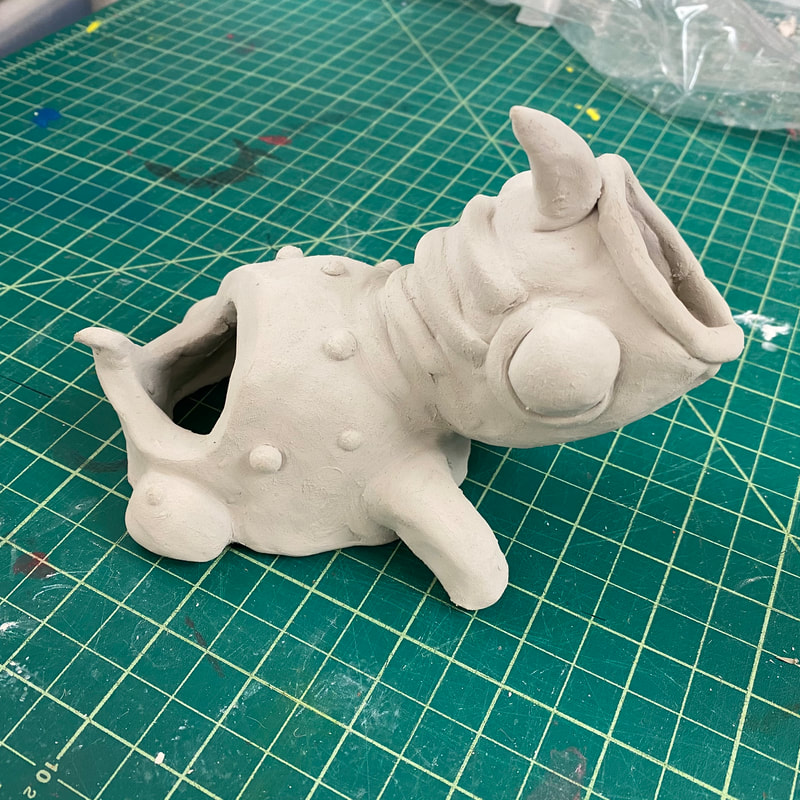
Step Six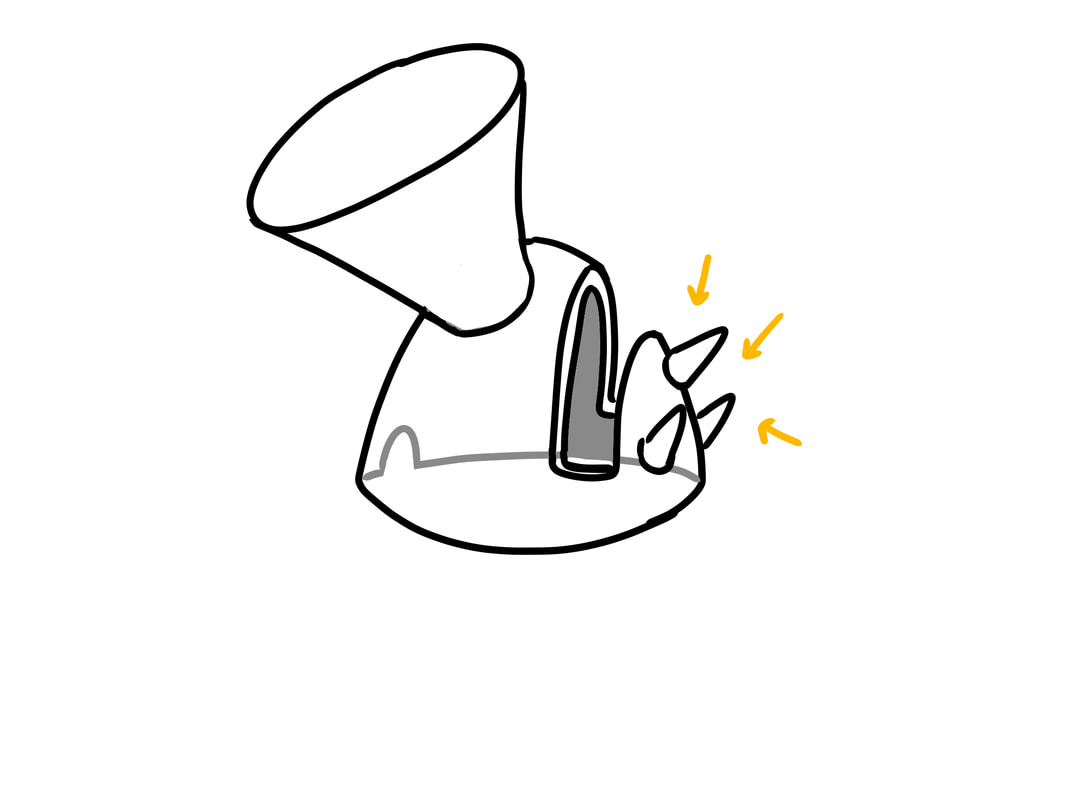
ADD SMALLER STUFF : Add the extra parts that will make your sculpture interesting to look at from all sides. Remember to Score, Slip, Stick, and Smooth any time you add clay.
|
Step Seven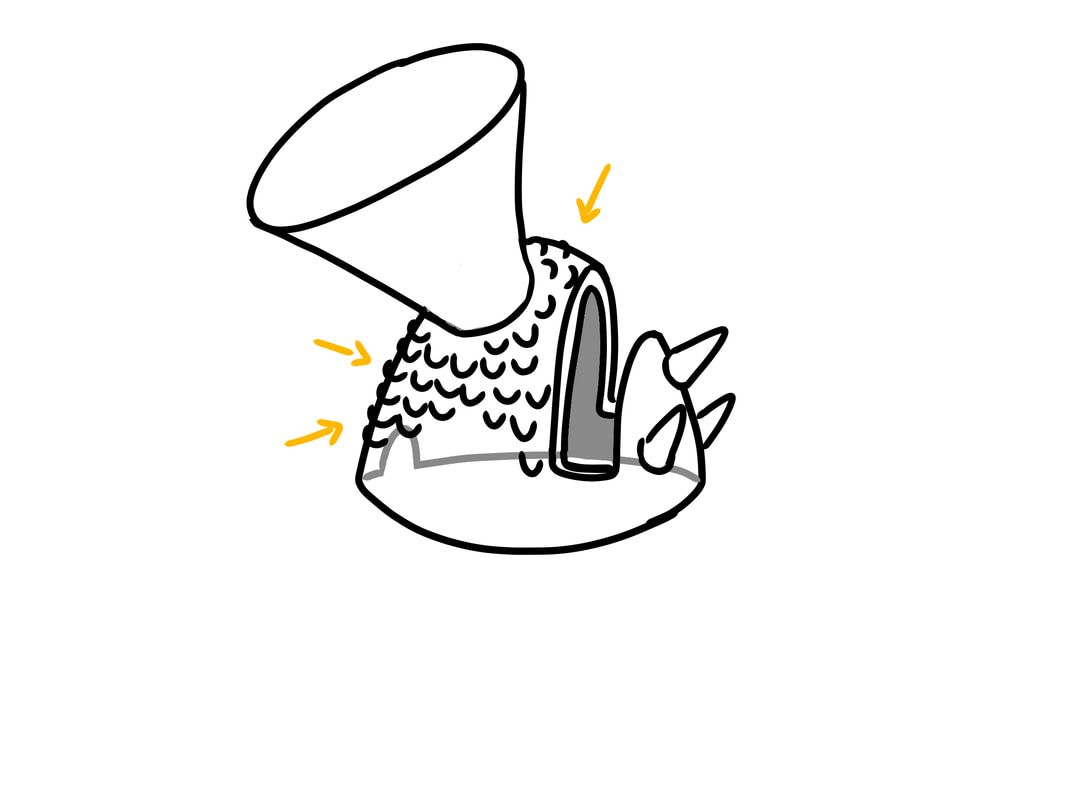
ADD TEXTURE : First smooth the surface of your sculpture with a damp sponge. Then, add a texture to make part of your sculpture more interesting. You can make impressions by pushing a tool into the clay in a repeating pattern. You can also add texture by adding small bits of clay in a pattern.
|
Step Eight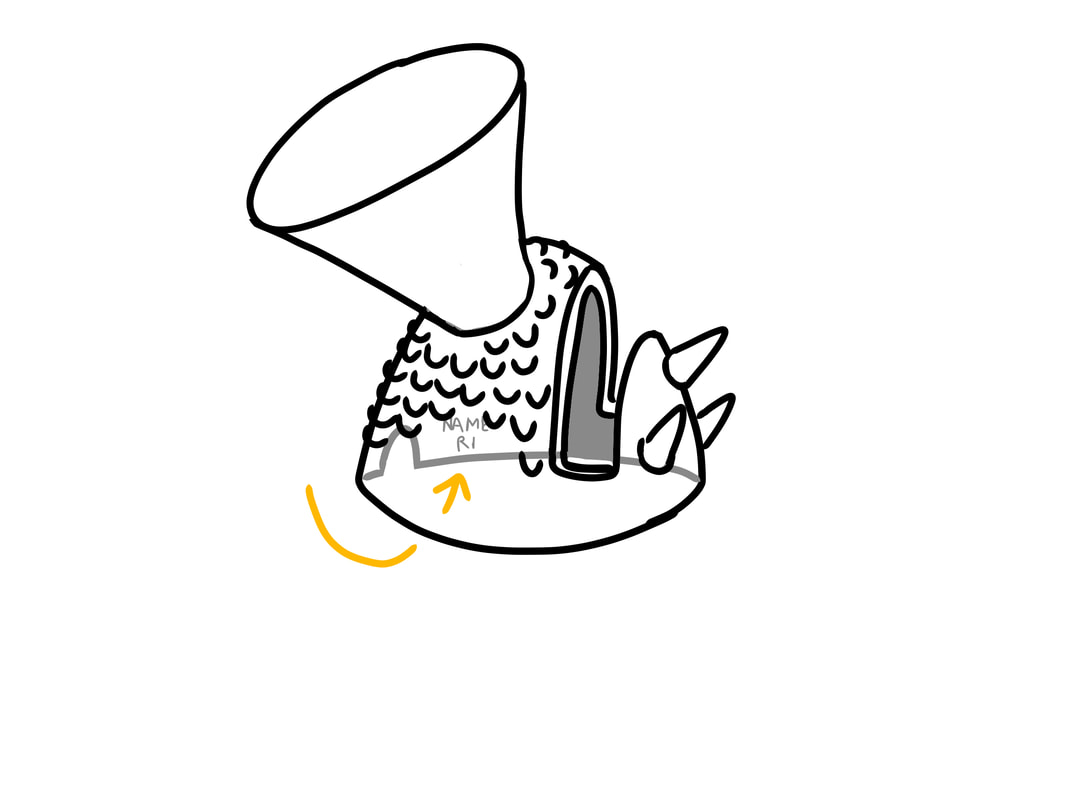
CARVE NAME : On the inside or the bottom, carve your NAME, your teacher's initial and your period number. Example: Name R1
|
In-Class Demonstration Videos |
|
Helmet Demo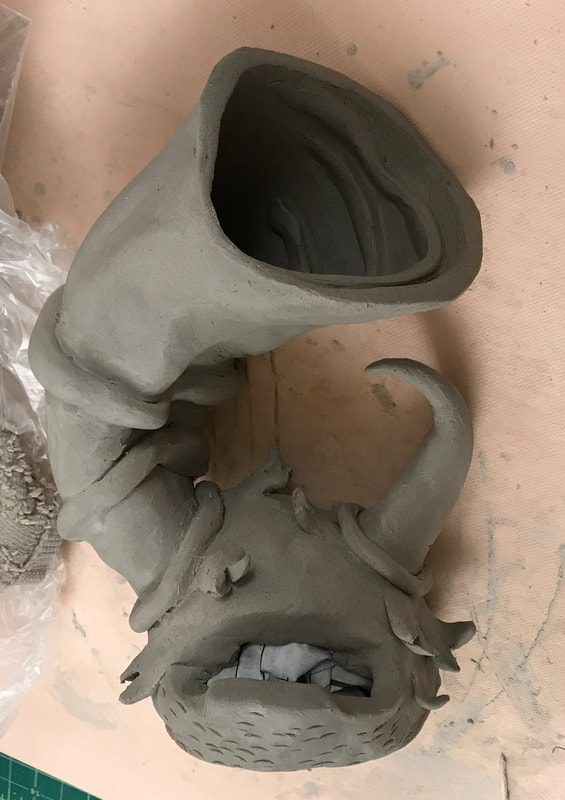
|
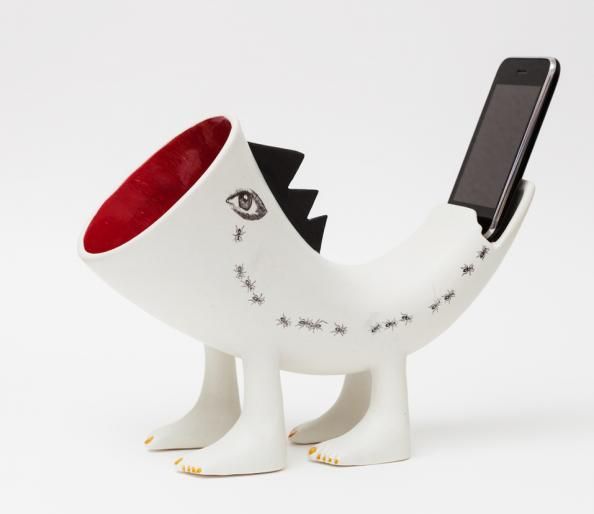
Dinosaur Demo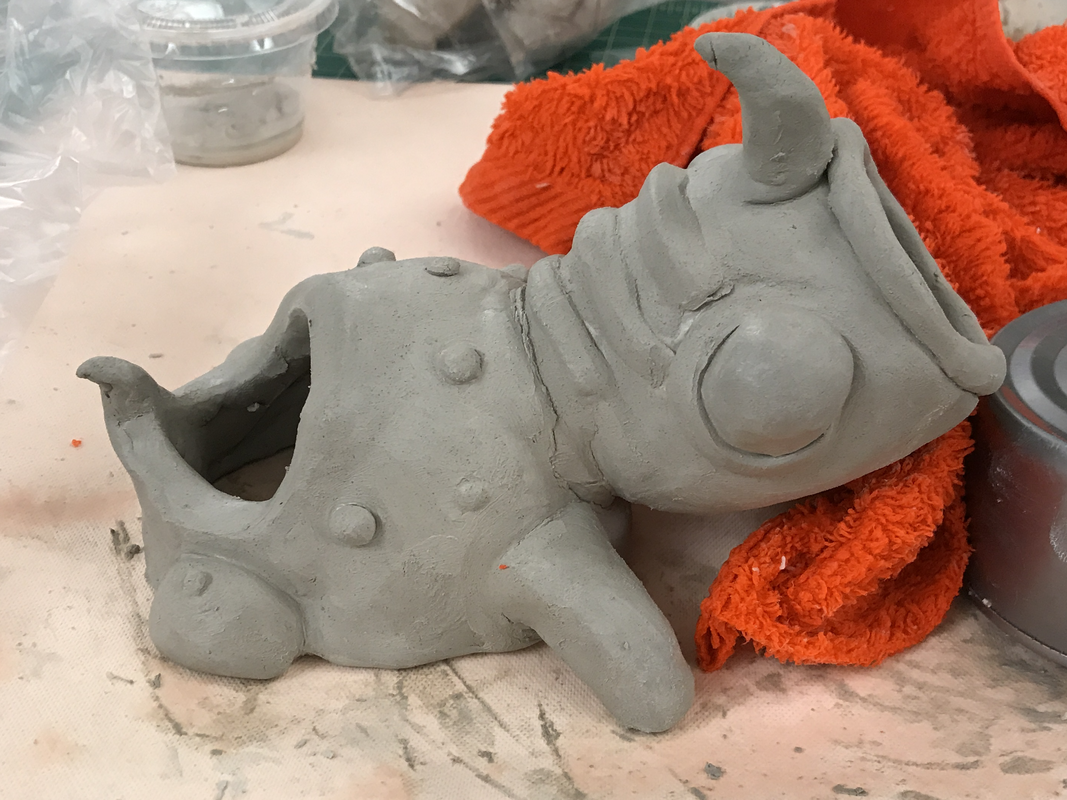
|
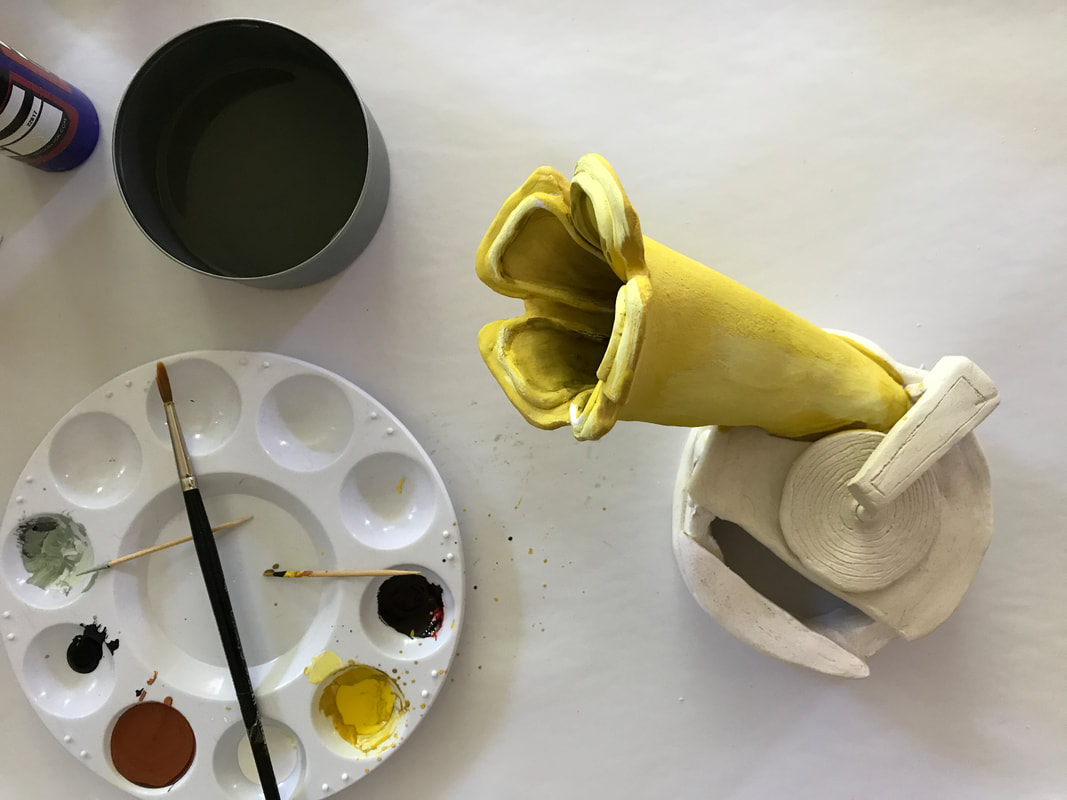
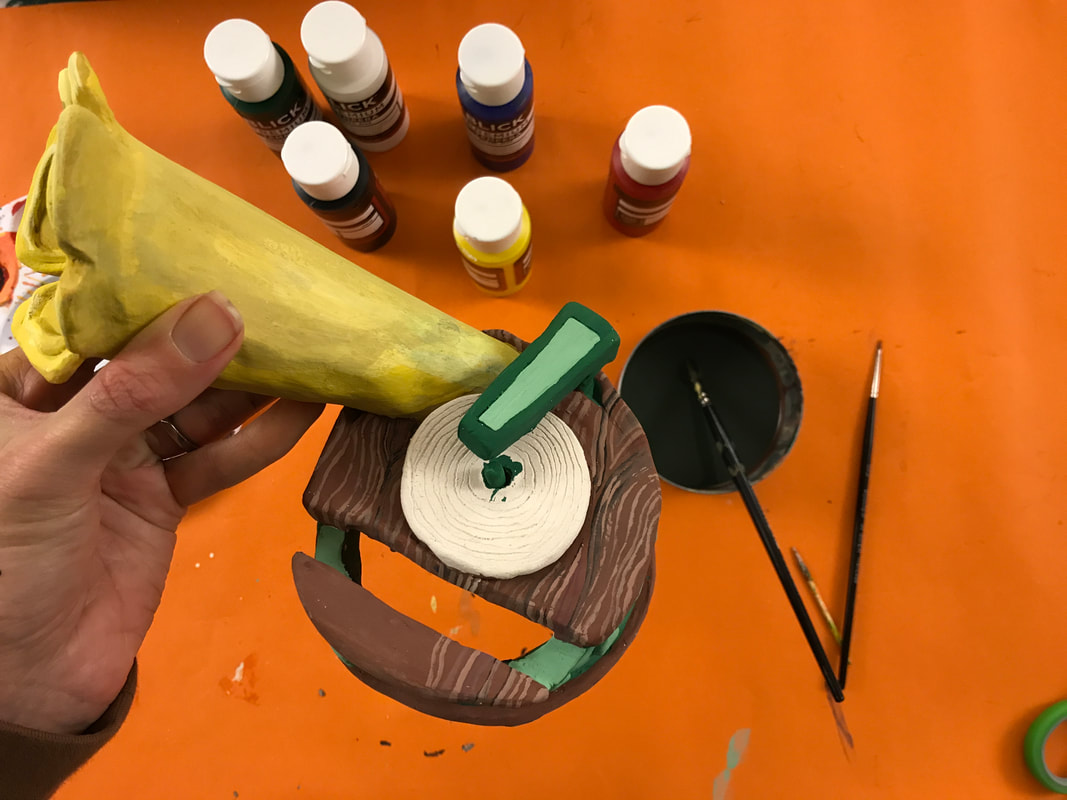
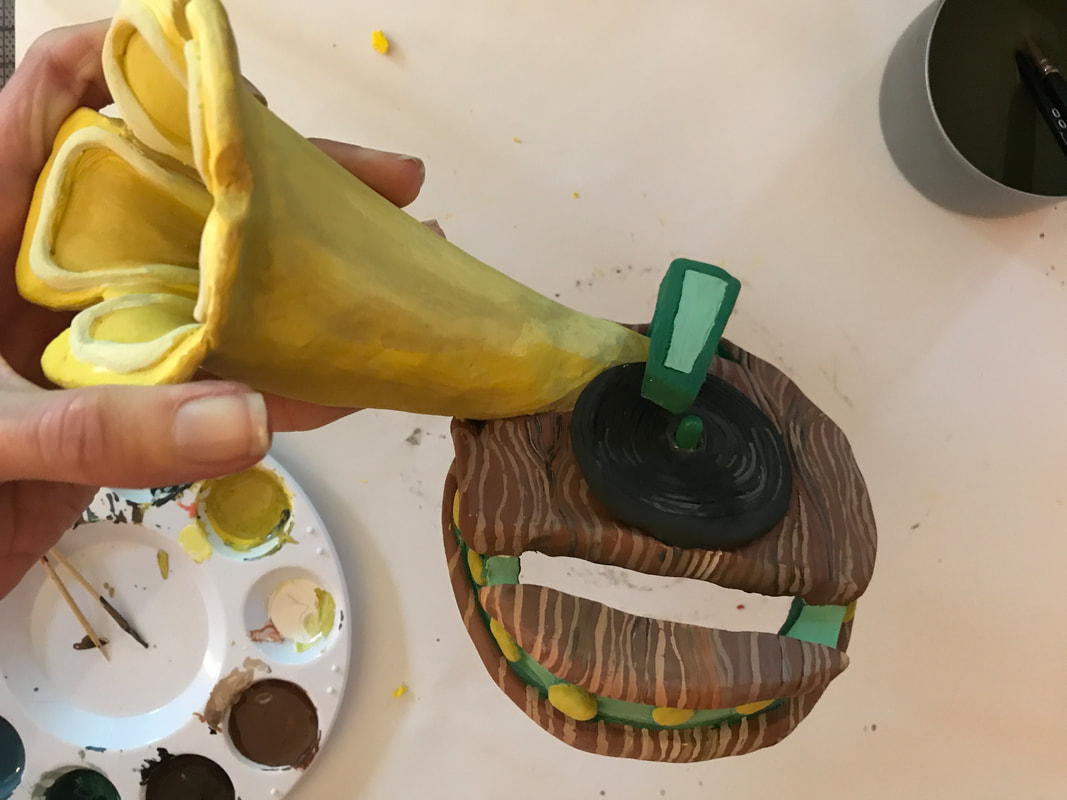
Phonograph Demo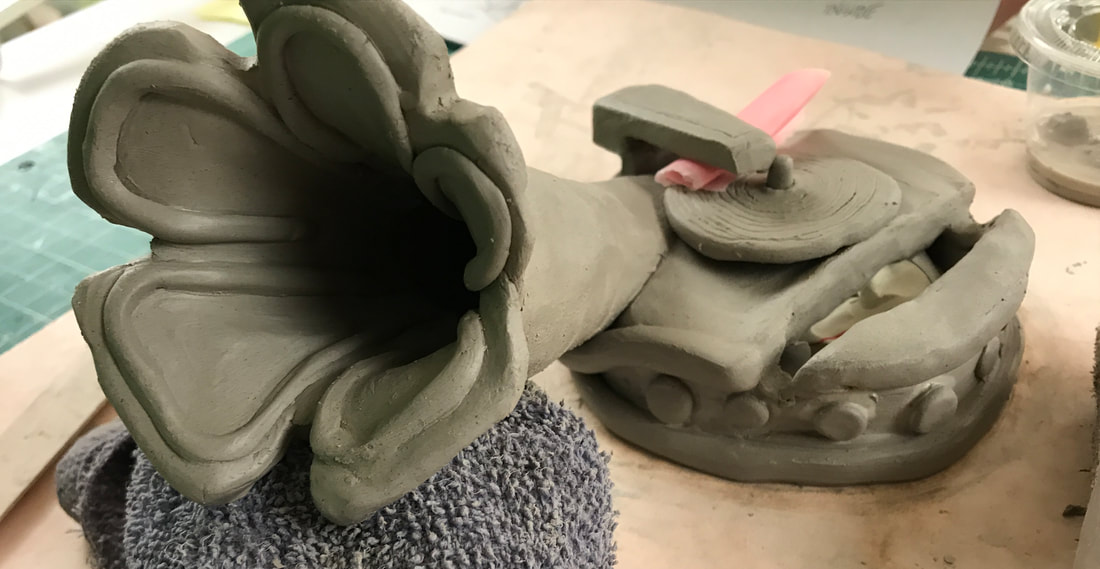
|
Turning in your Bone Dry Clay
TURN IN YOUR SCULPTURE TO THE "READY TO BE FIRED TABLE"
IT DOESN'T NEED TO BE BONE DRY - IT CAN BE LEATHER HARD.
IT DOESN'T NEED TO BE BONE DRY - IT CAN BE LEATHER HARD.
Photos You Need to Have of Your Sculpture
Right Side
Front
|
Back (cord hole visible)
Top
|
Left Side
Name Carved into Sculpture
|
Painting Your Ceramic Sculpture
|
VIDEO DEMONSTRATIONS
|
PAINTING YOUR SCULPTURE REQUIREMENTS
|

7 Photos of Finished Sculpture

|
|
|

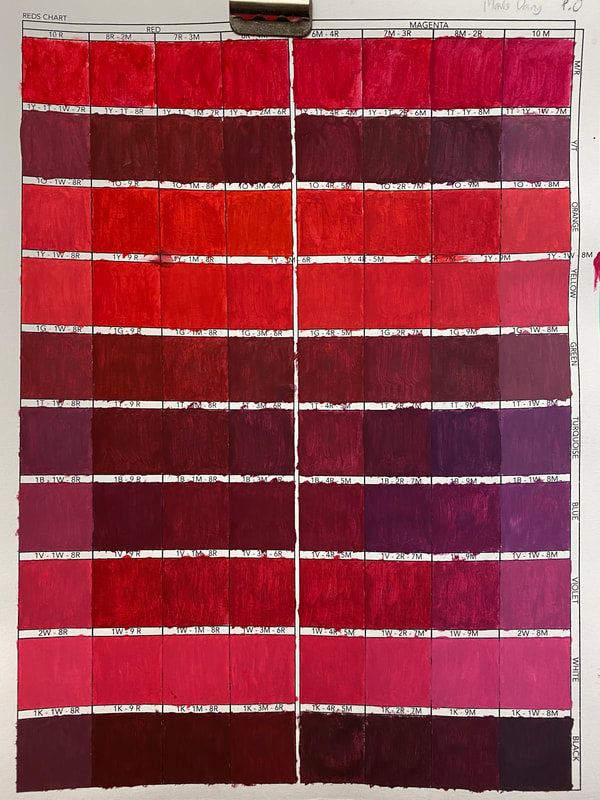
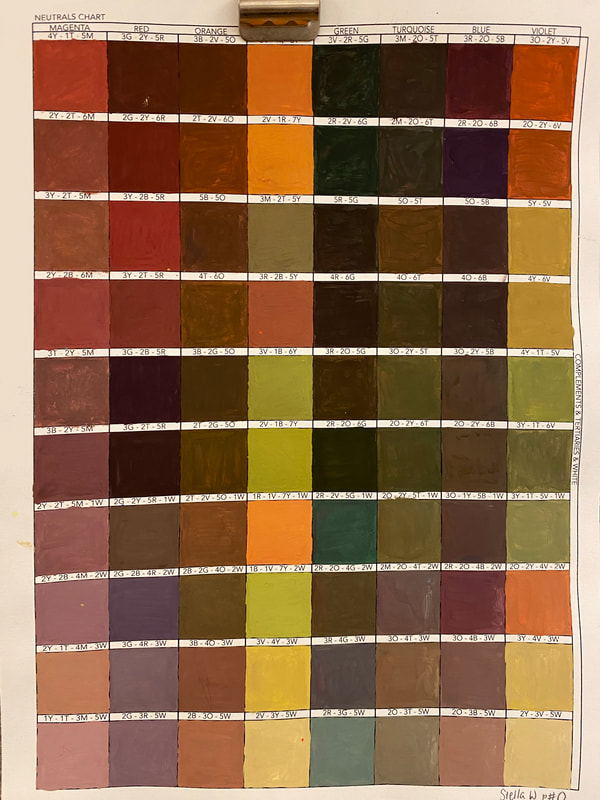
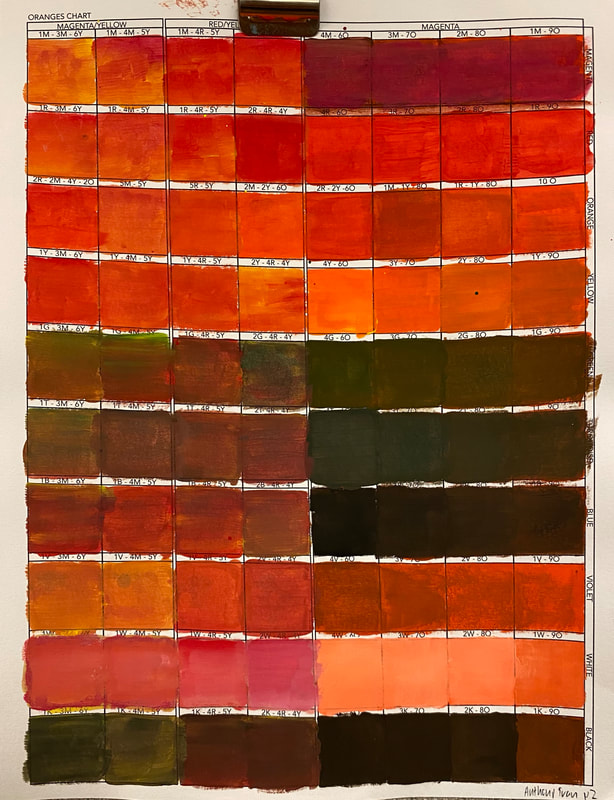
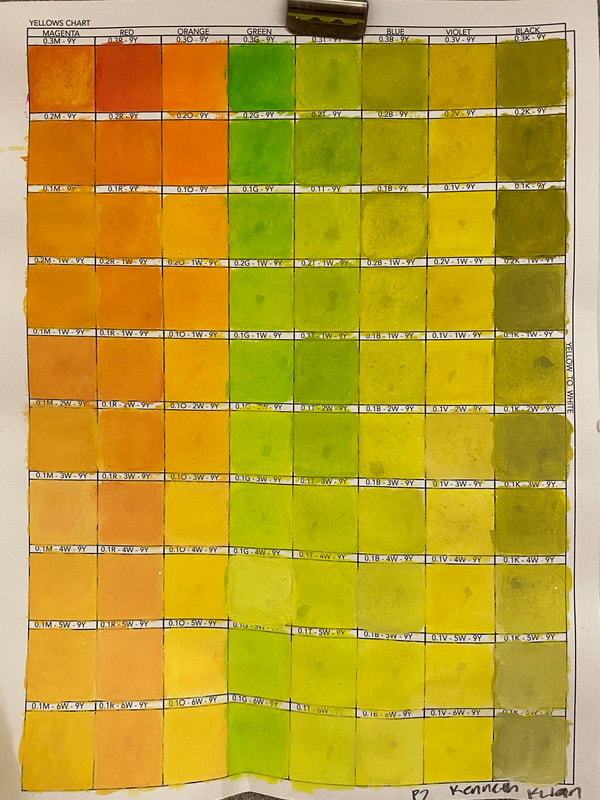
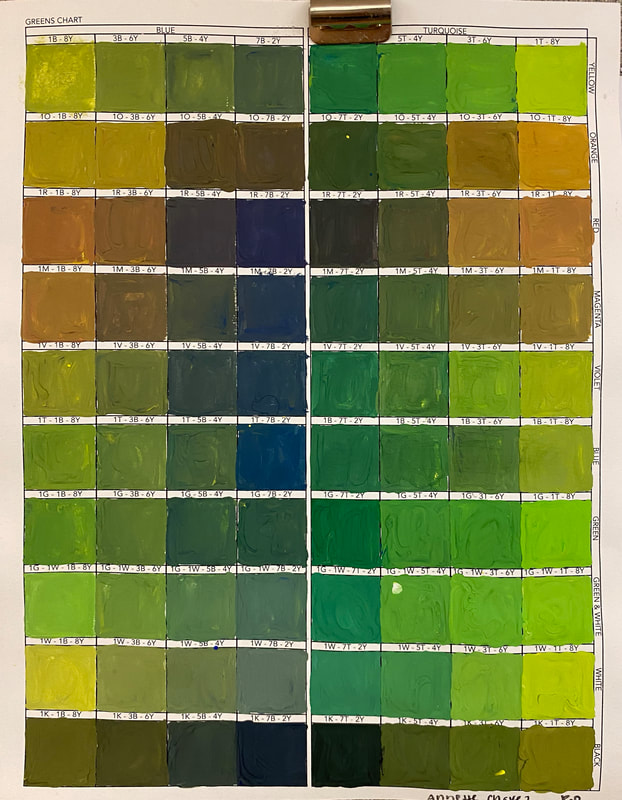
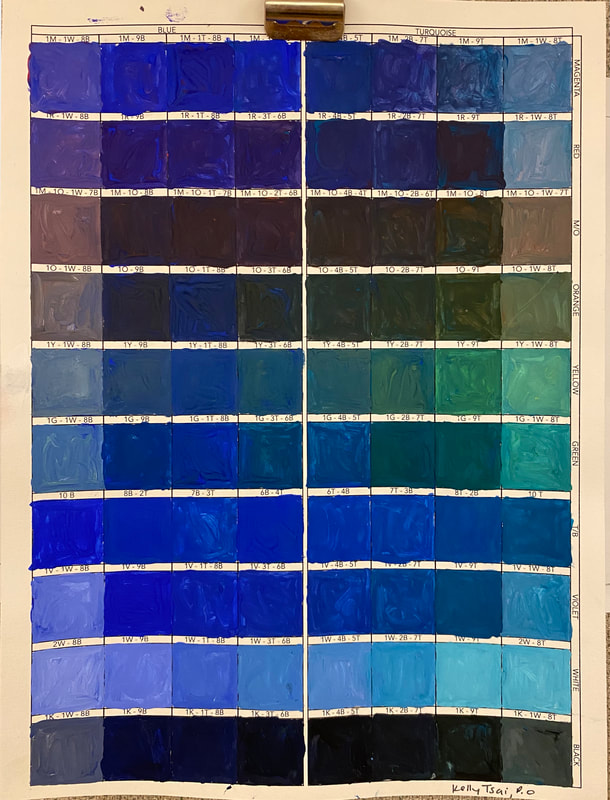
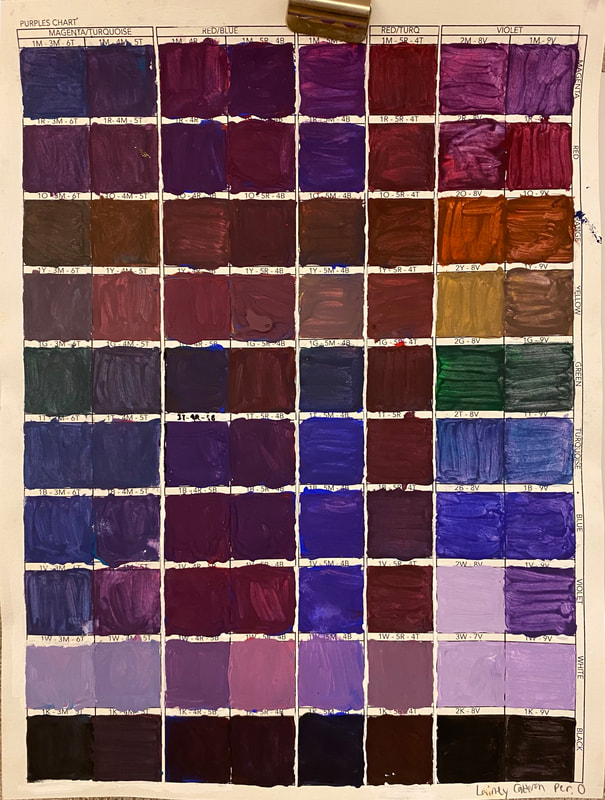
Tempera Color Charts
|
|
|
|
|
|
|
M = Magenta, R = Red, O = Orange, Y = Yellow, G = Green, B = Blue, T = Turquoise, K = Black, W = White
