art with ross
  • Home
  • Sculpture
  • Advanced Sculpture
  • Art Terminology
    • Art Term - Line
    • Art Term - Shape
    • Art Term - Form
    • Art Term - Color
    • Art Term - Value
    • Art Term - Texture
    • Art Term - Space
    • Art Term - Balance
    • Art Term - Contrast
    • Art Term - Dominance
    • Art Term - Pattern
    • Art Term - Movement
    • Art Term - Rhythm
    • Art Term - Variety
    • Art Term - Unity
    • Art Term - Style
    • Art Term - Perspective
    • Art Term - Vantage Point
    • Art Term - Graphic Design
    • Art Term - Hand Lettering
    • Art Term - Drawing Styles
    • Art Term - Shading
    • Art Term - Ceramics
    • Art Term - Painting
  • GHS
    • Field Trips
    • Intro
    • Motion
    • Printmaking
    • AP
    • Gallery
    • Other Art Classes
    • Distance Learning
    • AP 2019
    • Enrichment

Bezel Setting

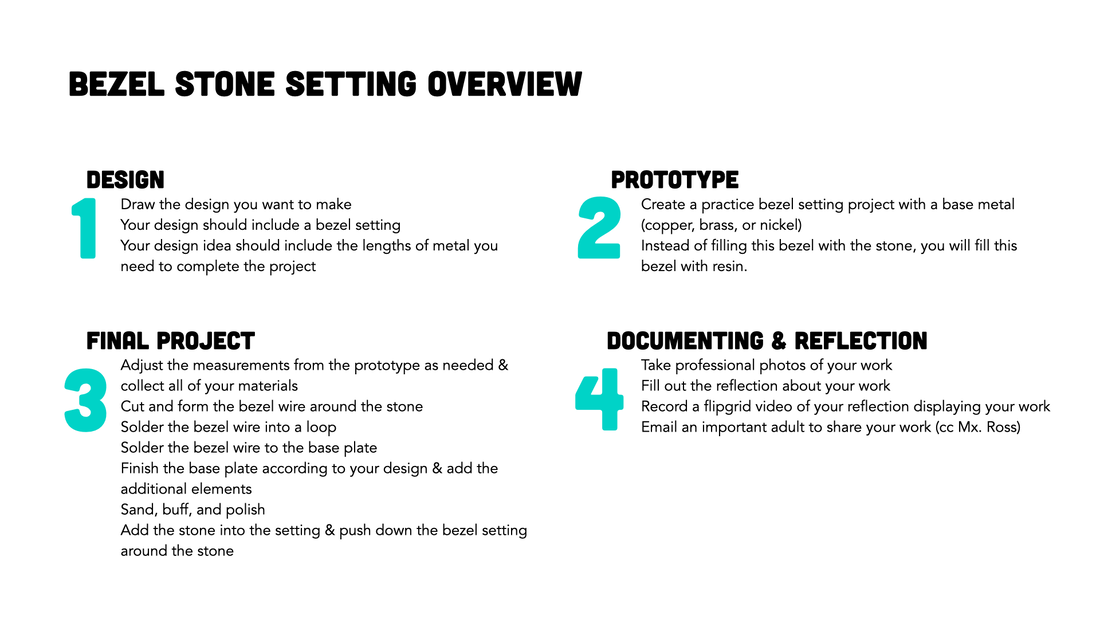
Students will create at least two bezel settings. Students will use the cutting pliers, sandpaper, solder station, hand files, buffer, polisher, ultrasonic, and jewelry saw to make the two bezel settings.

This unit has four parts: research and design (designing a project, measuring for materials), prototype (creating a project that uses a bezel setting in a base metal), final design in metal of student's choice using a stone cabochon, and documentation of the finished work (photos, email, reflection, and critique).

Overview Unit Goal

Picture
Picture

Composition Concepts

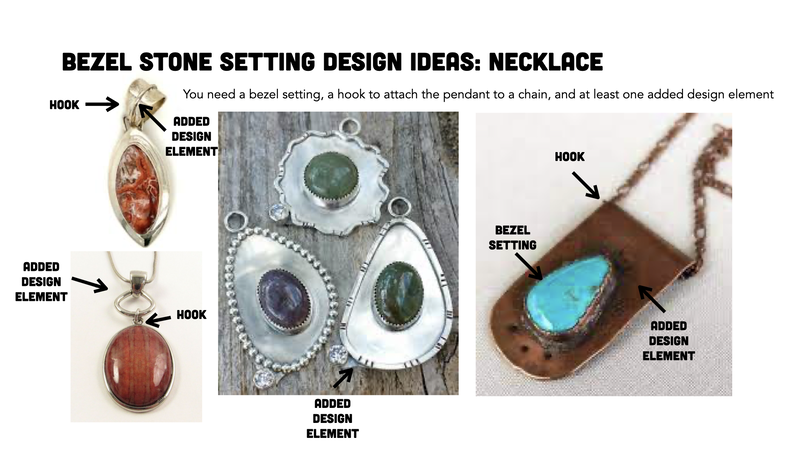
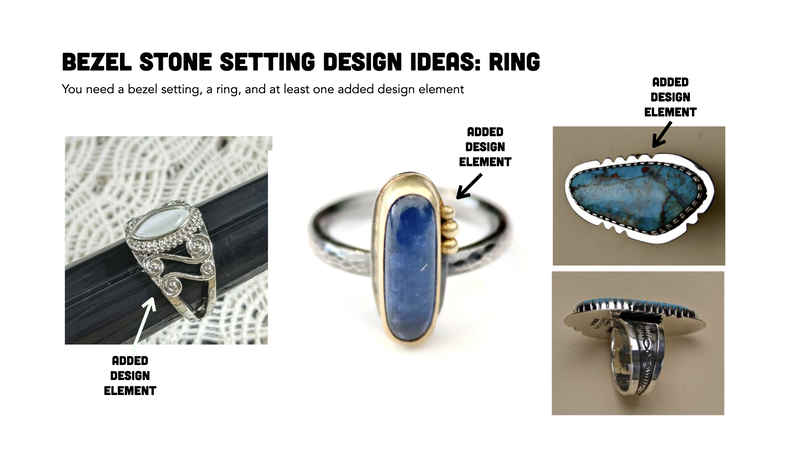
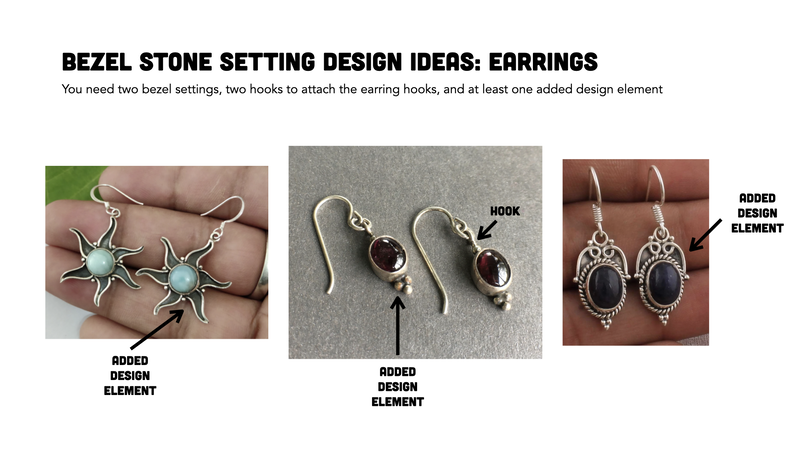
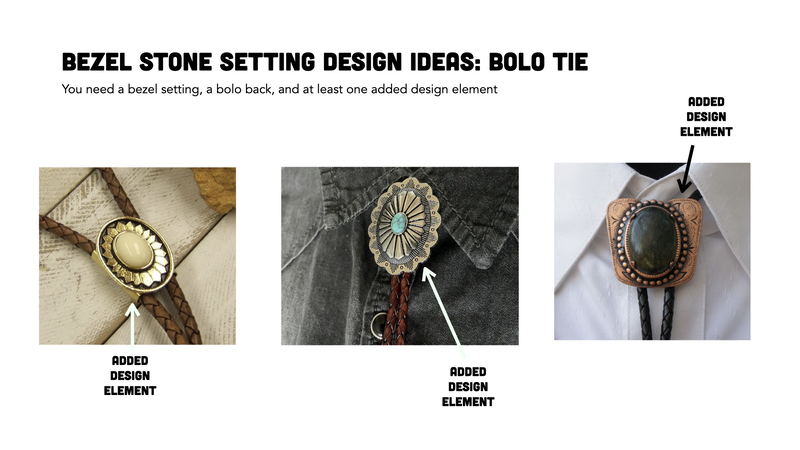
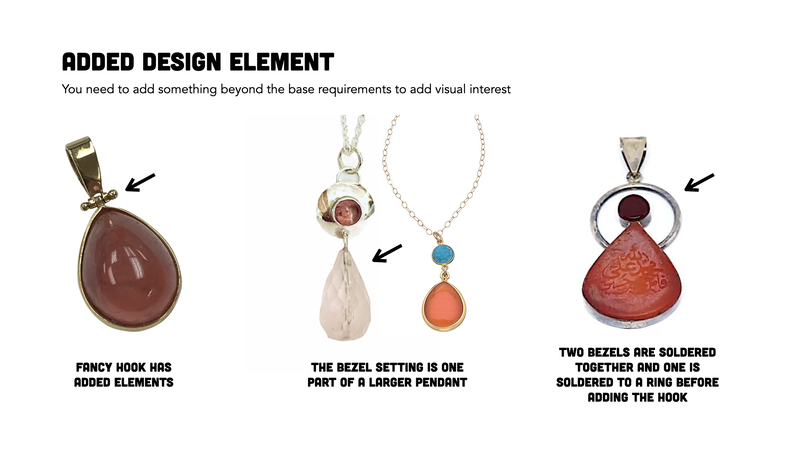
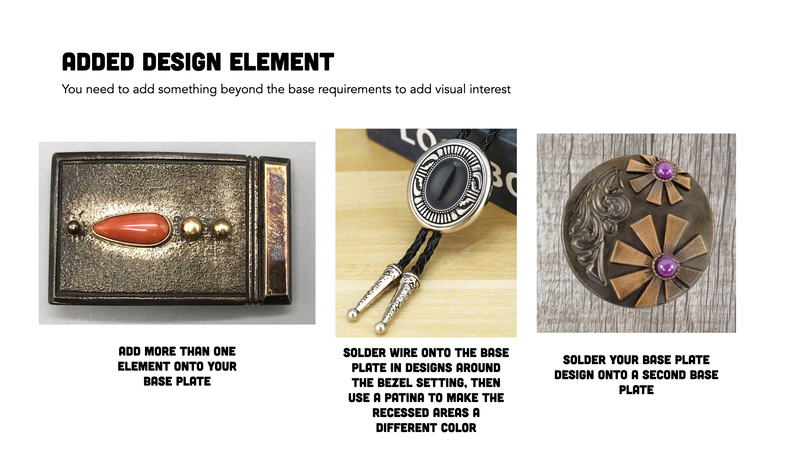
  • Creating Additional Design Elements
  • Functionality
  • Design Elements in Resin Casting
  • Cabochon Stone & Metal Combinations

Technical Skills

  • Soldering
  • Sanding
  • Filing
  • Buffing 
  • Polishing
  • Sawing

Tools & Supplies

  • Soldering Station
  • Jewelry Saw
  • Sandpaper
  • Hand Files
  • Buffer
  • Polisher

Technical Skills Videos

Making a Bezel Setting
Entire Process
Soldering Bezel Wire to Base Plate
Setting the Stone

Order of Work

Determine Your Design & Function
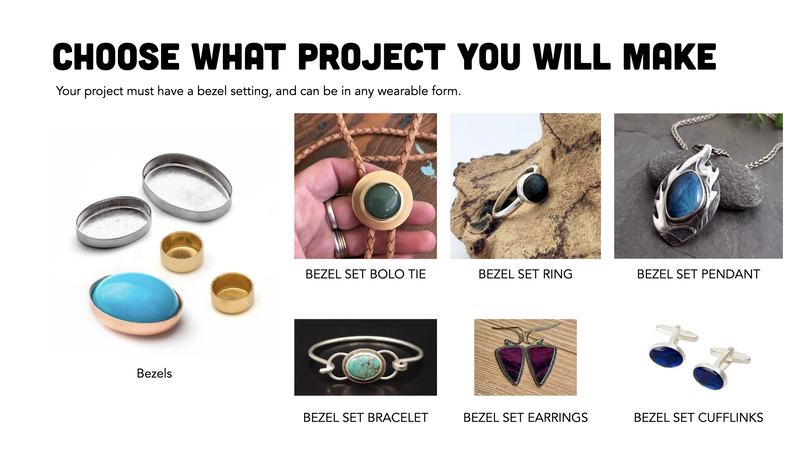
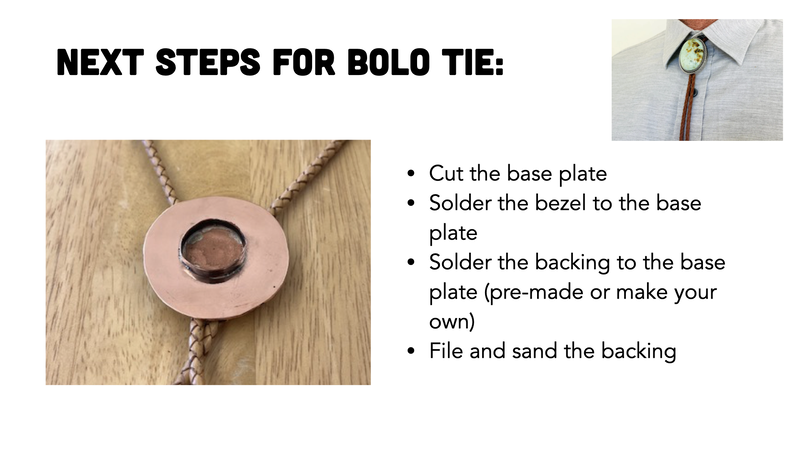
  • Choose a project type: ring, earrings, pendant, bolo tie, belt buckle, cufflinks
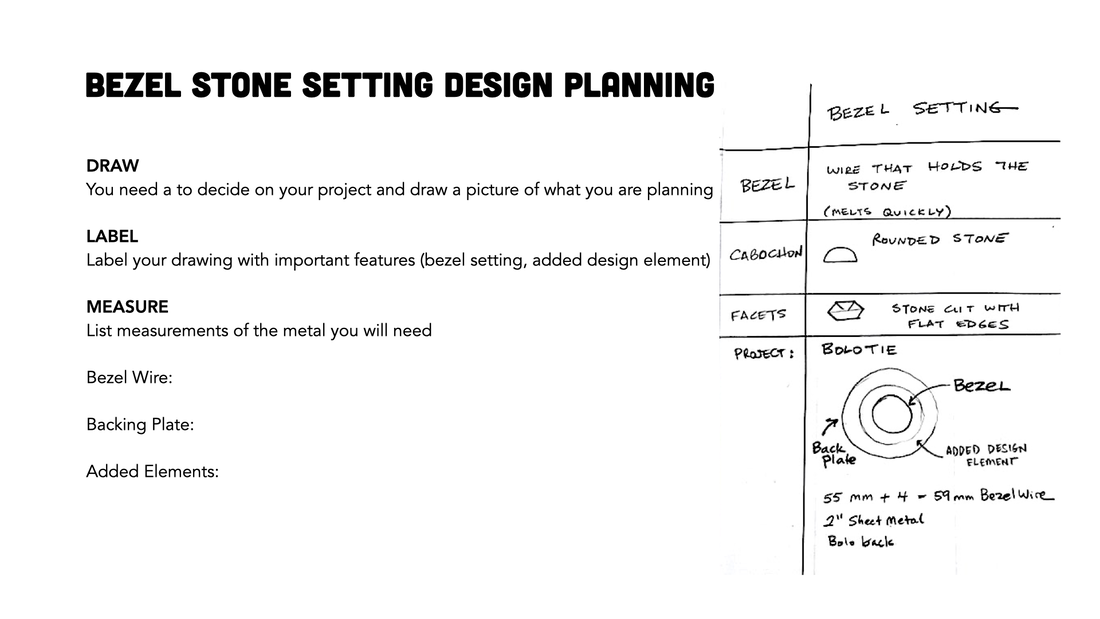
  • Draw a design that is functional 
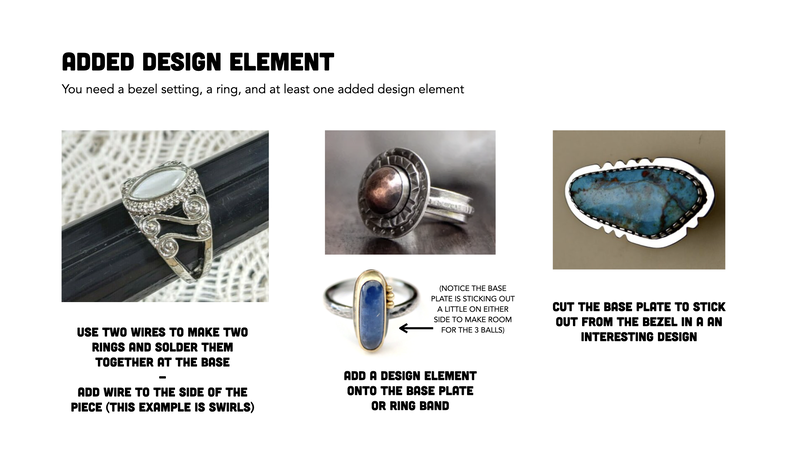
  • Add a design element that adds visual interest
Bezel Setting #1
  • Choose Copper, Brass, or Nickel
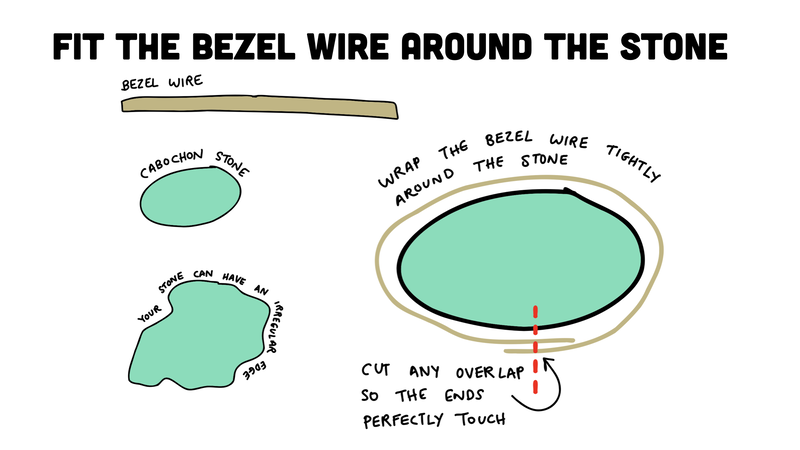
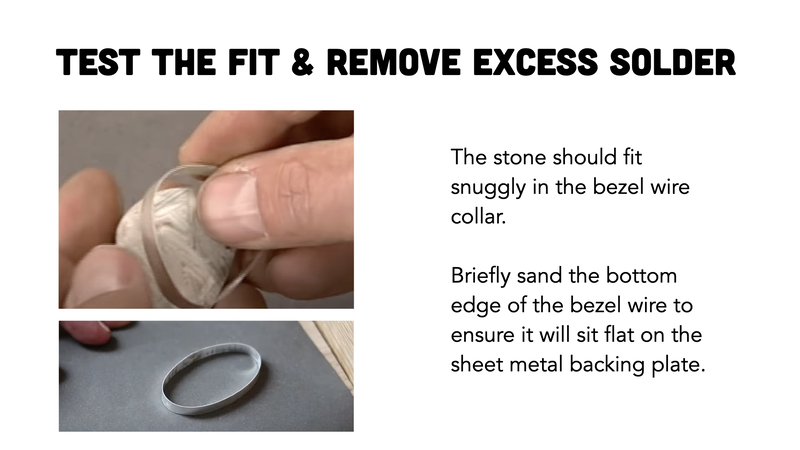
  • Form the Bezel Wire around the stone & cut to perfect fit
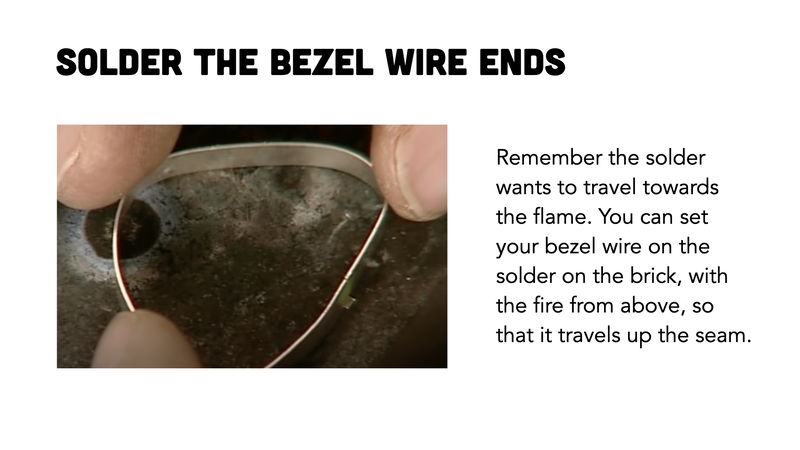
  • Solder the ends of the bezel wire
  • Cut the backing plate
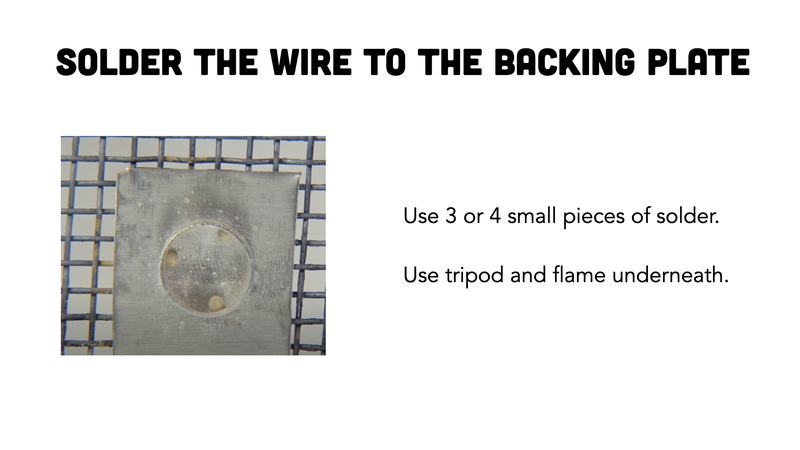
  • Solder the bezel wire to the backing plate (fire from underneath)
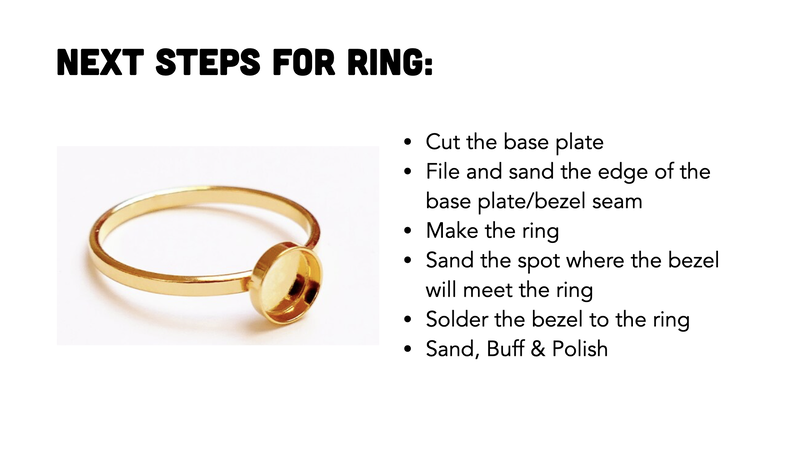
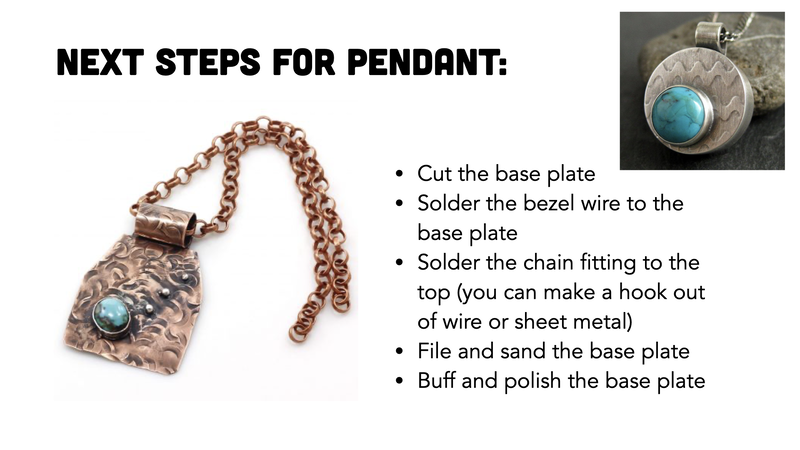
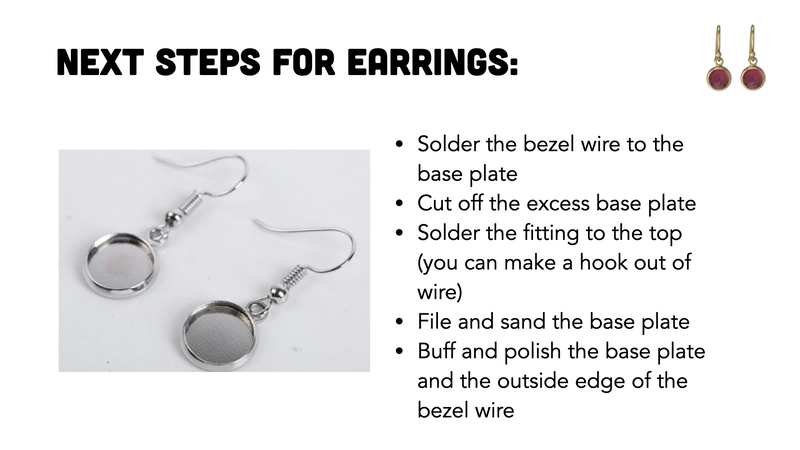
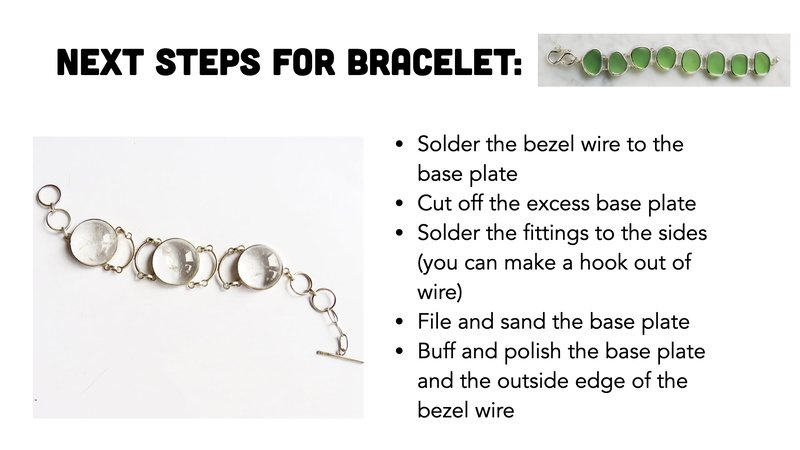
  • Make the rest of the project parts (ex: ring, earring loop, pendant hook, bolo tie back, etc.)
  • Solder the bezel to the rest
  • Pickle, Sand, Buff & Polish
  • Decide on an interior image, object, or color and turn in for resin pour
Best Setting #2
  • Choose your metal
  • Form the Bezel Wire around the stone & cut to perfect fit
  • Solder the ends of the bezel wire
  • Cut the backing plate
  • Solder the bezel wire to the backing plate (fire from underneath)
  • Make the rest of the project parts (ex: ring, earring loop, pendant hook, bolo tie back, etc.)
  • Solder the bezel to the rest
  • Pickle, Sand, Buff & Polish
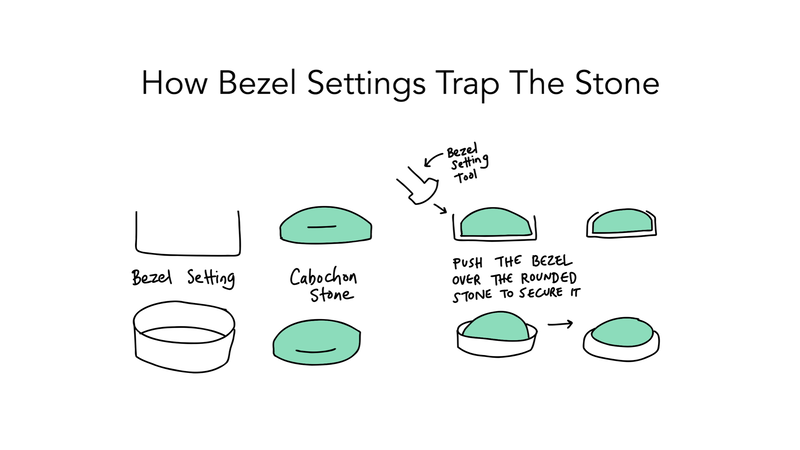
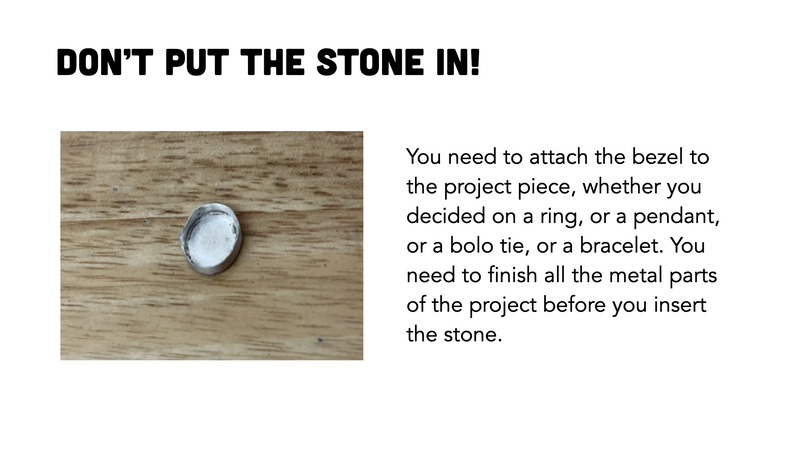
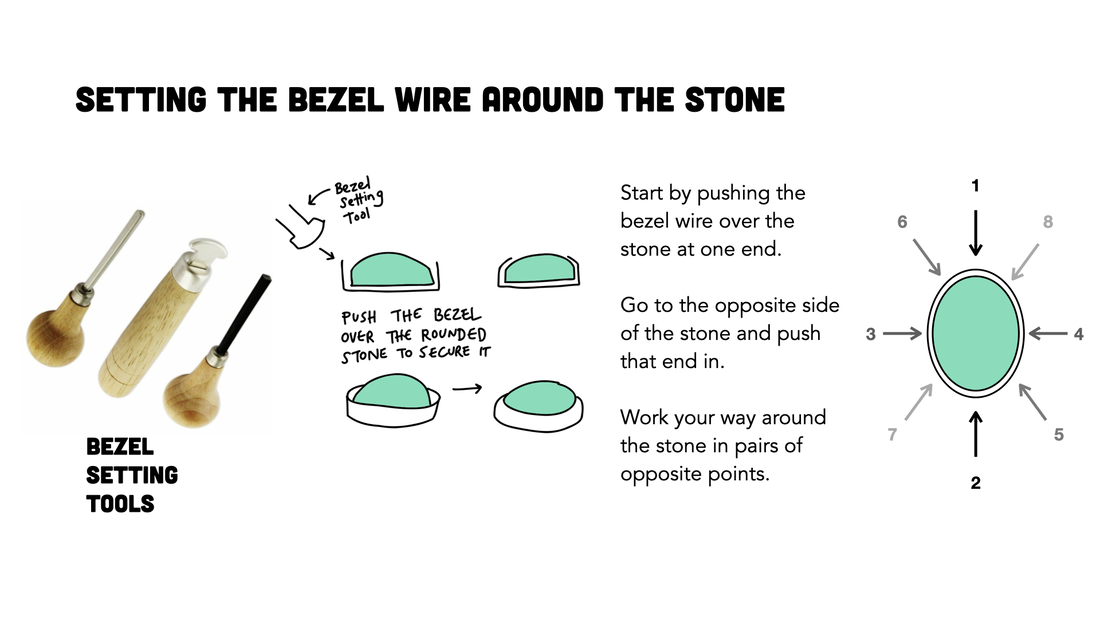
  • Set the stone into the bezel setting (use the bezel setting tools)
Documenting
  • PHOTOGRAPH your project (3 photos: Bezel #1, Bezel #2, Together)
  • Fill out the REFLECTION
  • Record a FLIP VIDEO
  • EMAIL an important adult about your work

Bezel Setting Planning

Picture

Forming the Bezel Wire around the Stone


Soldering the Bezel Wire into a Loop


Solder the Bezel Wire Loop to the Base Plate


Attach Bezel Setting to the Other Project Parts


More Added Design Element Ideas


Setting the Stone in the Bezel Setting

Picture

3 Photos of your Bezel Settings

  • Use a solid background (no distracting lines, shadows, table, or other stuff) like the photo cube
  • Use quality lighting (soft shadow from artwork only)
  • Photo should be in focus, with artwork centered
  • One photo of each bezel setting separately
  • One photo of both bezel setting projects together
  • Three photos in total

Email an Image of Your Project

  • Follow the email instructions to make sure you get full credit for your email.

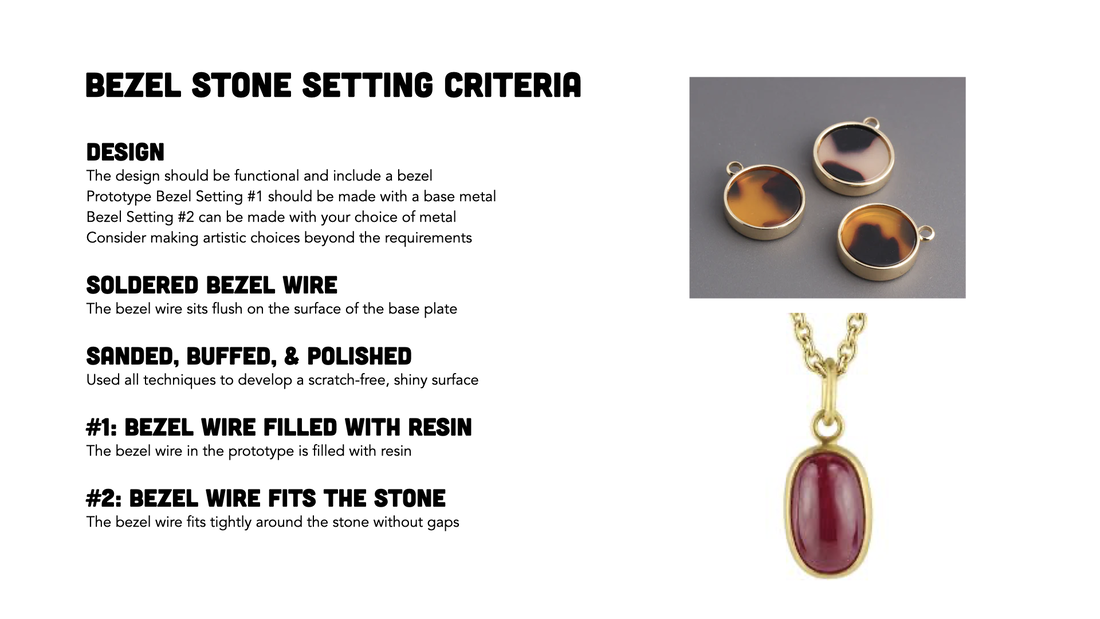
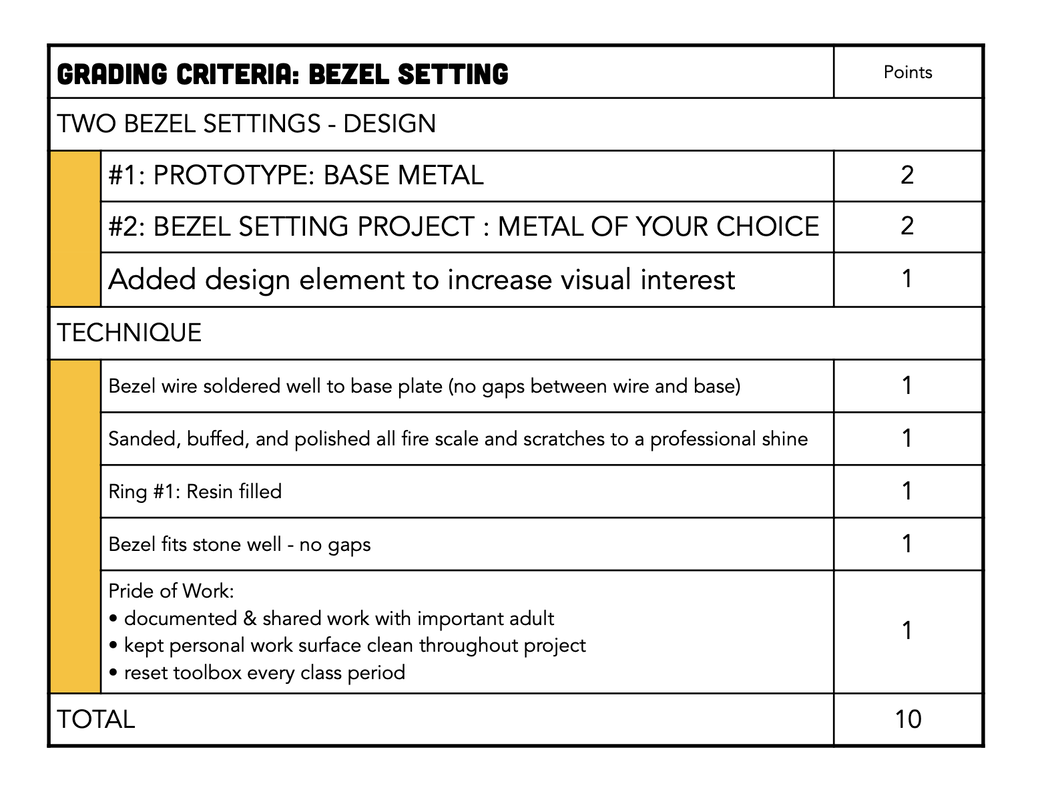
Grading Criteria

Picture
Powered by Create your own unique website with customizable templates.