
|
Animation: Lip SyncStudents will create an animated puppet head with replaceable mouths. Students will animate the puppet speaking, singing, or otherwise using movement to create a believable motion for their character.
This unit has four parts: research and design (designing the puppet, choosing/creating sound), prototype (creating a volume out of paper), final project design in fabric, and documentation of the finished work (photos, email, reflection, and critique). |
Overview Unit Goal
Composition Concepts
|
|
Inspiration VideosTechnical Skill VideosMore Interesting VideosResource Book Page |
Order of WorkDetermine Your Design
|
Stop Motion Animation


Project Requirements
Step 1: Designing Your Project
|
|
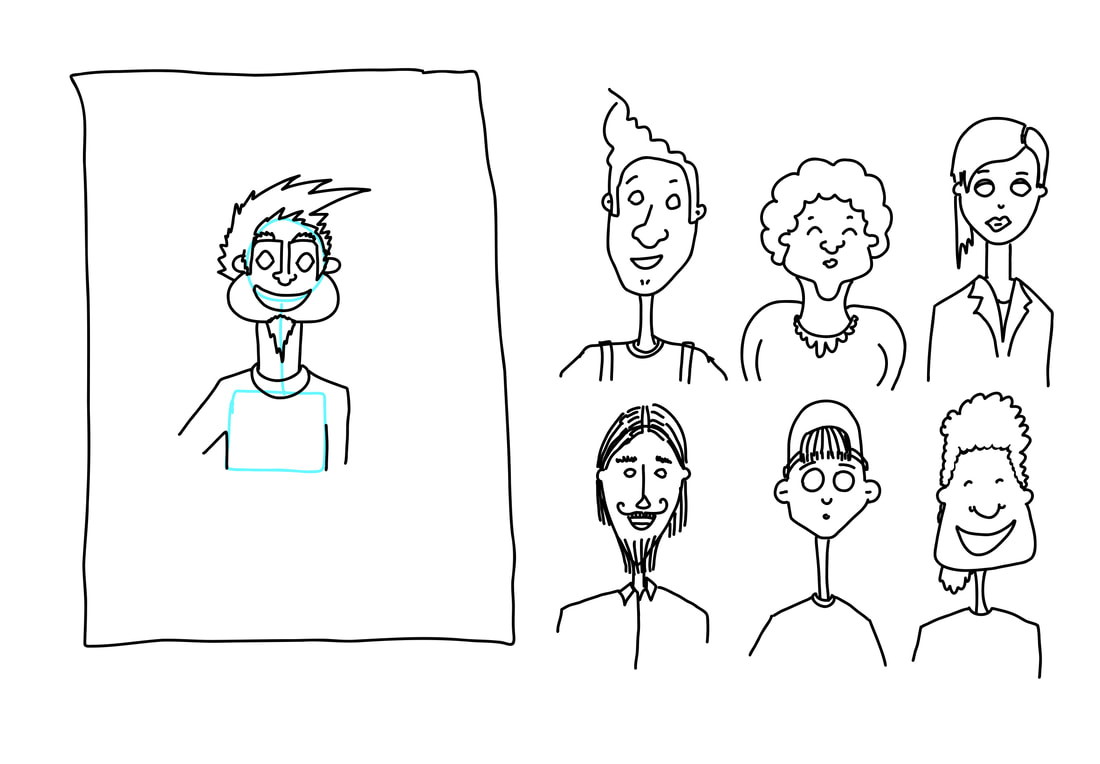
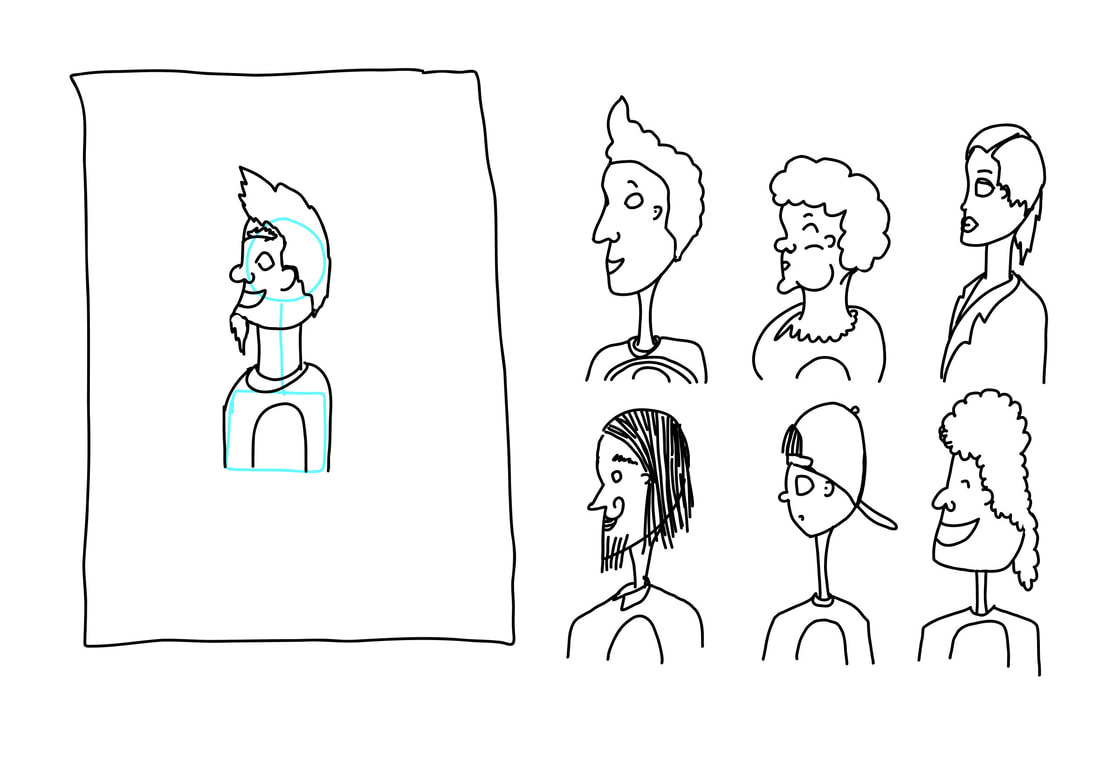
DRAW YOUR PUPPET DESIGN - 2 Views
|
Step 1-B: Sound
|
OPTION: GROUP - or - INDEPENDENT WORK
You have the option to work in a table group, or work independently. You will need to decide this at this step, because it impacts the sound you will use. If you work in a group, you will all use the same sound and animate your puppets in a group on the stage at the same time. You'll all use one background set and your characters will interact. |
ABOUT THE SOUND YOU NEED:
You need to create or find 10 to 30 seconds of sound that you will animate your puppet to. You can use dialogue (talking), music (singing), or a combination. You are required to have your character in motion for 10 seconds. The video itself is recommended to be 10 - 30 seconds. |
FINDING OR MAKING YOUR SOUND:
You can download a recording (from a show, movie, song, etc.) or create your own (make a video with your phone or iPad). Remember you only need a short clip, so you'll want to cut down that source footage to a small clip. You can use iMovie or Premiere Rush (free apps on your iPad) to cut your clip down or edit out sections. |
Things to Consider
- YOUR PUPPET WANTS PERSONALITY - give your character interesting facial proportions and distinct features
- EXAGGERATE - draw your favorite character more than once, and try to exaggerate different features to see how interesting you can make your design
- CLEAN SOUND - make sure your sound is of good quality. You don't want a bunch of white noise distracting from the character's sounds
- SHORT CLIP - 10 seconds of video at 12 frames per second requires you to take at least 120 photos of your puppet moving very slowly. Be sure you cut down your clip to a reasonable size (between 10 and 30 seconds is best)
Step 2: Sculpting a Puppet
|
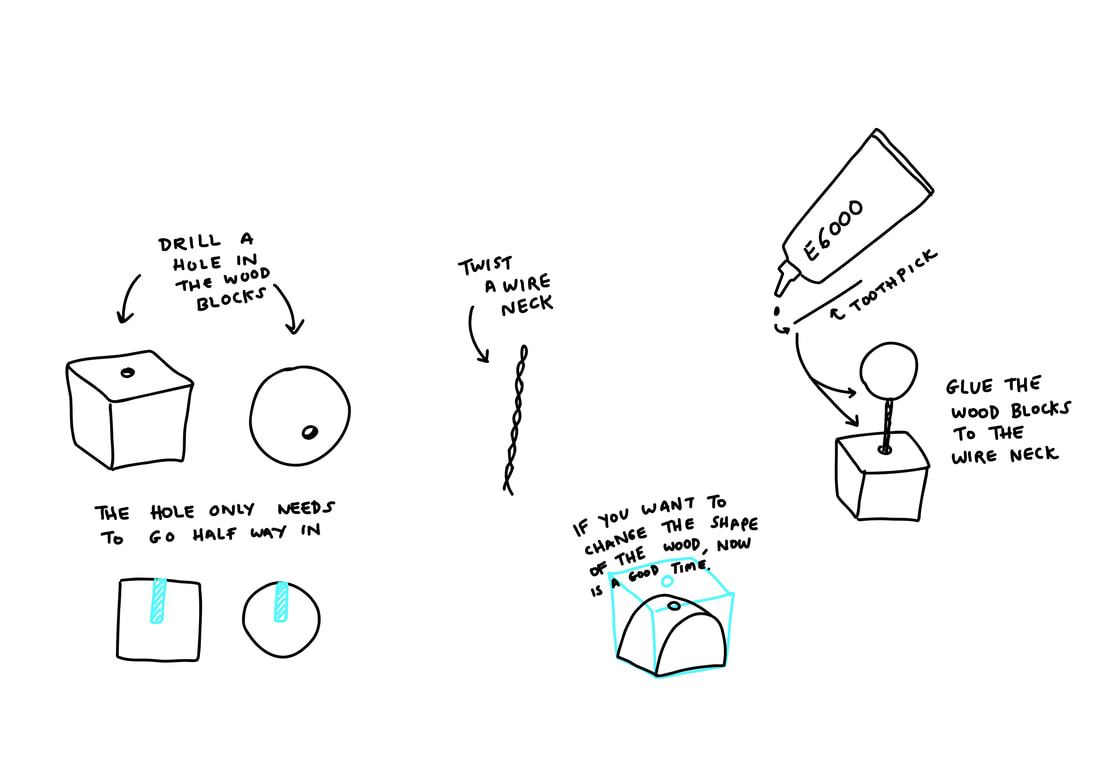
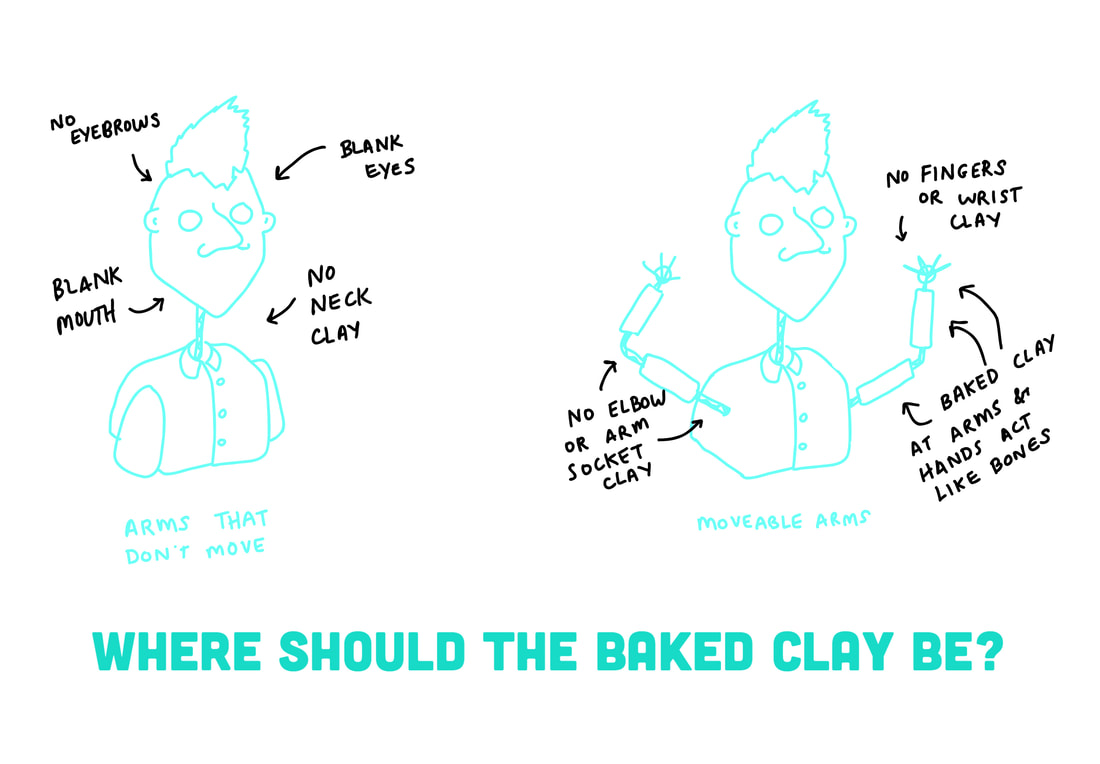
INNER ARMATURE
|
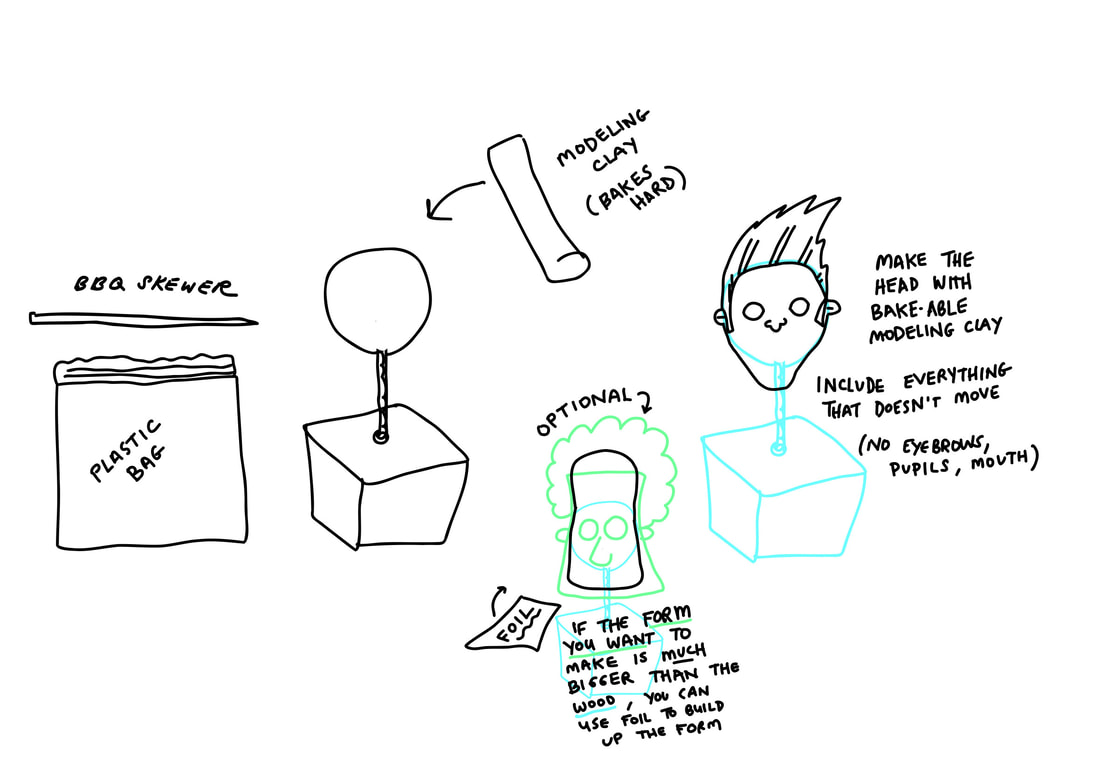
CLAY PARTS THAT DON'T MOVE: HEAD
|
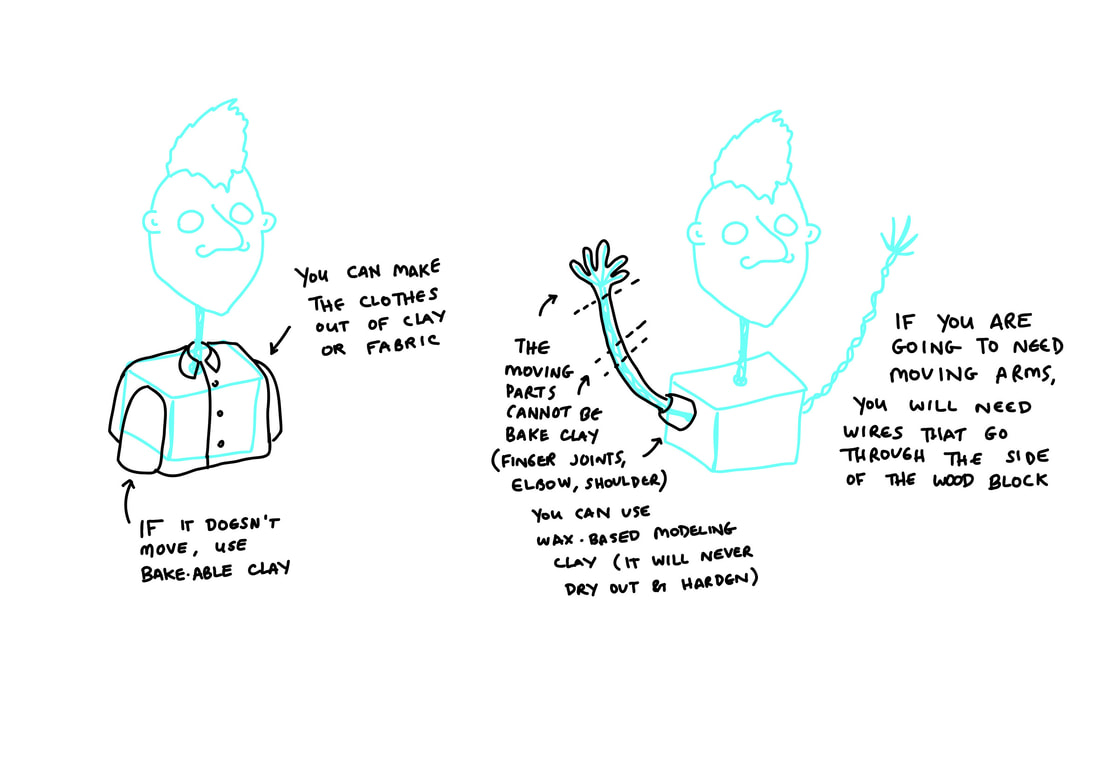
CLAY PARTS THAT DON'T MOVE: TORSO
|
|
|
|

|
BAKED CLAY
|
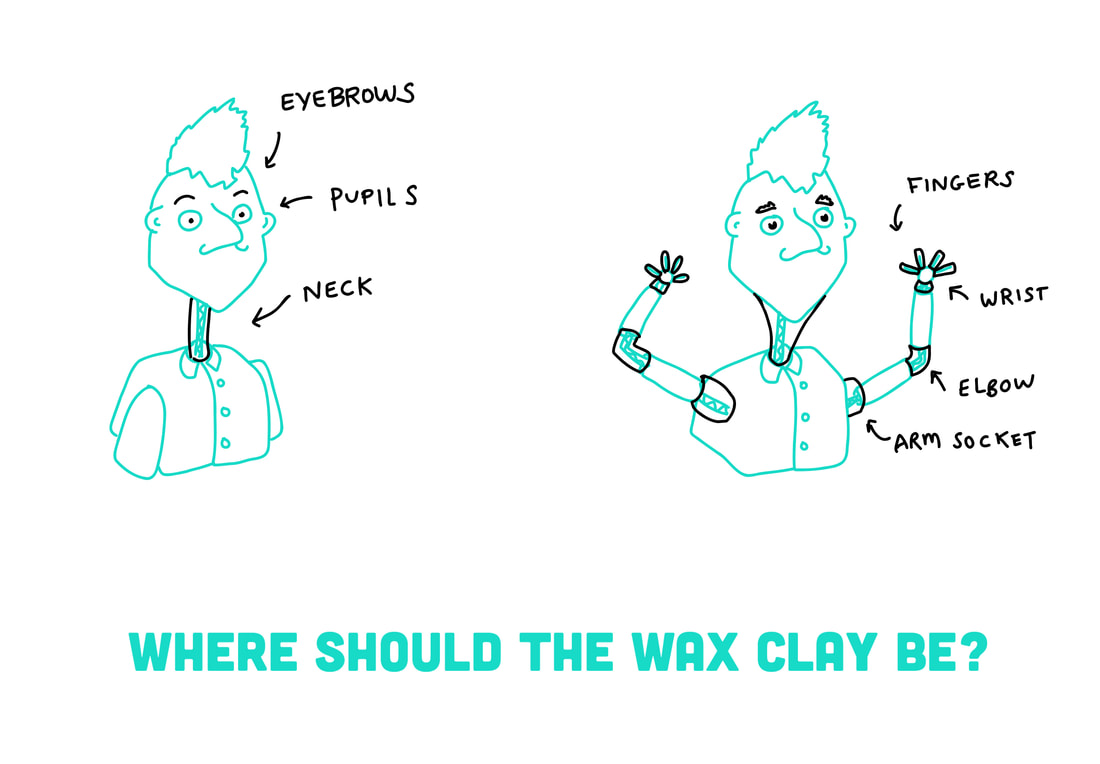
WAX-BASED CLAY
|
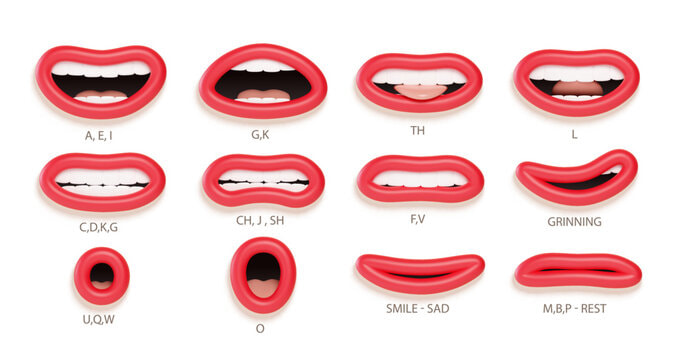
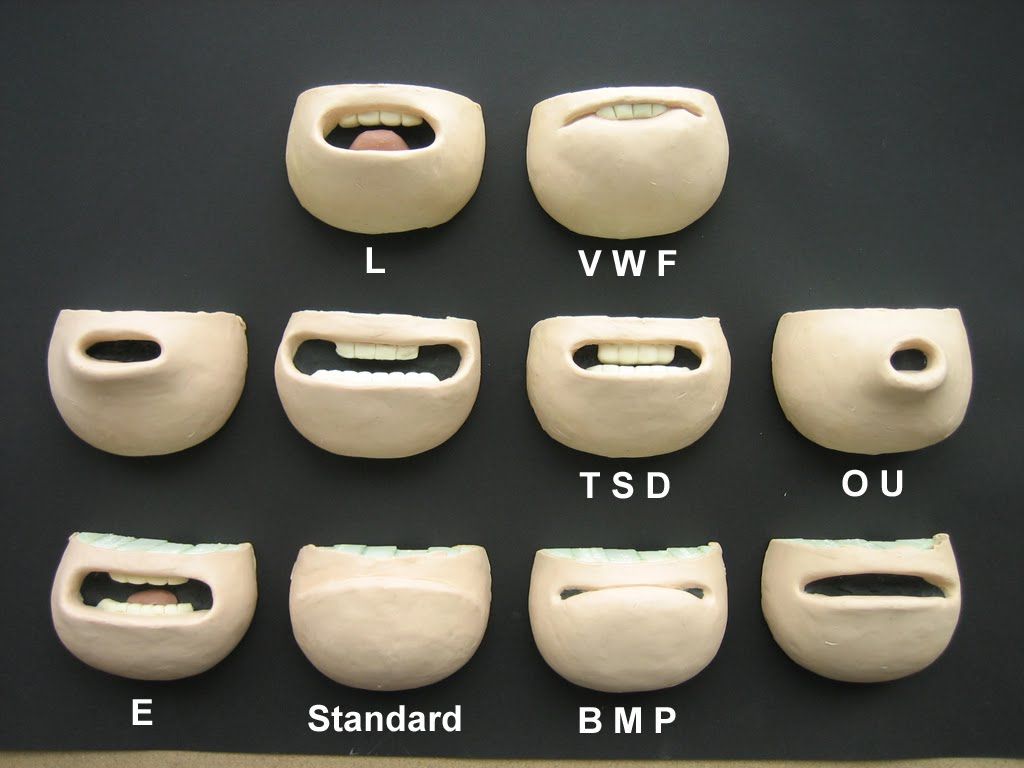
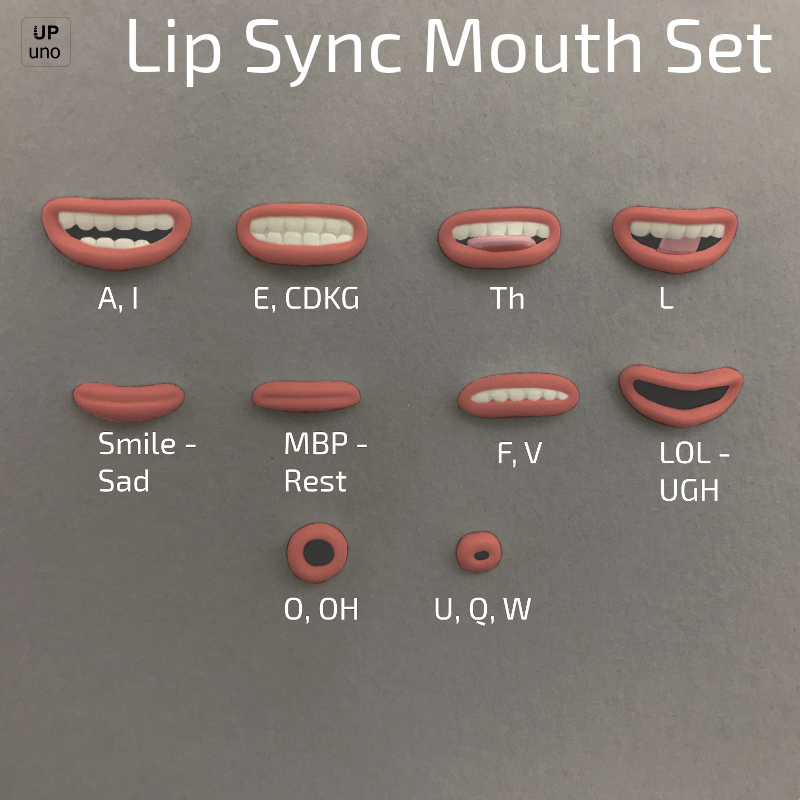
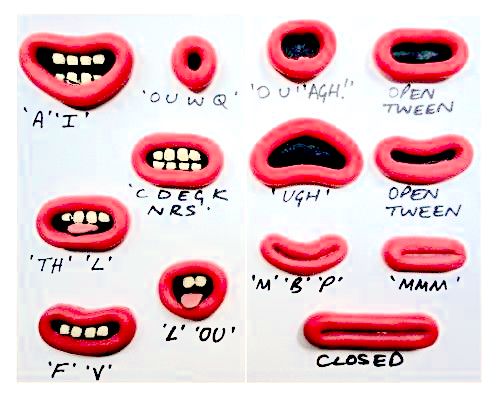
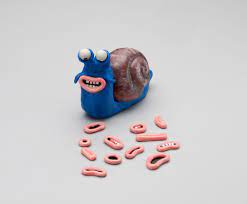
REPLACEABLE MOUTHS
|
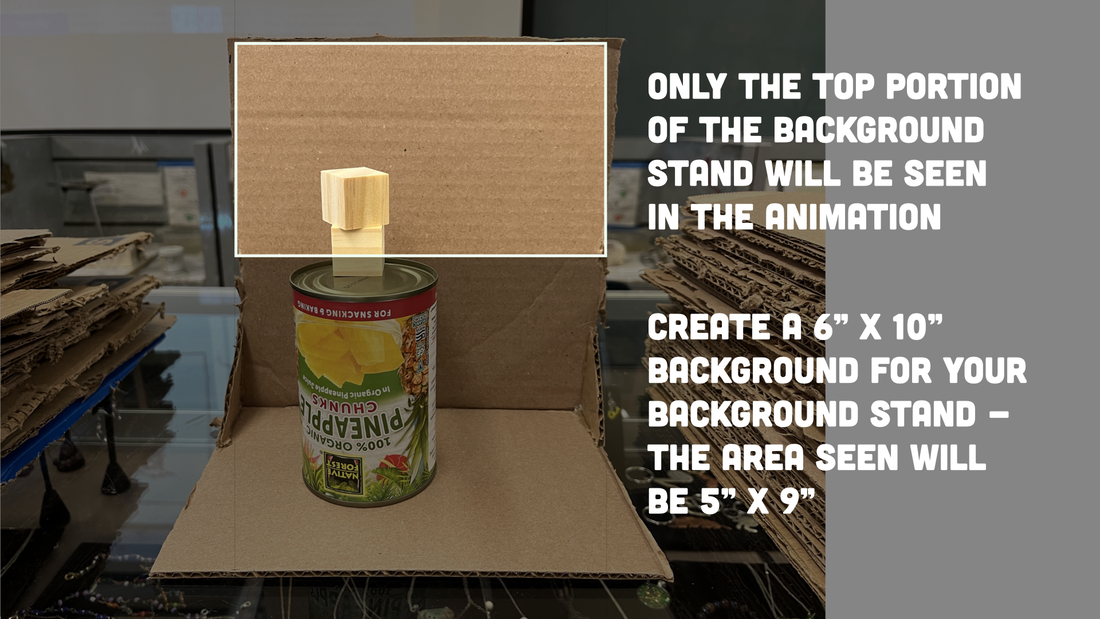
Step 2 - B: Making the Set / Background
|
|
Preparing for Step 3: Animation Principles
There are 12 Principles of Animation. Watch these videos to learn how to make a convincing illusion of movement.
Step 3 - A: Practicing Animating
|
|
|
Step 3 - B: Animating Your Puppet
|
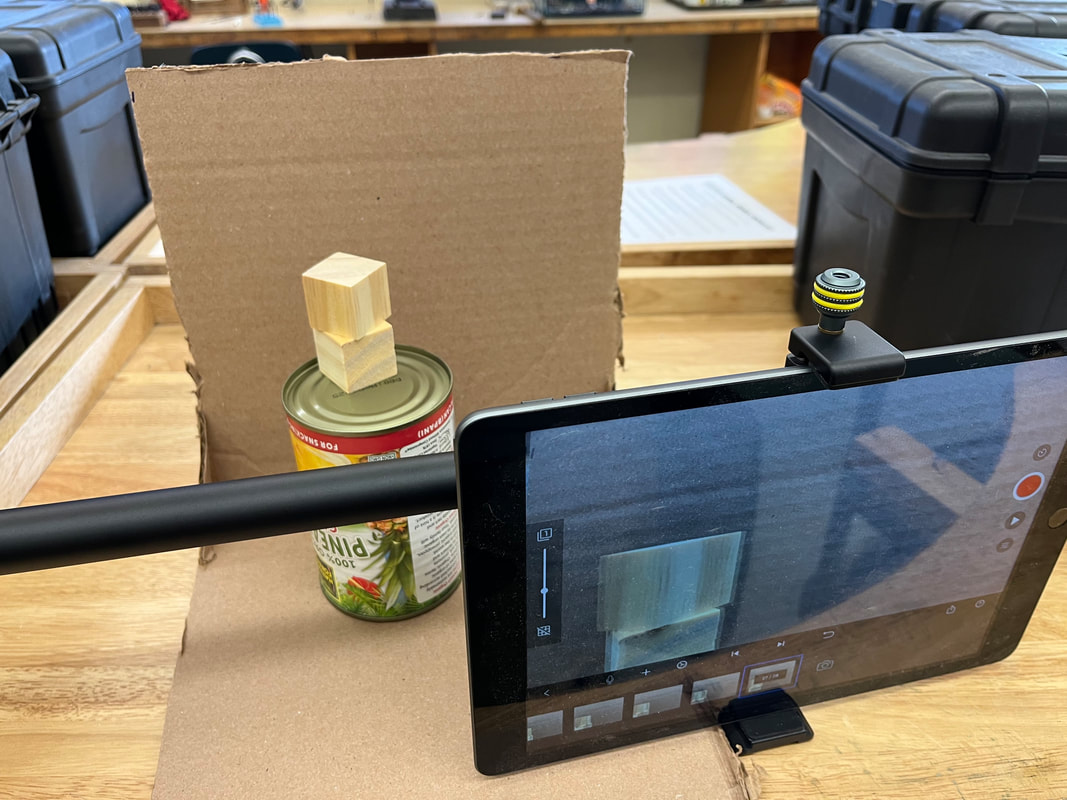
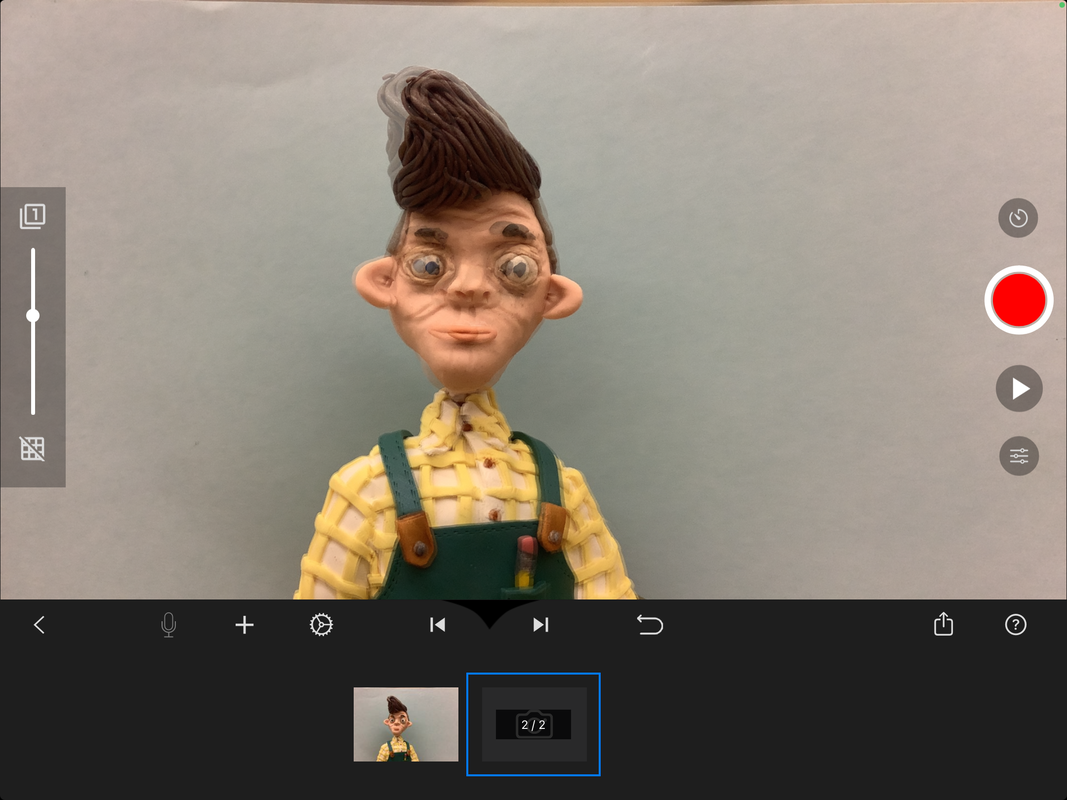
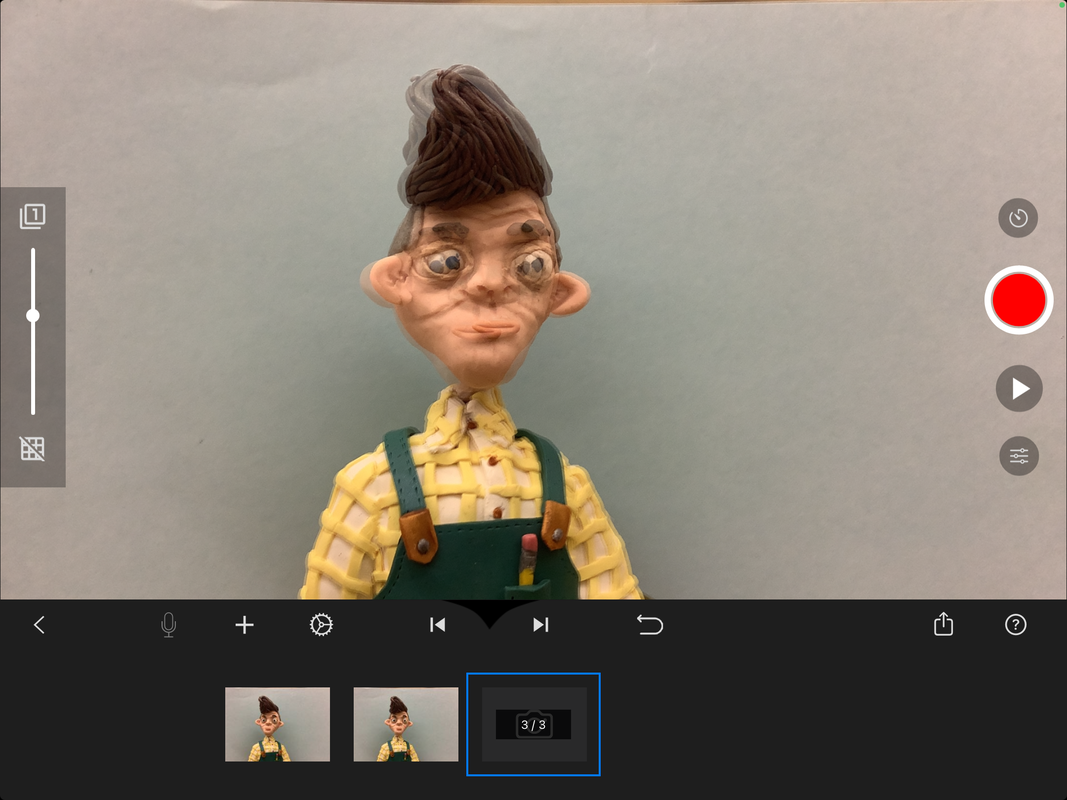
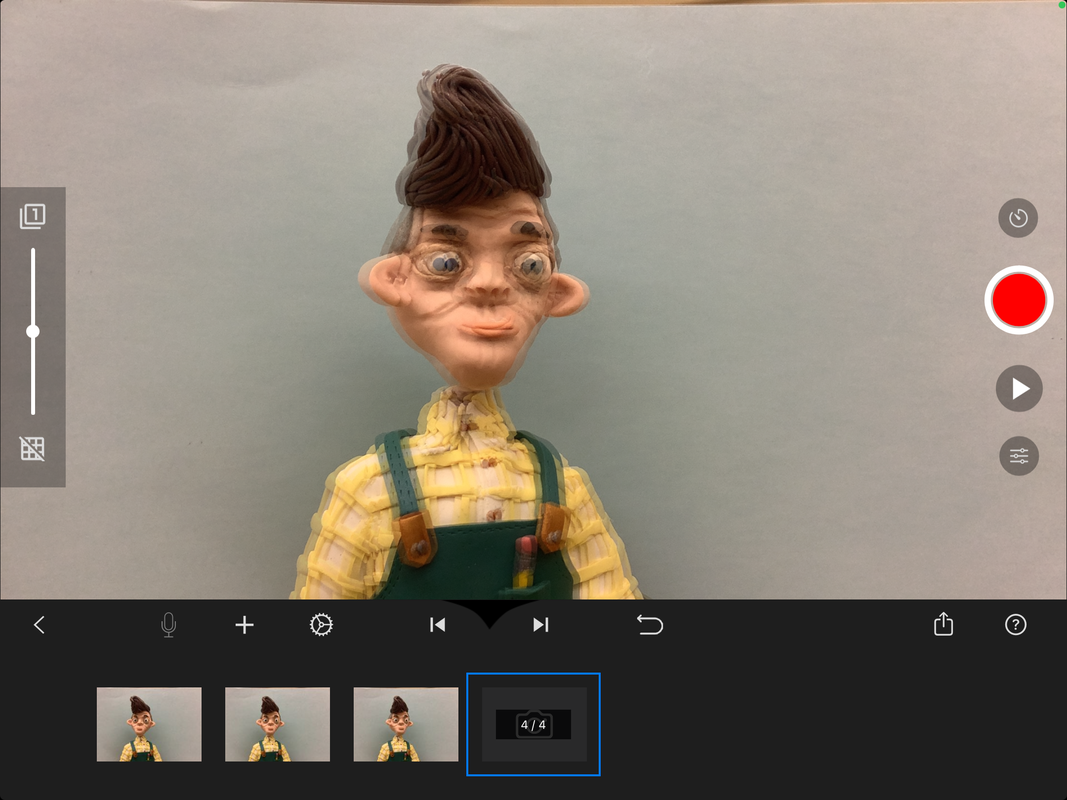
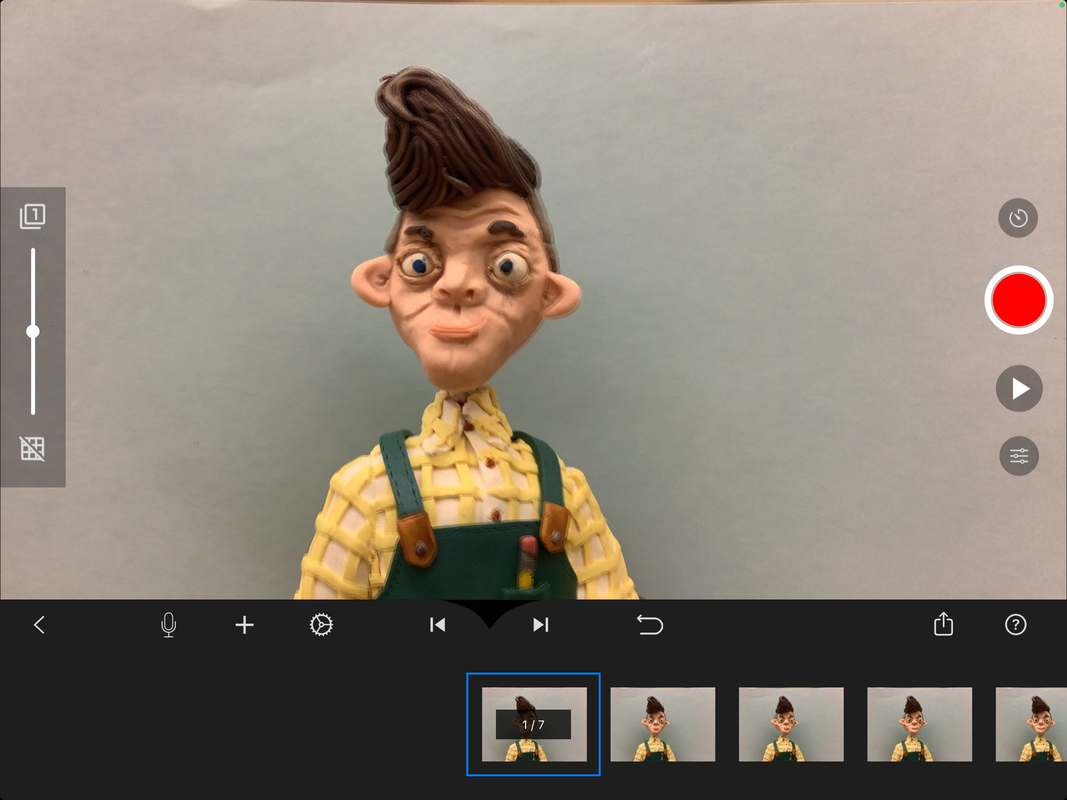
Use Stop Motion Studio to make your animation on your iPad
|


Step 3 - C: Putting the Sound onto the Visuals
You have a few options for how to add sound to your video: Stop Motion Studio, iMovie, and Premiere Rush are all iPad apps that can edit sound and video together. If you have a laptop with more powerful software, you would use Final Cut Pro, Premiere, or Animate to add the audio to your animation.
|
STOP MOTION STUDIO
Staying inside Stop Motion Studio, you can add audio to your animation. The audio can be a voice over or it can be a found source file. If it is a file from a show, movie, etc. be sure you have it downloaded onto your iPad as an audio file. Click on the microphone button on the timeline to access the audio features.
|
iMOVIE
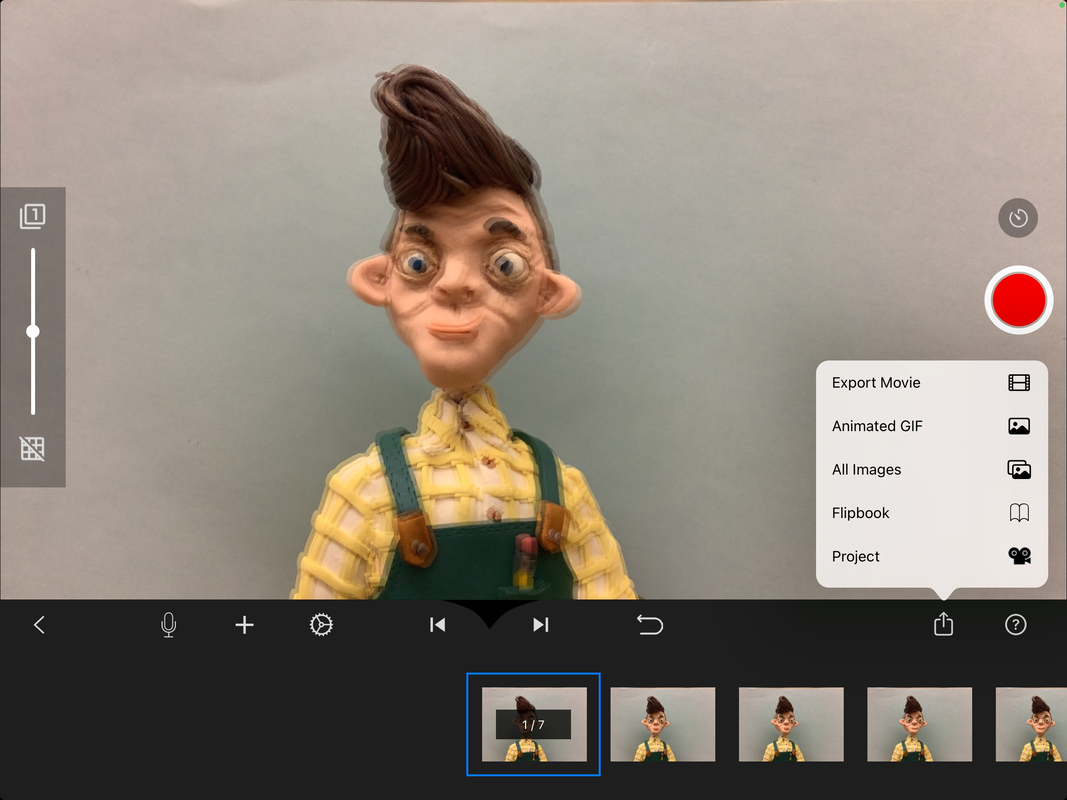
Export your animation as "All Images" and then import them into iMovie. You'll want to turn off the "Ken Burns effect" so the photos stay still rather than zoom in and out. You'll want to change the frame rate so the photos play faster than the default. Once you have it playing at a fluid speed, import the sound and add it underneath the photos in the timeline.
|
PREMIERE RUSH
Export your animation as "All Images" and import the set of images to Premiere Rush. Change the duration of the photos to speed up the playback. Import the sound file you want to use and add it to the timeline. Adjust the duration of the individual frames to match the pacing of the sound so that the lips sync with the audio speech.
|
Once you have the sound and animation together, make sure they sync up well. You can change the timing of the frames by duplicating frames to slow down an action, changing the frame rate for the entire series of frames to speed things up, or changing the duration of a short segment of the animation.
1 Video with Sound & 1 Looping GIF
Email an Image of Your Project
|
Grading Criteria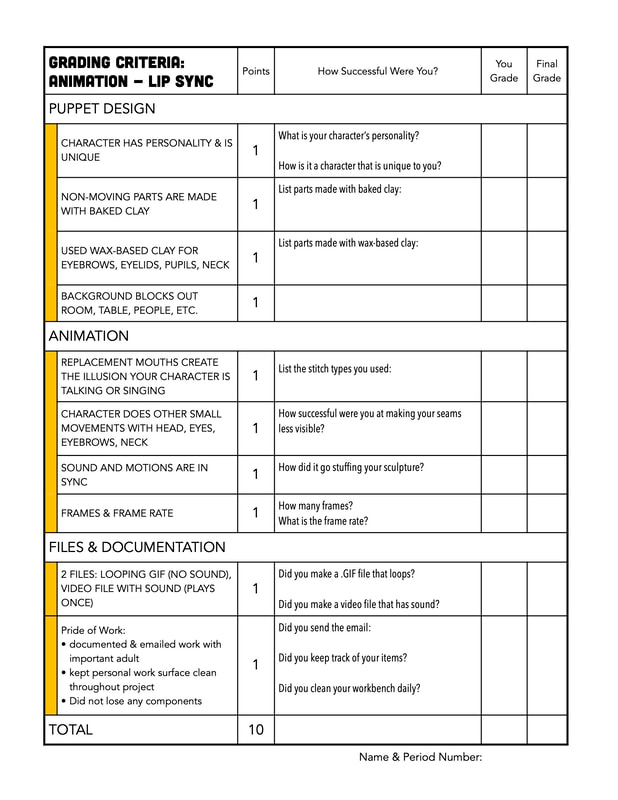
|
